Linkbar
Friday, October 7, 2011
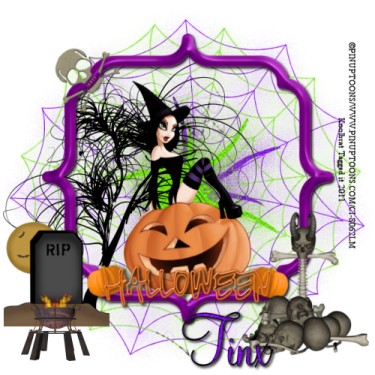
Spooks
Spooks
I am using the amazing artwork of Pinup Toons
You can purchase it here: CDO
Scrapkit "Spookylicious" by Tinx
Thank you for the amazing kit Tinx
You can purchase it here:Tinx's Scraps Mask of choice. I used WSL_Mask318
You can download it here: WSL
You can purchase it here: CDO
Scrapkit "Spookylicious" by Tinx
Thank you for the amazing kit Tinx
You can purchase it here:Tinx's Scraps Mask of choice. I used WSL_Mask318
You can download it here: WSL
Please remember to leave some love for our wonderful artists. Also remember that you must purchase
the artwork in order to use it.
Let's get started
the artwork in order to use it.
Let's get started
1. Open new image 500 X 500
2. Floodfill with paper 10 from kit
3. Go layers/ Load Save Mask/ Load Mask from Disk. Find your mask in the drop down window. Merge group
4. Add new layer and floodfill with paper 8
5. Repeat number 3
6. Go image Rotate 50 degrees to the right
7. Copy and Paste frame4 resize to your liking. I resized 75% 2 times. Add drop sahdow
8. Copy and Paste bones 2 resize 75% and place in the lower right hand corner of your image
9. Copy and Paste bones resize 75% and plac on the top right hand corner of your frame
10. Copy and Paste flames resize 75% and place in the lower left hand side of your image
11. Copy and Paste rip tombstone resize 75% and place behind yoru flames layer
12. Copy and Paste tree resize 75% 3 times and place under your frame layer
13. go Image Mirror
14. Add your copyright info and a friends name
15. Merge Visible and Save
That's it..... I hope you have enjoyed my tutorial. If you have any questions please
feel free to leave a message in the Chatbox.
This tutorial was written October 2011 by me(Koolbrat) any similarities to another is just a coincidence.
Tuesday, October 4, 2011
Christmas
Christmas
You can purchase this lovely artwork here:CDO
Scrapkit "A Christmas Wish" by Tonya
You can purchase this here: BrokenSky Dezine
Thank you Tonya for the amazing kit.
Mask of choice. I used gemsmasks-119
You can download it here for free: GEMS
Please remember that you have to purchase the artwork before you use it. Show your artists
the respect they deserve.
Make sure you save often.
2. Floodfill with paper10 from kit
3. Go Layers/Load Save Mask/ Load mask from disk. Find your mask in the drop down window. Merge Group
4. Copy and Paste holly resize 75%
5. Copy and Paste tree resize 75% and add drop shadow of choice
6. Copy and Paste giftboxes resize 75% 2 times add same drop shadow
7. Copy and Paste snowglobe2 resize 30% 2 times. Add the same drop shadow as before
8. Copy and Paste wordart3 resize 75% 2 times add drop shadow
9. Copy and Paste holly2 resize 75%. Place to your liking. Add the same drop shadow
10. Copy and Paste your tube into place. Resize if needed add same drop shadow
11. Add your copyright info and a friends name
12. Merge Visible and Save
feel free to leave a message in the Chatbox.
This tutorial was written October 2011 by me(Koolbrat) any similarities to another is just a coincidence.
Thursday, September 8, 2011
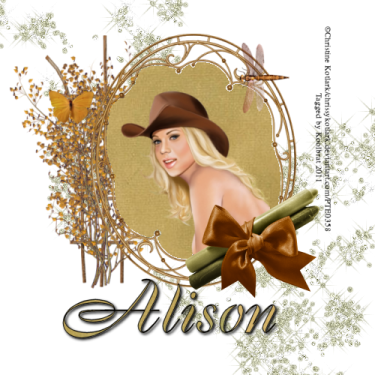
Glorious Autumn
Glorious Autumn
Please remember that you can not use her artwork without a license
Scrapkit "Subtle Autumn" by Alison at HungryHill Annex
You can purchase it here:Digifox
Scrapkit "Subtle Autumn" by Alison at HungryHill Annex
You can purchase it here:Digifox
1. Open new image 500 X 500
2. Copy and Paste sparkle
3. Copy and Paste vine resize 75%
4. Copy and Paste frame resize 75%
5. Grab your magicwand and click inside your frame. Floodfill with paper 5
6. Copy and Paste a part of your tube and place it so that it looks like it is inside your frame
7. Copy and Paste candles resize 30% and place on lower right hand side of frame
8. Copy and Paste dragonfly and resize 30% then 75% place on the upper right hand corner of frame
9. Add your copyright info and Text
10. Merge Visible and Save
That's it..... I hope you have enjoyed my tutorial. If you have any questions please
feel free to leave a message in the Chatbox.
This tutorial was written September 2011 by me(Koolbrat) any similarities to another is just a coincidence.
Tuesday, August 30, 2011
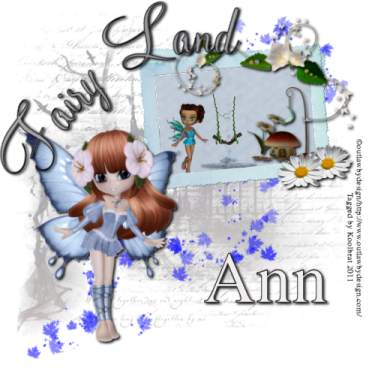
Fairy Land
Fairy Land
I am using the amazing artwork of Outlaw by Design
You can download it for free here: Outlaw
Scrapkit "FairyDust" by Babyfairy
You can purchase it here: Digifox
Thank you Babyfairy for the great kit and posers. I had alot of fun playing with it
Mask of choice. I used gemsmasks-118
You can download it here: Gems
1. Open new image 500 X 500
2. Floodfill with paper1(5). Go layers/Load Save Mask/Load Mask from Disk. Merge Group
3.Copy and Paste element1(9) resize 30% 3 times
4. Grab your magicwand and click inside your frame.
5. Add new layer and floodfill with paper1(1)
6. Copy and Paste element1(16) resize 30% 3 times again. Add drop shadow of your choice
7. Copy and Paste element1(27) resize so that it fits inside the frame. Add the same drop shadow
8. Copy and Paste element1(31) and resize 30% 3 times
9.Copy and Paste element1(2) the beautiful poser provided with the kit. Resize 30% then 75% 2 times
10. Copy and Paste element1(8) and resize to your liking. Add the same drop shadow as before
11. Copy and Paste element1 resize to your liking
12. Drag below your frame layer in your layer palette
13. Copy and Paste element1(11) resie 30% 2 times. Place in lower right corner of frame
14. Duplicate your flower and move over slightly from the original
15. Merge your copy to your originial and add the same drop shadow
16. Copy and Paste your tube and add same drop shadow
17. Add your copyright info and Text
18. Merge Visible and Save
That's it..... I hope you have enjoyed my tutorial. If you have any questions please
feel free to leave a message in the Chatbox.
feel free to leave a message in the Chatbox.
This tutorial was written August 2011 by me(Koolbrat) any similarities to another is just a coincidence.
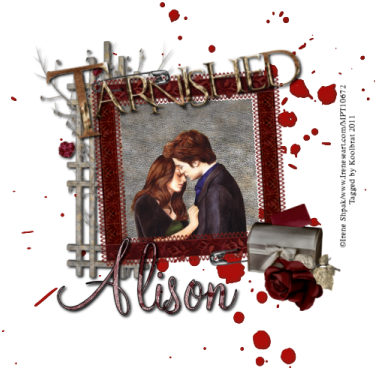
Tarnished
Tarnished
Irene is working on moving her artwork over to the store
so it might be a couple of weeks before you see her there.
But I got the info from Irene herself. So please be patient
Scrapkit "Tainted Love" by Alison
You can Purchase it here: DigiFox
so it might be a couple of weeks before you see her there.
But I got the info from Irene herself. So please be patient
Scrapkit "Tainted Love" by Alison
You can Purchase it here: DigiFox
1. Open new image 500 X 500
2. Copy and Paste splatter
3. Copy and Paste Square resize 75%
4. Grab your magicwand and click inside the frame
5. Add new layer and Floodfill with paper4
6. Copy and Paste your tube so that it looks like it is inside the frame
7. Copy and Paste lattice resize 75% and drag below your floodfill layer
8. Copy and Paste letterbox resize 30% then 75% and place in the lower right hand corner of your frame
9. Copy and Paste WA- Tarnished resize 75% and rotate 10 degrees left
10. Copy and Paste rose and resize 30% then 75% place next to your lettbox
11. Add your copyright info and Text
12. Merge Visible and Save
That's it..... I hope you have enjoyed my tutorial. If you have any questions please
feel free to leave a message in the Chatbox.
This tutorial was written August 2011 by me(Koolbrat) any similarities to another is just a coincidence.
Sunday, August 28, 2011
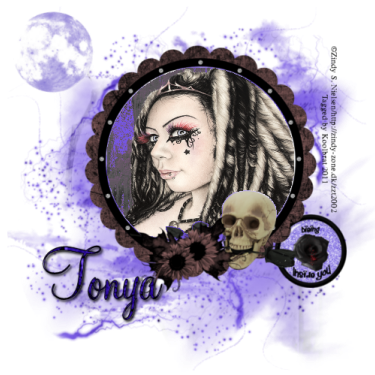
Dying Without You
Dying Without You
Scrapkit "Dieing Inside" by Tonya
You can purchase it here: BrokenSky Dezine
You can purchase it here: BrokenSky Dezine
I am using Gemsmask114.
You can download it here: GEMS
You can download it here: GEMS
1. Open new image 500 X 500
2. Floodfill with paper 17. Go Layers/Load Save Mask/Load Mask from Disk. Find your mask in the drop
down window. Merge Group
3. Copy and Paste BSD_moom resize 75% and place in top left corner of your image
4. Copy and Paste BSD_frame1. Grab your magicwand and click inside your frame
5. Add new layer drag below your frame layer and floodfill with paper13
6. While your magicwand is still selected copy and paste your tube into selection
7. Copy and Paste BSD_flowerings resixe 75% and place next to your skull
8. Copy and Paste BSD_diybrad resie 75% and drag under your frame layer
9. Add your copyright info and text
10. Merge Visible and Save
That's it..... I hope you have enjoyed my tutorial. If you have any questions please
feel free to leave a message in the Chatbox.
feel free to leave a message in the Chatbox.
This tutorial was written August 2011 by me(Koolbrat) any similarities to another is just a coincidence.
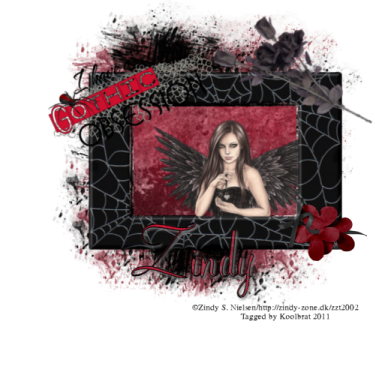
Obsession
Obsession
I am using the amaing artwork of Zindy Nielsen
You can purchase it here:Zindy-Zone
Scrapkit "Gothic Obsession" by Angel's Designe Wonderful kit Angel I had
a wonderful time playing with it.
You can purchase it here:Digifox
1. Open new image 500 X 500
2. Copy and Paste AD_tagback resize 75%
3. Copy and Paste AD_frame1 resize 75%
4. Grab your magicwand and click inside the frame
5. Add new layer and drag below your frame layer
6. Floodfill with paper7
7. While on your paper layer copy and paste your tube so that it is between the 2 layers
8. Copy and Paste AD_blackroses resize 75% rotate 25 degrees left. Then go Image/Mirror
9. Copy and Paste AD_paperflowers resize 30% and place in the lower right corner
10. Copy and Paste AD_wordart resize 75% 3 timesand rotate it 25 degrees left. Place
on the upper left hand side
11. Add your copyright info and Text. I made mine for Zindy
12. Merge Visible and Save
That's it..... I hope you have enjoyed my tutorial. If you have any questions please
feel free to leave a message in the Chatbox.
This tutorial was written August 2011 by me(Koolbrat) any similarities to another is just a coincidence.
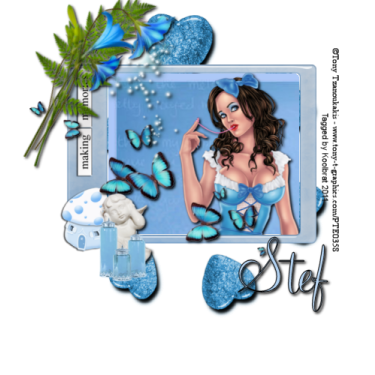
Memories
Memories
Scrapkit "Blue Bubbly World" by Stef
You can purchase it here:Stefsscrapkits
Remember to save often and add your drop shadows
You can purchase it here:Stefsscrapkits
Remember to save often and add your drop shadows
1. Open new image 500 X 500
2. Copy and Paste element 46 resize 75%
3. Grab your magic wand and click inside the frame
4. Floodfill with paper 13 on a seperate layer
5. Copy and Paste your tube under the frame layer but above your paper layer. Add drop Shadow of your liking
6. Copy and Paste element 08 resize to your liking and add the same drip shadow
7. Copy and Paste element 36 resize 30% and place next to the mushroon house. Add the same drop shadow
8. Copy and Paste element 27 resize 30% then 75%. Add same drop shadow
9. Copy and Paste element 24 resize 75% and drag down in your layer palette to right above raster layer 1
10. Copy and Paste element 03 Resize to your liking and place at the top. Rotate 20 Degrees right
11. Copy and Paste element 04 resize to your liking. Go Image mirror. Rotate 20 Degrees right
12. Copy and Paste element 02 resize to your liking again. Rotate 20 degrees right
13. Merge your flower layers down to your fern layer. Add the same drip shadow as before
14. Add your copyright info and Text
15. Merge visible and Save
That's it..... I hope you have enjoyed my tutorial. If you have any questions please
feel free to leave a message in the Chatbox.
This tutorial was written August 2011 by me(Koolbrat) any similarities to another is just a coincidence.
Sunday, August 21, 2011
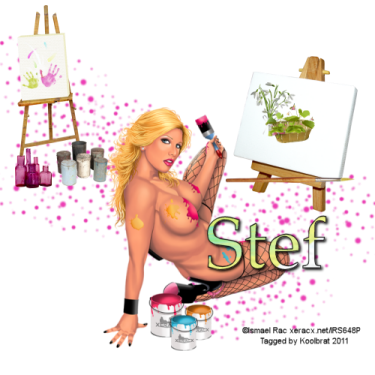
Paint Pain
Paint Pain
I am using the amazing artwork of Ismael Rac
You can purchase it here:RAC
Scrapkit "Painful Days" by Stef
You can purchase it here: Stefsscrapkits
1. Open new image 500 X 500
2. Copy and Paste element 41
3. Copy and Paste element 31 resize 30% 2 times
4. Copy and Paste element 30 resize 30%
5. Copy and Paste element 42 resize it to fit on the canvas
6. Copy and Paste element 57 resize it to fit the canvas
7. Copy and Paste element 20 resize 30%
8. Copy and Paste element 10 resize to fit second canvas
9. Copy and Paste element 02 and resize to fit inside the basket
10. Copy and Paste element 09 resize it to fit the canvas behind the basket layer
11. Copy and Paste element 17 resize 30% 2 times
12. Copy and Paste element 29 resize 30%
13. Add your tube
14. Add your copyright info and Text
15. Merge Visible and Save
That's it..... I hope you have enjoyed my tutorial. If you have any questions please
feel free to leave a message in the Chatbox.
Saturday, August 20, 2011
Dream
Dream
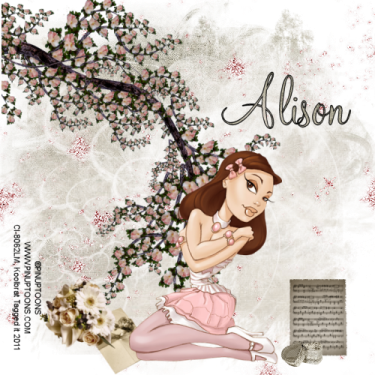
I am using the amazing artwork of PinUp Toons
You can purchase it here:CDO
Scrapkit "Dreamerie" by Alison
You can purchase it here:DigiFox
Mask of Choice. I used gemsmasks-119
You can download it here:GEMS
You can download it here:GEMS
1. Open new image 500 X 500
2. Floodfill with paper 10. Go layers/Load Save mask/ Load Mask from Disk. Find your
mask in the drop down window. Merge Group
3. Copy and Paste glitter spill
4. Copy and Paste flowering_branch resize 75%
5. Copy and Paste trinket_box resize 30% 2 times
6. Copy and Paste sheetmusic resize 30% then 75%
7. Copy and Paste love-letter resize 30% then 75%
8. Copy and Paste bouquet resize 30% then 75% 2 times
9. Place your tube
10. Add your copyright info and Text
11. Merge Visible and Save
That's it..... I hope you have enjoyed my tutorial. If you have any questions please
feel free to leave a message in the Chatbox.
Elegance
Elegance
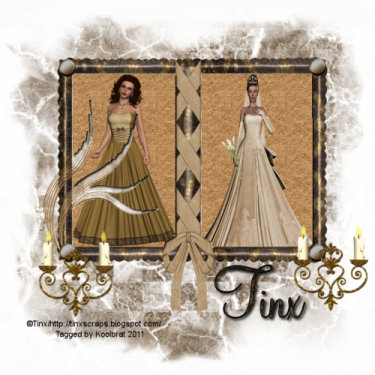
I am using the amazing artwork of Tinx
Thank you Tinx for the amazing kit and posers
You can purchase it here: Tinx
Mask of choice. I used gemsmasks-115
You can download it here:GEMS
1. Open new image 500 X 500
2. Floodfill with paper 9. Go layers/ load save mask/load mask from disk. Find your mask
in the drop down window. Merge Group
3. Copy and Paste frame 2
4. Grab your magicwand and click inside one side of your frame.
5. Copy and Paste your tube into selection resize if needed
6. Add new layer and floodfill with paper 23 Select none
7. Grab your magicwand again and click in the other side of the frame
8. Copy and Paste your other tube resize if needed
9. Add new layer and floodfill with the same paper as before
10. Merge backgrounds and tubes down to the frame layer
11. Resize 75%
12. Copy and Paste candles resize 75% place on the lower right hand side
13. Duplicate your candles layer and move to the lower left hand side
14. Add your copyright info and Text
15. Merge Visible and Save
That's it..... I hope you have enjoyed my tutorial. If you have any questions please
feel free to leave a message in the Chatbox.
Thursday, August 18, 2011
Wicked
Wicked
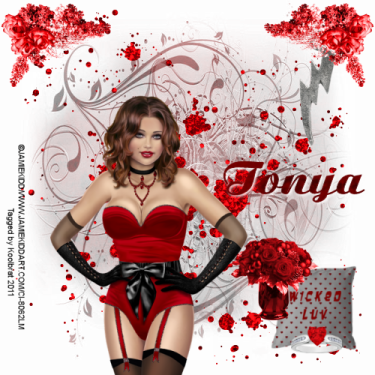
Scrapkit "A Wicked Kind of Love" by Tonya.
You can purchase it here: BrokenSky Dezine
Mask of Choice
You can purchase it here: BrokenSky Dezine
Mask of Choice
1. Open new image 500 X 500
2. Floodfill with BSD_8. Go Layers/Load Save Mask/Load mask from Disk. Find your mask. Merge Group
3. Copy and Paste BSD_glitter
4. Copy and Paste BSD_pillow resize 30% place in the lower right hand corner
5. BSD_ring reisze it 30% and place in front of the pillow
6. Copy and Paste BSD_roses resize 75% and place next to the pillow
7. Copy and Paste BSD_flowers resize 75% Flip and place int he upper right hand corner
8. Duplicate your BSD_flowers layer and go Image/Mirror
9. Copy and Paste BSD_lightningcharm resize 30% move under your first BSD_flowers layer
10. Add your copyright info and Text
11. Merge Visible and Save
That's it..... I hope you have enjoyed my tutorial. If you have any questions please
feel free to leave a message in the Chatbox.
feel free to leave a message in the Chatbox.
Friday, July 29, 2011
Autumn Days
Autumn Days
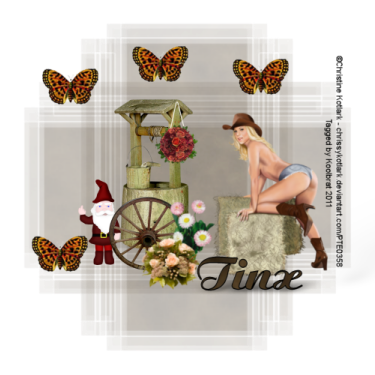
I am using the awsome artwork of Christine Kotlark.
You can purchase her artwork here: PTE
Scrapkit"Autumn Falls" by Tinx
Thank you Tinx for the great kit.
You can purchase her kit here: Tinx
You can purchase her artwork here: PTE
Scrapkit"Autumn Falls" by Tinx
Thank you Tinx for the great kit.
You can purchase her kit here: Tinx
Mask of your choice. I used WSL_Mask149
You can get it here:WSL
You can get it here:WSL
Eyecandy 5 Impact
1. Open new image 500 X 500
2. Floodfill with paper2. Go Layers/LoadSaveMask/Load mask from Disk
3. Copy and Paste well. Resize 30%
4. Copy and Paste rose dangle. Resize 30% 2 times and place on the side of the well
5. Copy and Paste wheel and Resize 75%
6. Copy and Paste flowers and Rresize to your liking. I Resized 30% 2 times
7. Copy and Paste flower2 and again Resize to your liking
8. Copy and Paste gnome5 and Resize 30% then Resize 75%
9. Copy and Paste butterfly3 Resize 30%. Then duplicate 4 timesand place to your liking
10.Add your tube Resize to fit the image
11. Add your copyright info and Text
12. With your Text Layer highlighted go:Effects/Plugins/Alien Skin Candy 5/ Impact/
Perspective Shadow. Use these settings: Perspective Shadow checked, 332,
101.37,90,34.32, 169.17,48,Mask Selection
13. Merge Visible and Save
That's it..... I hope you have enjoyed my tutorial. If you have any questions please
feel free to leave a message in the Chatbox.
This tutorial was written July 2011 by me(Koolbrat) any similarities to another is just a coincidence.
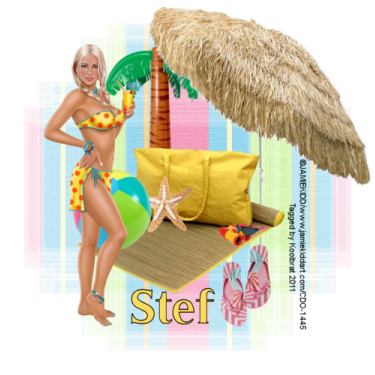
Summer Fantasy
Summer Fantasy
I am using the amazing artwork of Jamie Kidd
You can purchase it here: CDO
You can purchase it here: CDO
Scraptkit "Summer Breeze" by Stef
You can download it for free here: Stef's Scrapkits
Mask of choice. I used WSL_Mask 149
You can get it here: WSL
You can download it for free here: Stef's Scrapkits
Mask of choice. I used WSL_Mask 149
You can get it here: WSL
1. Open new image 500 X 500
2. Floodfill with paper01. Go Layers/LoadSave Mask/Load Mask from Disk
3. Copy and Paste ele11 Resize 30%
4. Copy and Paste ele23 Resize 75%
5. Copy and Paste 09 Resize 30%
6. Copy and Paste ele04 Resize 30%
7. Copy and Paste ele08 Resize 30%
8. Copy and Paste ele27 Resize 30%
9. Copy and Paste ele30 Resize 30%
10.Copy and Paste ele28 Resize 30%
11. Add your tube and resize to your liking
12.Add your copyright info and Text
13. Merge Visible and Save
That's it..... I hope you have enjoyed my tutorial. If you have any questions please
feel free to leave a message in the Chatbox.
This tutorial was written July 2011 by me(Koolbrat) any similarities to another is just a coincidence.
Delicious Cherry
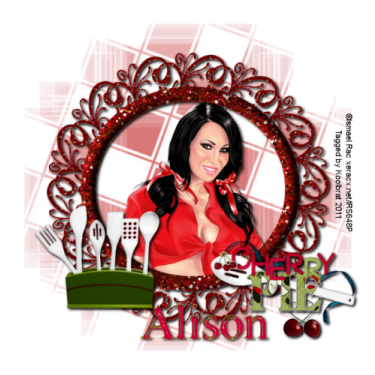
Delicious Cherry
I am using the amazing artwork of Ismael Rac.
You can purchase his work here: Rac
Scraptkit"Cherry Pie" by Alison at HungryHillAnnex
You can purchase it here: SATC
Great kit Alison hun thank you.
Mask of choice. I used WSL_Mask149
You can get it here: WSL
1. Open new image 500 X 500
2. Floodfill with paper1. Go Layers/LoadSave Mask/Load Mask from Disk/ Find your mask
3. Copy and Paste doodle circle and resize 30%. Add Drop Shadow of your choice
4. Copy and Paste your Tube and drag it below your doodle layer
5. Copy and Paste utensil box resize 30% and add Drop Shadow
6. Copy and Paste Cherry Heart and place to your liking. I placed mine on the right hand side
7. Copy and Paste WA Cherry Pie resize 30% and add Drop Shadow
8. Add your copyright info and Text
9. Merge Visible and Save
That's it..... I hope you have enjoyed my tutorial. If you have any questions please
feel free to leave a message in the Chatbox.
This tutorial was written July 2011 by me(Koolbrat) any similarities to another is just a coincidence.
Sunday, July 24, 2011
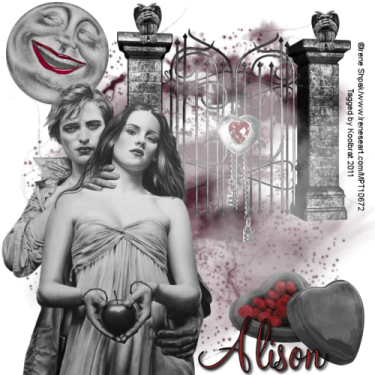
Ghoul Love
Ghoul Love
I am using the amazing artwork of Irene Shpak.
You can purchase it here: MPT
Scrapkit"Whatza Goul to do" By Alison
You can purchase it here: DigiFox
1. Open new image 500 X 500
2. Floodfill with paper 5
3. Go Layers/Load Save Mask/ Load Mask from Disk. Find your mask in the drop
down window
4. Copy and Paste gate resize 30%
5. Copy and Paste gargoyle and resize 30% 2 times. Place on the top of gate
6. Copy and Paste dangle resize 30% and place in the middle of gate to make it look like
a lock
7. Copy and Paste moon and resize 30% then drag it below your gate layer
8. Copy and Paste fog. You can play around with this to get the look you want.
9. Copy and Paste candybox resize 30%
10. Add your tube
11. Add your copyright info and Text
12. Merge Visible and Save
That's it..... I hope you have enjoyed my tutorial. If you have any questions please
feel free to leave a message in the Chatbox.
Friday, July 22, 2011
Mother's Love
I made this quick Tutorial up.... I hope you enjoy it

Mother's Love
Scrapkit "A Mothers Love" By Tonya
You can purchase it here: BrokenSky Dezine
You can purchase it here: BrokenSky Dezine
This is a very simple tutorial.... You should be able to follow it fairly easily.
1. Open new image 640 X 200
2. Floodfill with Color #ffc6d4
3. Go Selections/ Select All/ Selections/ Modify/ Contract/12
4. Floodfill with pp10
5. Copy and Paste frame3. Resize 30% and add Drop Shadow of your choice
6. Copy and Paste teadybear. Resize 30% and add Drop Shadow
7. Copy and Paste flower5. Resize 30% and add Drop Shadow
8. Add your tube make sure that you resize it 30%. I added a Drop Shadow to her also but you dont have to
9. Add your copyright info and Text
10. Merge Visible and Save
That's it..... I hope you have enjoyed my tutorial. If you have any questions please
feel free to leave a message in the Chatbox.
This tutorial was written July 2011 by me(Koolbrat) any similarities to another is just a coincidence.
Wednesday, July 20, 2011
Firework's

Firework's
I am using the amazing artwork of Jose Cano
You can purchase it here: PTE
You can purchase it here: PTE
Scrapkit "4th of July" by BrokenSky
You can purchase it here:BrokenSky Dezine
You can purchase it here:BrokenSky Dezine
This is a quick and simple little Tutorial.
1. Open new image 640 X 200
2. Floodfill with paper 8
3. Go Selections/Select All/ Selections/ Modify/ Contract/12
4. Floodfill with paper 12 and select none
5. Copy and Paste element 4 and place at the top
6. Copy and Paste element 30 resize 75% and place on the left side
7. Copy and Paste element 29 resize 75% and place on the right side
8. Copy and Paste element 1 and place in the top right hand corner
9. Copy and Paste element 34 and place in the middle under element 1 layer
10. Add your tube and put a Drop shadow
11. Add your Cpoyright info and Text
12. Merge Visible and Save
That's it..... I hope you have enjoyed my tutorial. If you have any questions please
feel free to leave a message in the Chatbox.
feel free to leave a message in the Chatbox.
This tutorial was written July 2011 by me(Koolbrat) any similarities to another is just a coincidence.
Who's your Queen
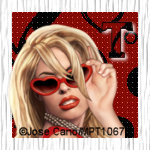

Who's your Queen?
Scrapkit "Queen of Hearts" by Tinx
You can purchase it here: Tinx Scraps
You can purchase it here: Tinx Scraps
1. Open new image 640 X 200
2. Floodfill with paper 16
3. Go Selections/ Select All/ Selections/ Modify/ Contract/12
4. Floodfill with paper 13. Select None
5. Copy and Paste queen of hearts chess piece. Resize 30% and place
6. Go to your layer palette and duplicate
7. Go Adjust/ Color Balance/ Manual Color Correction use these Settings: H:0, S:0, L:0, Black. Move into place
8. Copy and Paste card 2. Resize 30% and place below your chess pieces
9. Copy and Paste rose2. Resize 30% place next to the chess pieces.
10. Copy and Paste stepping stones. Resize 85%
11. Copy and Paste rope. Resize 85%
12. Copy and Paste your tube. Resize 75%
13. Add your Copyright info and Text
14. Merge Visible and Save
Avatar
1. Open new image 150 X 150
2. Floodfill with paper 16
3 Go Selections/ Select All/ Modify/ Contract/12
4. Floodfill with paper 13. Select None
5. Copy and Paste your tube
6. Add your copyright info and Text
7. Merge Visible and Save
That's it..... I hope you have enjoyed my tutorial. If you have any questions please
feel free to leave a message in the Chatbox.
This tutorial was written July 2011 by me(Koolbrat) any similarities to another is just a coincidence.feel free to leave a message in the Chatbox.
Punky
I just wrote this up for a contest for Stef's Scrakits..... I hope you enjoy it...
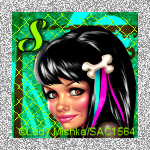

Punky
I am using the amazing artwork of Lady Mishka.
You can purchase it here: SATC
Scrapkit "Punky Green & Bad Lolita" by Stef.
You can purchase them here: Stef's Scrapkits
1. Open new image 640 X 200
2. Floodfill with paper 05 from the bad Lolita kit
3. Go Slections/ Select All/ Modify/Contract 12
4. Floodfill with paper 2 of the Punky Kit
5. Before you Select None grab your Element 41 and paste into selection
6. Copy and Paste Element 17 Resize 30%
7. Copy and Paste Element 11 Resize 30% and add Drop Shadow
8. Copy and Paste Element 29 Resize 30% move to just above your background
layer and add Drop Shadow
9. Copy and Paste Element 12 Resize 30% add Drop Shadow
10. Copy and Paste your tube Resize 30%
11. Copy and Paste Element 21 Resize 30% and move below your Punky Layer
12.Add your copyright info and Text
13. Merge Visible and Save
Avatar
1.Open new image 150 X 150
2. Floodfill with paper 05 from Bad Lolita Kit
3. Selections/ Select All/ Modify/ Contract 12
4. Flood fill with paper 2 of the Punky Green kit
5. Copy and Paste Element 41 into Selection
6. Copy and Paste your Tube and place it
7. Add your copyright info and Text
8. Merge Visible and Save
2. Floodfill with paper 05 from Bad Lolita Kit
3. Selections/ Select All/ Modify/ Contract 12
4. Flood fill with paper 2 of the Punky Green kit
5. Copy and Paste Element 41 into Selection
6. Copy and Paste your Tube and place it
7. Add your copyright info and Text
8. Merge Visible and Save
That's it..... I hope you have enjoyed my tutorial. If you have any questions please
feel free to leave a message in the Chatbox.
Friday, July 15, 2011
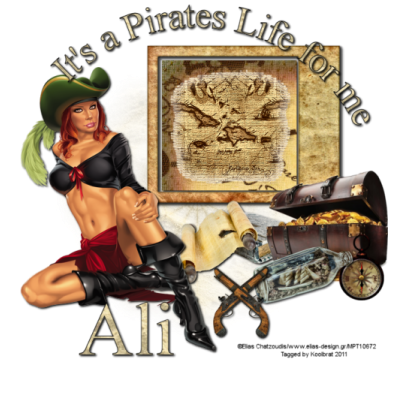
It's a Pirate's Life for Me
It's A Pirate's Life for Me
I used the amazing artwork of Elias Chatzoudis
You can purchase it here: PTE
Scrapkit "Pearl of the Caribbean" by Ali
You can get it here: DigiFox
Mask of choice. I used WSL_27
You can get it here: WSL
1. Open new image 700 X 700
2. Floodfill with paper-4
3. Load Mask and Merge Group
4. Copy and Paste frame-paper-1. Resize 75% add Drop Shadow
5. Grab your Magic Wand and click inside your frame
6. Floodfill with paper-5
7. Copy and Paste map-mask into selection and add Drop Shadow
8. Copy and Paste Tube into place and add Drop Shadow
9.Copy and Paste coffer-2 resize 75%
10. Copy and Paste compass resize 75%
11. Copy and Paste pistol resize 30% then duplicate layer. Go Image/Mirror and
move copy over original
12. Merge down and add Drop Shadow
13. Copy and Paste scroll-and-book resie 30% movedown in your layer palette
and add Drop Shadow
14. Copy and Paste ship-in-bottle and resize 30% add Drop Shadow
15. Add your copyright info and Text
16. Merge Visible and Save
That's it..... I hope you have enjoyed my tutorial. If you have any questions please
feel free to leave a message in the Chatbox.
This tutorial was written July 2011 by me(Koolbrat) any similarities to another is just a coincidence.
Thursday, July 14, 2011
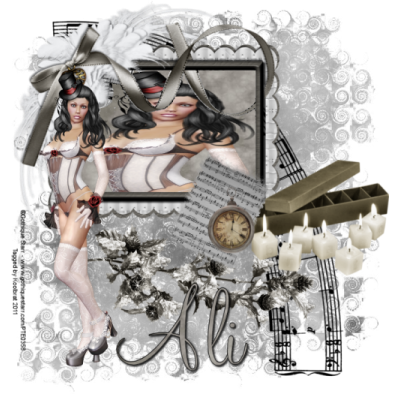
Romantic Music
Romantic Music
I am using the wonderful artwork of Gothique Starr
You can get this tube for free right now here: PTE
You can get this tube for free right now here: PTE
The amazing Scrapkit "Fallen" by Ali
You can purchase it here: Digifox
You can purchase it here: Digifox
Mask from WSL_258. You can download it here: WSL
1. Open new image 500 X 500
2. Floodfill with paper-6. Go layers load/Save Mask/ Load Mask from Disk. Find WSL_258, Merge Group
3. Copy and Paste Frame-cluster. Resize 75%
4. Grab your Magic Wand and click inside the frame. Make sure that you get all areas in the frame
with ants in it
5. Floodfill with paper-5
6. Crop some of your tube and Copy and Paste into Selection
7. Copy and Paste music and move below frame layer
8. Copy and Paste angeltwig resize 75%. Then Rotate 90 degrees to the right
9. Copy and Paste candles resize 75% 2 times
10. Copy and Paste music-mask resize 75%
11. Copy and Paste time and resize 75% 2 times
12. Copy Paste tube into place
13. Add your Copyright info and Text
14. Merge Visible and Save
That's it..... I hope you have enjoyed my tutorial. If you have any questions please
feel free to leave a message in the Chatbox.
feel free to leave a message in the Chatbox.
This tutorial was written July 2011 by me(Koolbrat) any similarities to another is just a coincidence.
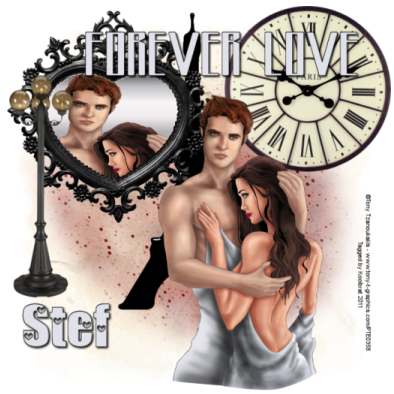
Forever Love
Forever Love
I am using the amazing artwork of Tony Tzanoukakis.
You can purchase it here: PTE
You can purchase it here: PTE
The amazing scrapkit "Love in Paris" by Stef
You can ourchase it here: Stef's Scraptkits
You can ourchase it here: Stef's Scraptkits
I used Becky's Masks. You may download them here: Supplies
1. Open new image 700 X 700
2. Floodfill with paper 02. Then go layers Load/Save Mask/ Load Mask from disk. Find
Becky 022 in your drop down window. Merge group
3. Add New Layer and Floodfill with Paper 01. Go layers/ Load Mask from disk and find
Becky 009 in your list Merge Group
4. Copy and Paste Element 13 resize 75%
5. Copy and Paste Element 12 and resize 75%
6. Copy and Paste Element 05 and resize 75%
7. Grab your Magic Wand and click inside Element 05. Then floodfill
with any metal you like. I used Corel_06_020 in my Gradient folder.
We are making our own mirror
8. Now you are going to go to your tube and Crop out what you want in your
mirror. Then Copy and Paste into selection and add Drop Shadow
9. Copy and Paste your tube into place
10. Copy and Paste Element 57 and move to the top of your Merged Layer in
your Layer Palette.
11. Add your Copyright info and your text
12. Merge Visible and Save
That's it..... I hope you have enjoyed my tutorial. If you have any questions please
feel free to leave a message in the Chatbox.
feel free to leave a message in the Chatbox.
This tutorial was written July 2011 by me(Koolbrat) any similarities to another is just a coincidence.
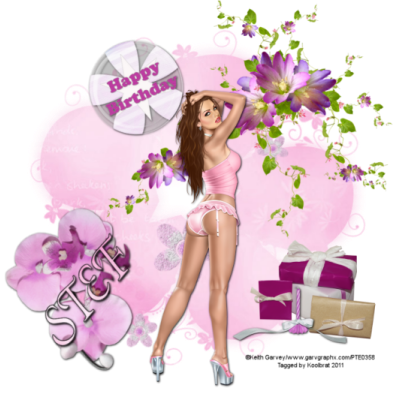
Birthday Bash
Birthday Bash
I am using the wonderful artwork of Keith Garvey.
You can purchase it here: PTE
The awsome kit "Birthday Girl" by Stef
You can purchase it here: Stef's Scrapkits
Mask from WSL. Which you can Download here: WSL
You can purchase it here: PTE
The awsome kit "Birthday Girl" by Stef
You can purchase it here: Stef's Scrapkits
Mask from WSL. Which you can Download here: WSL
1. Open new image 700 X 700
2. Floodfill with Paper 06
3. Go Lyaer: Load/Save Mask/Load Mask From DIsk. Choose WSL_Mask 303
from the drop down window. Merge group
4. Copy and Paste 30_BirthdayGirl resize 30% and add Drop Shadow
5. Copy and Paste 46_BirthdayGirl resize 30% and add Drop Shadow
6. Copy and Paste 10_BirthdayGirl resize 75% and rotate 50 degrees to the left.
7. Copy and Paste 19_BirthdayGirl reisze 30% and add Drop Shadow
8. Copy and Paste 03_BirthdayGirl resize 75%
9. Copy and Paste 09_BirthdayGirl resize 75% and add Drop Shadow
10. Copy and Paste your tube and add Drop Shadow
11. Add your copyright info and Text
12. Merge Visible and Save
That's it..... I hope you have enjoyed my tutorial. If you have any questions please
feel free to leave a message in the Chatbox.
This tutorial was written July 2011 by me(Koolbrat) any similarities to another is just a coincidence.
Monday, July 11, 2011
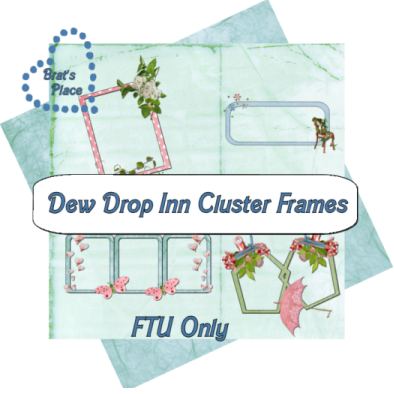
Dew Drop Inn Cluster Frames
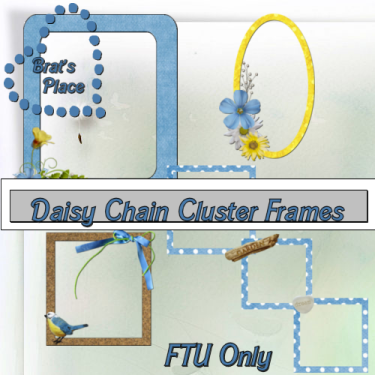
Daisy Chain Cluster Frames
Monday, June 20, 2011
Night on the Town
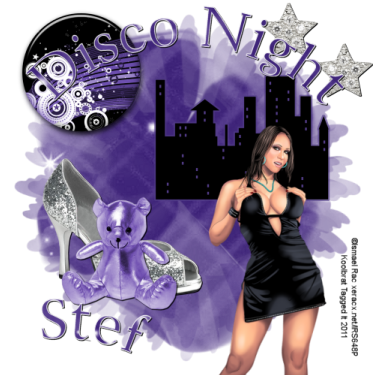
Night on the Town
I used the wonderful artwork of Ismael Rac
You can purchase it here: Rac
Scrapkit Disco Night by Stef
Lovely kit Stef Thank you
You can purchase it here: Stefs Scrapkits
Mask DBV mask 137
You can download it here: Designs By Vaybs
1. Open new image 500 X 500
2. Floodfill with paper 08
3. Go Layers/Load/Save Mask/Load Mask from Disk. Find DBV Mask 137 in your drop down
window. Merge Group
4. Copy and paste Stars resize 30%
5. Add drop Shadow of your choice
6. Copy and paste Button resize 30% and add the same drop shadow as before
7. Copy and paste Shoe03 resize 30% and add the same drop Shadow
8. Copy and paste Teddy02 resize 30% and add drop shadow
9. Copy and paste City and resize 30% 2 times
10. Copy and paste your tube resize to your liking and add the same drop shadow
11. Add your copyright info and Text
12. Save
That's it..... I hope you have enjoyed my tutorial. If you have any questions please
feel free to leave a message in the Chatbox.
This tutorial was written June 2011 by me(Koolbrat) any similarities to another is just a coincidence.
Friday, June 17, 2011
Devilious
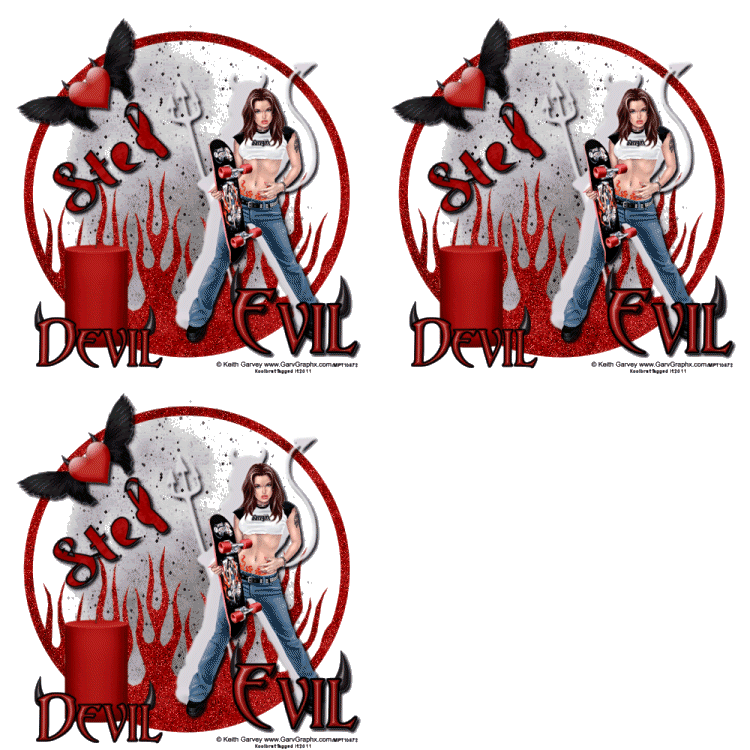
Devilious
I used the wonderful Artwork of
Keith Garvey.
You can purchase his Artwork here: MPT
Scrapkit Angel or Devil by Stef
You can purchase it here: Stef-Scraps
I also used Bflyflby_Mask12
You can download it here:
ButterflyFlutterby
I used Becky_mask022
You can download it here: Supplies
Dont forget to add your drop shadows.
1. Open new image 500 X 500
2. Floodfill with paper 09
3. Go Layers/Load/Save Mask/Load mask from disk and find Becky_mask022 in your drop down window
4. Merge group
5. Add new layer and floodfill with paper11
6. Go Layers/Load/Save Mask/ Load mask from disk and find Bflyflbymask12 in your drop down window
7. merge group
8. Copy and paste Heart04 resize and place in the upper left hand corner
9. Copy and paste Wordart02 and resize and place in bottom right hand corner
10. Copy and paster Candle01 resize and place in the bottom left hand corner
11. Copy and paste your tube. Resize and drag under Wordart layer
12. Add you copyright info and your text
13. Go to your bflyflbymask layer and duplicate it 2 times
14. Click on the original layer and go : Ajust/Add/ Remove Noise/ Add Noise Set your noise to 25
15. Do this for the other 2 layers but change the noise to 30 and 35
16. Make sure your duplicated layers are Xed out and go: Edit/ Copy Merged and paste as new animation
17. Do this for the other 2 layers
18. In Animation Shop go: Edit/ Select All/ Animation/ Resize animation 75%
Save
That's it..... I hope you have enjoyed my tutorial. If you have any questions please
feel free to leave a message in the Chatbox.
This tutorial was written June 2011 by me(Koolbrat) any similarities to another is just a coincidence.
Sunday, June 12, 2011
Bad Company

Bad Company
I used the wonderful artwork of
Elias Chatzoudis.
You can purchase it here: PTE
Scrapkit Bad Lolita by Stef
You can purchase it here: Stefs-scrapkits
1. Open new image 640 x 200
2. Floodfill with paper14
3. Add new layer and floodfill with paper 05
4. Go Selections/ Select All/ Modify/ contrast by 8 hit the delete key once.
5. Copy and paste Sparkles
6. Copy and paste Skulldoodle02 resize 30% and add drop shadow using these
Settings: 5,5,75,5.00
7. Copy and paste Bunny Bad Lolita resize 30% and add same drop shadow
8. Copy and paste Handcuffs and resize 30% Rotate 90 degrees to the right
9. Copy and paste Lipstick02 and resize 30%. Rotate 60 degrees right. Add the same drop shadow
10. Copy and paste your tube resize to your liking and add drop shadow
11. Copy and paste Condom03 and resize to your liking. Place under your bunny layer. Add drop
shadow
12. Copy and paste Skull02 and resize it 30% 2 times
13. Add your copyright info and text
14. Now go back to layer 2 and duplicate 2 times. Remember you need to duplicate the original layer
15. X out both copies and make sure the original layer is selected
16. Go Adjust/ Add/Remove Noise/Add Noise. Use these settings: Random, 25, Monochrome checked
17. Do this to the other 2 layers just change the noise to 30 & 35
18. Go Edit/ Copy Merged and paste as new animation in Animation Shop
19. Back in PSP X out the 1st layer and UnX the 1st of the duplicated layers
20. Go Edit/ Copy merged and paste after current frame
21. Back in PSP X out that layer and UnX the 2nd of the duplicated layers
22. Go Edit Copy Merged and paste after current frame
23. Check your animation and Save
Now for the Avatar
1. Open new image 150 x 150
2. Floodfill with paper 14
3. Add new layer and floodfill with paper05
4. Go Selections/ Select All/ Modify/ Contrast 8 and hit the delete key once
5. Copy and paste Sparkles
6. Copy and Paste you tube. Add the same drop shadow as before
7. Add your copyright info and text
8. Go to your Raster 2 layer and duplicate it 2 times
9. Make sure the original layer is selected and go Adjust/ Add/Remove Noise/Add Noise 25
10. Do the same for the other 2 layersand change noise to 30 & 35
11. Go Edit/ Copy Merged and paste as new animation in A.S
12 Do this for the other 2 layers aloso except paste after current frame
13. Save
That's it..... I hope you have enjoyed my tutorial. If you have any questions please
feel free to leave a message in the Chatbox.
This tutorial was written June 2011 by me(Koolbrat) any similarities to another is just a coincidence.
Wonderland
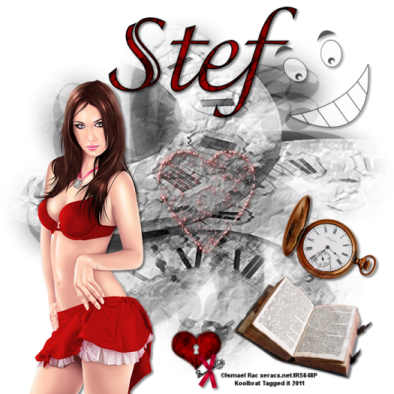
Wonderland
I used the wonderful artwork of
Ismael Rac.
You can purchase his work here: Rac
Scrapkit AliceinWonderland by Stef.
You can purchase it here:
Stefs-Scrapkits
I used WSL_Mask 18.
You can download it here: Weescotlass
1. Open new image 700 x 700
2. Floodfill with paper 03 from kit
3. Go Layers/ Load/Save Mask/Load mask from Disk. Find WSL_Mask 18 in your drop down window
4. Copy and paste element09 from kit. Resize it 75% and add drop shadow using these settings:3,3,50,5.00
5. Copy and paste your tube and add the same drop shadow as before. Place to your liking
6. Copy and paste element34 from kit. Resize 30% and add same drop shadow
7. Copy and paste element21 from kit. Resize 30% and add the same drop shadow as before
8. Change Visibilty to 66
9.Copy and paste element 18 resize 30%
10. Copy and paste element 19 and resize 30% 2 times. Add the same drop shadow as before
11. Copy and paste element 17 add same drop shadow as before.
12. Go Adjust/color balance/manual color correction and use these settings: Hue 0, Saturation 213, Lightness 91,
Target color #A60f0f.
13. Add your copyright info and text and save.
That's it..... I hope you have enjoyed my tutorial. If you have any questions please
feel free to leave a message in the Chatbox.
This tutorial was written June 2011 by me(Koolbrat) any similarities to another is just a coincidence.
Friday, June 10, 2011
Forever Garden
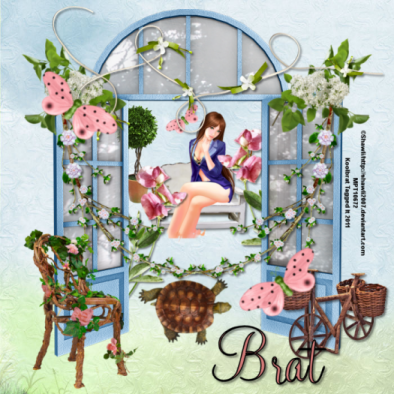
Forever Garden
I used the wonderful artwork of Shawli.
You can purchase it here: MPT
The Scrapkit Dewdrop by Sarah.
You can purchase it here: Digifox
1. Open new image 700 x 700.
2. Flood fill with paper-1 from kit.
3. Copy and paste bench from kit and resize it 75% 4 times.
4. Add drop shadow using these settings: 3,3,50,5.00. black.
5. Copy and paste garden-door from kit.
6. Copy and paste branch from kit and resize it 75% 2 times. Place at the top of the left door.
7. Go to your layer palette and duplicate your branch layer. Then go image/mirror. Add the
same drop shadow as before to both branches.
8. Copy and paste lilacs from kit. Resize them to your liking and place them over the top
of the branches.
9. Go layers duplicate and then image/ mirror.
10. Copy and paste flower- string resize 75% and place at the top of the garden doors. Add the same
drop shadow as before.
11. Copy and paster topiary and resize 75%. Place under he garden foors somewhere close to the bench.
12. Copy and paste woven-bicycle and resize to your liking. Add the same drop shadow as before.
13. Copy and paste garden-chair and resize to your liking. Place on the left side of the garden doors.
14. Copy and paste flower-1 and resize to your liking and place behind left garden door.
15. Go layer/ duplicate layer adn then image/ mirror. Add same drop shadow as before.
16. Copy and paste fluttery-bug and resizeto your liking.
17. Go to your layer palette and duplicate layer and then place both to your liking.
18. Copy and paste turtle from kit. Resize to your liking and place anywhere that looks good to you.
19. Add your copyright info and text. And Save.
That's it..... I hope you have enjoyed my tutorial. If you have any questions please
feel free to leave a message in the Chatbox.
This tutorial was written June 2011 by me(Koolbrat) any similarities to another is just a coincidence.
Kits
I am going to get some kits added as soon as I get caught up on the other things that I am behind on.... I also have Stationaries that I mke up and Menu's. If you would like them added also please let me know.
Picture Perfect
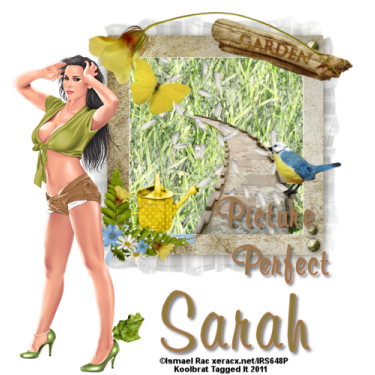
Picture Perfect
I used the wonderful artwork of Ismael Rac.
You can purchase his artwork here: Rac
The scraptkit DaisyChain by Sarah.
You can purchse it here: Digifox.
Dont forget to save often and add your drop shadows in where you like.
1. Open a new image 500 x 500.
2. Grab your frame from the kit. Copy and paste as new layer.
3. Take your magicwand and click inside the frame.
4. Floodfill with your grass pattern and check Texture and use grass.
5. Copy and paste your path from the kit. Resize so that it fits inside your frame.
6. Copy and paste the garden_sign from kit and resize 30% and rotate 13 degrees to the right.
Place in the right hand corner of the frame.
7. Copy and paste your butterfly from kit and place in the left hand corner of the frame. I also
rotated mine 30 degrees to the right.
8. Copy and paste the bird from kit and resize and place so that it looks like it is sitting on the
side of the path.
9. Copy and paster your watercan from kit and resize. Place in the bottom left hand corner.
10. Copy and paste the petals from kit. resize them and place them in the middle of the frame so
that it looks like they are blowing around.
11. Take your stem from kit and resize it and place at the top of your frame.
12. The the cluster-shadowed and reisze then place on the left hand corner of your frame.
13.Copy and paste your tube place to your liking.
14. Copy and paste the frog from the kit close to your tube.
15. Add your copyright info and your text and Save.
That's it..... I hope you have enjoyed my tutorial. If you have any questions please
feel free to leave a message in the Chatbox.
This tutorial was written June 2011 by me(Koolbrat) any similarities to another is just a coincidence.
Saturday, June 4, 2011
Chocolate Master
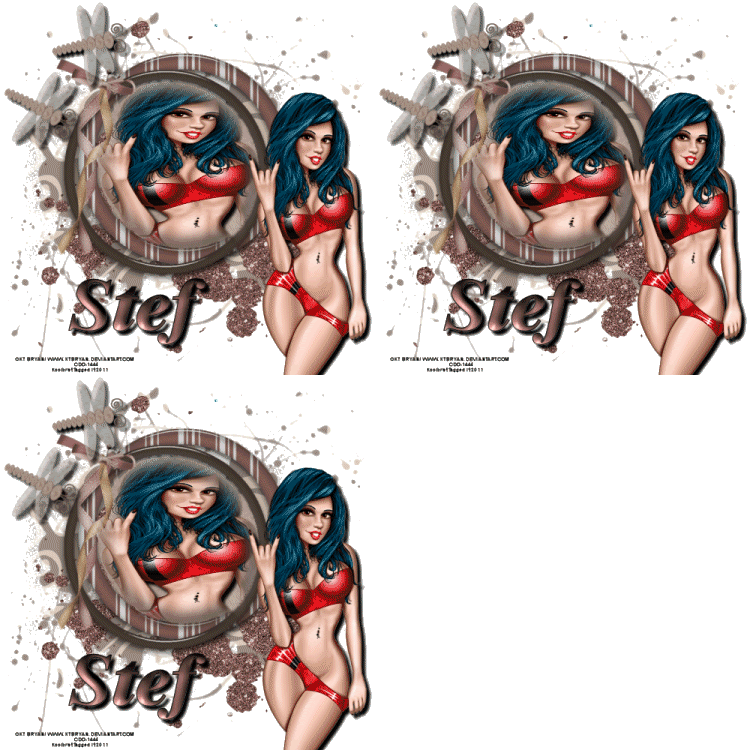
Chocolate Master
I used the wonderful artwork of KTBryan-Roxxy.
You can purchase it here:CDO
I am also using the ScrapKit Hot Chocolate By Stef.
You can download it here: Stef's ScrapKits
I used the Mask Butterflyflutterby86.
You can get it here: Butterfly Flutterby
1. Open new image 500 x 500.
2. Open paper 12 from kit and flood fill your image.
3. Go layers/Load/SaveMask/Load from disk. Find your mask. Use these settings:
source luminance fit to canvas all checked.
4. Go to your layer Palette and change visiblity to 70.
5. Grab your glitter01 from kit copy and paste as new layer. Resize to your liking and place
where you want. I resized 75% and Rotated 180 degrees to the left.
6. Grab your frame03 from kit copy and paste it as new layer.... I resized mine 75% 3 times
place to your liking.
7. Grab your magic wand change the feather to 24.
8. Add new layer and flood fill with paper 14 from kit.
9. Add new layer while still selected and paste your tube into selection. Add your drop shadow and select none.
10. Copy and paste your tube again as new layer this time add drop shadow of your choice and place where you want.
12. Copy and paste Dragonflies from kit add drop shadow and move them to your liking.
13. Add your copyright info and text.
13. Find your glitter layer and duplicate it 2 times. Make sure that the original is highlighted and go
adjust/Add remove noise/ Add noise with these settings Guassian checked and 25.
14. Do this for the copy layers also just change to 30 and 35.
15. Make sure that the original layer is highlighted and the copies are x out, then go edit/ copy merged
paste in Animation Shop as new image. Do the same with the copies but paste after current frame.
16. Go edit select all/ animation/ animation properties change to 22. Then Resize aninmation. I resized 75% then save.
That's it..... I hope you have enjoyed my tutorial. If you have any questions please
feel free to leave a message in the Chatbox.
This tutorial was written May 2011 by me(Koolbrat) any similarities to another is just a coincidence.
Friday, June 3, 2011
Cracked up
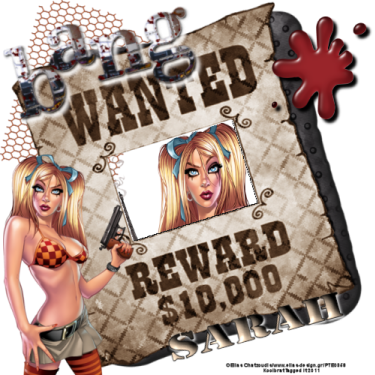
I used the wonderful artwork of Elias Chatzoudis.
You can purchase his artwork here: Elias Chatzoudis
I used the lovely Scrapkit by Sarah.
You can purchase it here:Digifox
1. Open a new image 500 x 500.
2. Open wanted frame from kit and copy and paste as new layer. Close the original. Resize to your
liking. I resized 75%.
3. Grab your magic wand and use these settings: Mode-Replaced/Match Mode-RGB Valve/Tolerance 55/
Contiguous checked/Feather 1. and click in the open space on the wanted frame.
4. Open your tube and copy and paster into selection. Add drop shadow of your choiceand select none.
5. Grab your tube again and copy and paste as new layer. Resize to your liking.
6. Grab mesh from kit and copy and paste as new layer. Resize .Move this layer under your wanted frame layer.
7. Open your WA-bang and copy and paste as new layer. Resize to your liking. I used 75%.
8. Open the splatter and copy and paste as new layer. Resize to your liking. I used 75% twice. Add drop
shadow of your choice.
9. Add your copyright info and text.
10. Merge visible resize 75% and save.
That's it..... I hope you have enjoyed my tutorial. If you have any questions please
feel free to leave a message in the Chatbox.
This tutorial was written May 2011 by me(Koolbrat) any similaritiesto another is just a coincidence.
Wednesday, June 1, 2011
Grrrrrrrr
Google keeps signing me out so I cant do anyting.... As soon as I can get signed in and stay signed in I will get the Tutorials moved for you all.....
Monday, May 30, 2011
Green Fairy
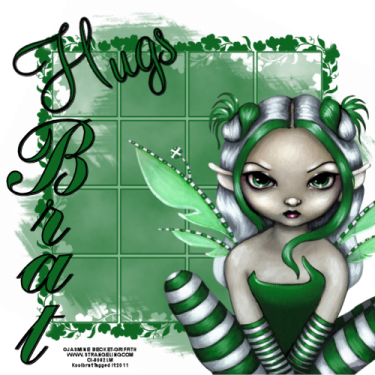
Green Fairy
I am using the beautiful artwork of Jasmine Becket- Griffith
You can purchase her artwork here: CDO
I used Wee Scot Lass Mask 169
You can get it for free here: WSL I also used Butterfly Flutterby Mask 01
You can get it for free here: ButterflyFlutterby
You can use Font of choie
1. Open your tube and duplicate it. Then close the original.
2. Open a new image 500 x 500 and flood fill it with the color
of your choice.
3. Go to Layers/Load/Save Mask/Load mask from disk. Find your mask
butterflyflutterby01.
4. Go to your layer palette and merge group.
5. Go Image/Rotate/Free Rotate left 25.
6. Change the visibility to 48.
7. Add a new layer and flood fill with the same color.
8. Then go Layers/Load/Save Mask/Load mask from disk. Find your
WSL_mask 169.
9. Go to your layer palette and merge group.
10. Copy and paste your tube and place it where you want it.
11. Dont forget to add your drop shadows.
12. Add your text and name of choice.
13. Dont forget to add your copyright info.
14. Merge visible and resize and save.
That's it..... I hope you have enjoyed my tutorial. If you have any questions please
feel free to leave me a message in the chat box.
This tutorial was written May 2011 by me(Koolbrat) any similaritiesto another is just a coincidence.
Sunday, May 29, 2011
TaggingAngels has gone crazy
Omg TaggingAngel is at it again... I think she went completely crazy this time.
She not only has her whole store onsale for $5.00. But she just mark her yearly and
cu4cu down as well. You can now get her yearly for $15.00 and her cu4cu for $6.00.
This sale end tomorrow night so you better run and check it out while you have the
chance.........http://taggingangels.net/
She not only has her whole store onsale for $5.00. But she just mark her yearly and
cu4cu down as well. You can now get her yearly for $15.00 and her cu4cu for $6.00.
This sale end tomorrow night so you better run and check it out while you have the
chance.........http://taggingangels.net/
Saturday, May 28, 2011
Tubers Everywhere lookie here!!!!!!!!!!!!!!!!!!!!!!!!!
Love Song
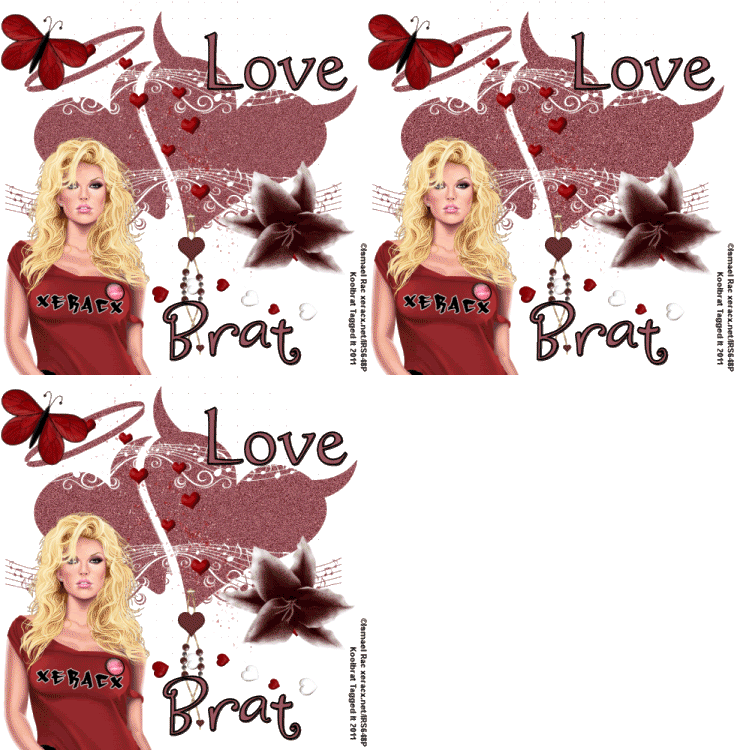
Love Song
I used the wonderful artwork of Ismael Rac.
You can purchase the tube here: Rac
Or use a tube of your choice.
You are going to need the mask I used. You can get
it here: Butterfly Flutterby Creations I used mask number 66
You are also going to need the scrap kits pieces I used.
Thank you Jolene for allowing me to use and share your
wonderful artwork. You can get them Here
This tutorial requires a good working knowledge of psp.
1. Open you tube and duplicate it. Then close the original.
2. Open a new image 500 x 500 and flood fill it with a color
from your tube.
3. Go to layers/Load/SaveMask/Load from Disk. Find your mask by using
the drop down window.
4. Go to your layer palette and merge group.
5. Now you are going to copy and paste the elements into your image. I resized
all of mine by 75%. You many want yours bigger or smaller. That is up to you.
6. Copy and paste your tube and move it to where you like. Remember to add your
drop shadows as you go.
7. Now go back to your merged mask layer and duplicate it twice.
8. Click on the original layer and to to Adjust/Add/Remove noise/Add noise.
Use these settings Gaussian/25/Monochrome checked.
9. Do this again with your first copy but change the noise to 30.
10. Same with your second copy noise 35.
11. Add your name and saying or whatever.
12. Dont forget to add your copyright. The tag wont be able to be used without it.
13. Now open your animation shop. Go back to psp.
14. Make sure that your merged copies are x ed out. Go edit/Copy Merged.
Then go back to AS and go and paste as new image. Back to PSP and x out
the first layer and unx the second. Edit/Copy merged. Go back to AS and go edit/ paste/
after current frame. Then back to PSP and x out that layer and unx the third copy and go
edit/copy merged. Then back in AS edit/paste/after current frame.
15. Go to edit/select all. Then animation/frame properties and change to 22. Then animation/
resize animation. I resized mine 75%.
16. Make sure that the animation is to your liking and then save.
That's it..... I hope you have enjoyed my tutorial. If you have any questions please
feel free to leave me a message in the Chatbox.
This tutorial was written May 2011 by me(Koolbrat) any similaritiesto another is just a coincidence.
Sunday, May 22, 2011
I am going to try and get some stuff added this week.... Sorry everyone I am really behind on this.... I have been busy working in the yard and stuff..... I promise that there will be something here for you soon to play with.....
Huggiessssssssssssss
Huggiessssssssssssss
Sunday, May 8, 2011
Look at the great job that Stu has done for me.... Isnt it amazing.... I love it Stu hunni thank you
Tuesday, May 3, 2011
We are working very hard to get this blog up and running... Please keep checkin back.
Monday, April 18, 2011
Construction underway
This Blog is under Construstion.... I am going to try to get it up and going in the next month or so.... Keep checking back.......
Construction underway
This Blog is under Construstion.... I am going to try to get it up and going in the next month or so.... Keep checking back.......
Subscribe to:
Posts
(Atom)
TERMS OF USE
The Tubes in the zip are all made by me(Koolbrat).
:Please do not claim them as your own.
:They are Free for Personal Use Only.
:Please do not Share the files....
:Please do not change the file names.
:Please do not Burn to a CD or DVD or replicate to any other media or fix tangent unless it is for your own personal back up.
:Please do not use to create Brushes, Custom Shapes, Ect.
:Please leave the tubes intact, do not distor in any way.
If you have any Questions. Comment regarding these TOU please email koolbrat@gmail.com
Thank you for your download,
I hope you enjoy them,
Have fun,
Love Koolbrat
***********************
Copyright Notes:
Taggers.
Please add my copyright.
DO NOT use with other artist Tubes,
with the exception of Elements, Frames Ect.
Tutorial Writers.
Please include a credit to me somewhere on your page
(http://bratsplace-koolbrat.blogspot.com/)
Please add my copyright.
DO NOT use with other artists Tubes, with the exception of Elements, Frames ECT.
************************
Labels
- FTU Frames (5)
- My CT Tutorials (137)
- My Tutorials (2)
- News (118)


