Linkbar
Monday, December 23, 2013
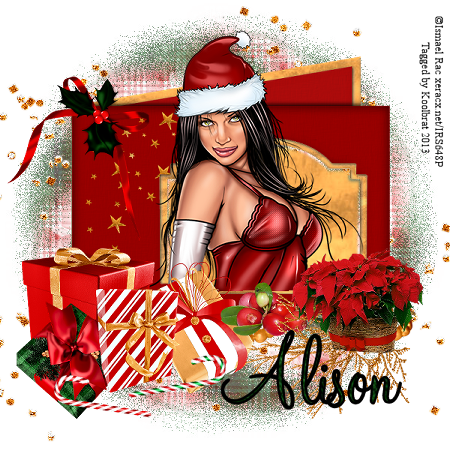
Christmas Crimbo
Christmas Crimbo
I used the wonderful artwork of Ismeal Rac
You can purchase tube here:RAC
Scrapkit used "Crimbo" By HungryHill
You can purchase it here: Treasured Scraps
1. Open new image 600 X 600
2. Floodfill with paper1. Load saved mask and merge group
3. Add new layer and floodfill with paper 2. Load saved mask and merge group
4. Copy and paste glitter scatter
5. Copy and paste frame 4. Resize to your liking and place in the middle of your image
6. Grab your magic wand and click inside your frame and floodfill with paper 3
7. Copy and paste your tube as new layer. Resize to your liking and place in the middle of your frame layer
8. Copy and paste beads. Resize and place under your frame layer
9. Copy and paste gift 2. Resize to your liking and place on the left hand side of your frame
10. Copy and paste gift 1. Resize to your liking and place in front of gift 1
11. Copy and paste gift 4. Resize to your liking and place on the right hand side of your gift 2
12. Copy and paste gift 3. Resize to your liking and place in front of other gifts
13. Copy and paste berries. Resize to your liking and place under gift4 in the middle of your beads layer
14. Copy and paste bow 7. Resize to your liking and place on the upper left hand corner of your frame
15. Copy and paste trim 2. Resize to your liking and place over the right hand side of your beads. Go Image/Flip
16. Copy and paste poinsettas. Resize to your liking and place in front of your trim
17. Copy and paste candy cane 1. Resize to your liking and place in front of gifts on the right hand side
18. Copy and paste candy cane 2. Resize to your liking and place in front of gifts on the left hand side
19. Add Copyright info and text
20. Merge visible and Save
That's it..... I hope you have enjoyed my tutorial. If you have any questions please
feel free to leave a message in the Comments.
This tutorial was written December 2013 by me(Koolbrat) any similarities to another is just a coincidence.
Tuesday, October 1, 2013
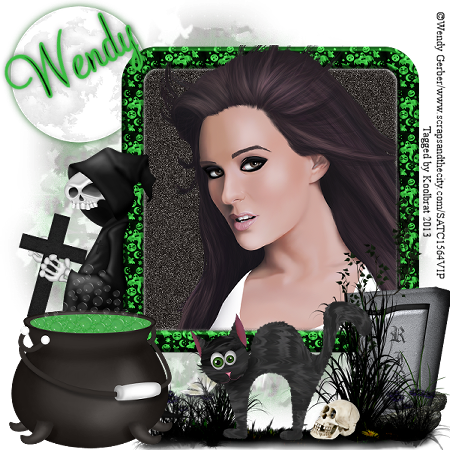
Green Zombie
Green Zombie
I am using "Zombie Chick" by Wendy Gerber
You can purchase it here: SATC
Scrapkit "WitchyPoo" by Black Widow Creations
You can purchase it here: SATC
1. Open new image 600 X 600
2. Floodfill with paper PP4. Load saved mask and merge group
3. Add new layer and floodfill with paper PP6. Load saved mask and merge group
4. Copy and paste the moon. Resize and place in the upper right hand corner of your image. Add drop shadow of your
choice
5. Copy and paste frame 15. Resize and place in the middle of your image
6. Grab your magic wand and click inside your frame
7. Floodfill with paper PP9
8. Copy and paste your tube as new layer. Duplicate and X out the copy
9. Go Selections/ Invert/ Delete/Select None
10. UnX your copy and grab your eraser tool and erase everything that you don't want showing
11. Copy and paste the tombstone. Resize and place in the lower right hand corner of your image
12. Copy and paste grass. place in the lower right hand corner of your image
13. Copy and paste reaper. Resize and place in the lower left hand corner of your image
14. Copy and paste cauldron. Resize and place in front of your reaper
15. Copy and paste black cat. Resize and place in the middle of the bottom half of your image
16. Add your copyright info and Text
17. Merge visible and Save
That's it..... I hope you have enjoyed my tutorial. If you have any questions please
feel free to leave a message in the Comments.
This tutorial was written October 2013 by me(Koolbrat) any similarities to another is just a coincidence.
Monday, September 30, 2013
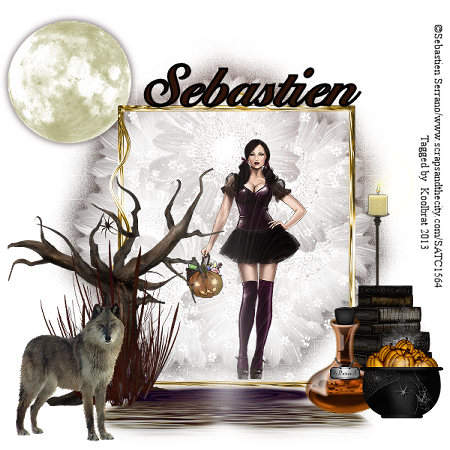
Haunted Nights
Haunted Nights
I am using "Little Dark" by Sebastien Serrano
You can purchase it here: SATC
Scrapkit "LIttle Dark" by Hania Designz
You can purchase it here: SATC
1. Open new image 600 X 600
2. Floodfill with paper 3. Resize 85%
3. Copy and paste moon. Resize and place in the upper left hand corner of your image. Add drop shadow of your choice
4. Copy and paste golden frame. Resize and place in the middle of your image
5. Copy and paste your tube. Resize so that she fits in your frame
6. Copy and paste tree 05. Resize and place in the lower left hand corner of your image
7. Copy and paste candle stick 66. Resize and place in the lower right hand corner of your image
8. Copy and paste pond 56. Resize and place in front of your frame
9. Copy and paste books 17. Resize and place in front of your candle stick
10. Copy and paste dead grass 04. Resize and place in front of your tree
11. Copy and paste potion 26. Resize and place next to your books
12. Copy and paste cauldron 35. Resize and place in front of your books
13. Copy and paste wolf 16. Resize and place in front of your tree and grass
14. Copy and paste mist 10. Resize and place over your water
15. Add your copyright info and Text
16. Merge Visible and Save
That's it..... I hope you have enjoyed my tutorial. If you have any questions please
feel free to leave a message in the Comments.
This tutorial was written September 2013 by me(Koolbrat) any similarities to another is just a coincidence.
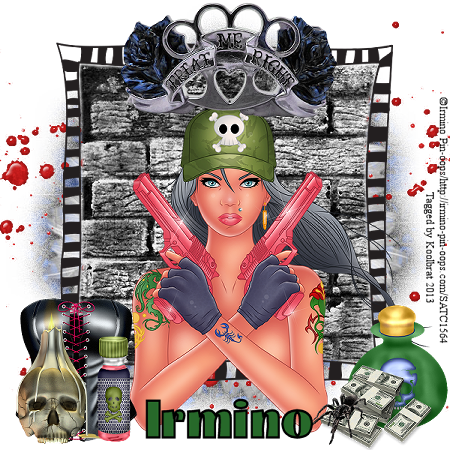
Killer on the Loose
Killer on the Loose
I am using "Sexy Killer" by Irmino Pin-oops
You can purchase it here: SATC
Scrapkit "Sexy Killer" by Hania Designz
You can purchase it here: SATC
1. Open new image 600 X 600
2. Floodfill with paper 7. Load saved mask and merge group
3. Copy and paste element 24
4. Copy and paste frame 100. Resize and place in the middle of your image
5. Grab your magic wand and click inside the frame
6. Floodfill with paper 2 select none
7. Copy and paste your tube so that it looks like she is in the frame
8. Copy and paste element 05. Resize and place in the lower left hand corner of your image
9. Copy and paste element 25. Resize and place at the top of your frame
10. Copy and paste element 57. Resize and place in the lower left hand corner of your image
11. Copy and paste element 69. resize and place next to your skull
12. Copy and paste element 28. Resize and place in the lower right hand corner of your image
13. Copy and paste element 84. Resize and place in the lower right hand corner of your image
14. Copy and paste element 65. Resize and place so that it looks like it is climbing down your money stack
15. Add your copyright info and Text
16. Merge Visible and Save
That's it..... I hope you have enjoyed my tutorial. If you have any questions please
feel free to leave a message in the Comments.
This tutorial was written September 2013 by me(Koolbrat) any similarities to another is just a coincidence.
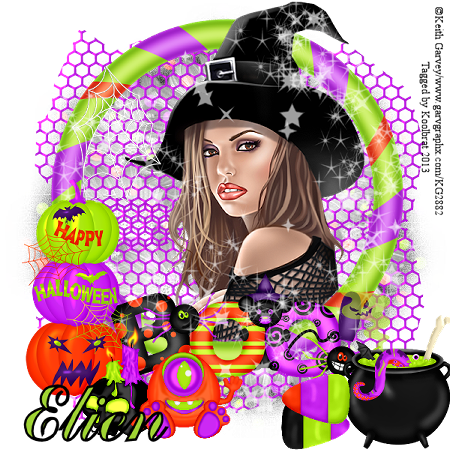
Halloween Monsters
Halloween Monsters
I am using "Tabitha" by Keith Garvey
You can purchase it here: Garv
Scrapkit "Howl O ween" by Waggish Sparkles
You can purchase it here: SATC
1. Open new image 600 X 600
2. Floodfill with paper 17. Load saved mask and merge group
3. Copy and paste wire. Resize and place in the middle of your image
4. Duplicate wire and flip
5. Copy and paste frame 2. Resize and place in the middle of your image
6. Grab your magic wand and click inside your frame
7. Copy and paste tube as new layer. Resize and place then duplicate your tube and X the copy out
8. Go selections/invert/delete select none
9. UnX your copy and take your eraser tool and clean up the extra tube over lapping your frame
10. Copy and paste boo. Resize and place at the bottom of your frame
11. Copy and paste the web. Resize and place in the top left hand corner of your frame
12. Copy and paste pumpkins. Resize and place on the left hand side of your frame
13. Copy and paste cauldron. Resize and place in the lower right hand corner of your image
14. Copy and paste candy corn 2. Resize and place at the bottom of your image
15. Copy and paste skull. Resize and place next to your pumpkins
16. Copy and paste monster3. Resize and place in the middle of the bottom of your image
17. Copy and paste candy corn3. Resize and place on top of the other candy
18. Copy and paste sparkle 1
19. Add your copyright info and Text
20. Merge Visible and Save
That's it..... I hope you have enjoyed my tutorial. If you have any questions please
feel free to leave a message in the Comments.
This tutorial was written September 2013 by me(Koolbrat) any similarities to another is just a coincidence.
Sunday, September 29, 2013
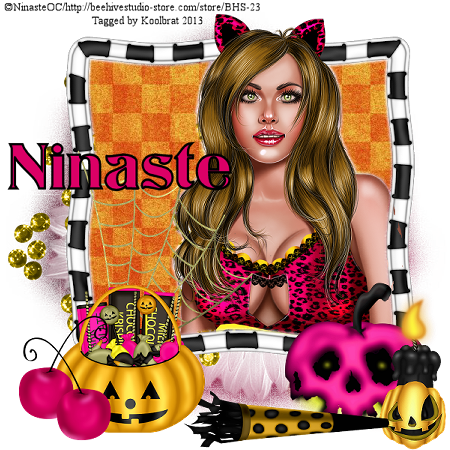
Cherry Halloween
Cherry Halloween
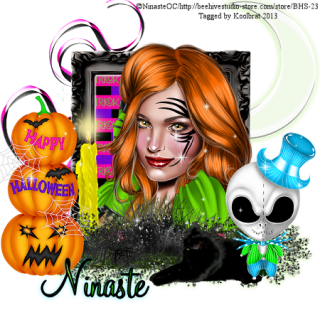
I am using "LaunchingFreebie1" by Ninaste
You can purchase it here: BHS
Scrapkit "Halloween Party" by Hania Designz
You can purchase it here: SATC
I am using "LaunchingFreebie1" by Ninaste
You can purchase it here: BHS
Scrapkit "Halloween Party" by Hania Designz
You can purchase it here: SATC
This tube is a freebie if you spend $5 or more at the
Grand Opening of The BeeHive Studio Oct. 1st thru Oct. 5th
1. Open new image 600 X 600
2. Copy and paste paper 09. Load saved mask and merge group
3. Copy and paste element 16. Place on the right hand side of your image
4. Copy and paste element 100. Resize and place in the middle of your image
5. Grab you magic wand and click inside your frame
6. Copy and paste your tube as new layer. Resize and place to your liking
7. Duplicate your tube and X it out
8. On your orginal layer go Selections/Invert/Delete then Selct none
9. UnX your copy and grab your eraser tool and erase the excess tube
10. Grab your magic wand one more time and Click in the blank areas of your frame. You can select multiple areas by hitting shift at the same time that you click where you want to select
11. Floodfill with paper 1
12. Copy and paste element 62. Resize and place in the lower right hand corner of your image
13. Copy and paste element 09. Resize and place next to element 62
14. Copy and paste element 28. Resize and place in the lower right hand corner of your image
15. Copy and paste element 15. Resize and place on the left hand side of your frame
16. Copy and paste element 95. Resize and place in the lower left hand corner of your image
17. Copy and paste element 57. Resize and place in the lower left hand corner of your image
18. Add your copyright info and Text
19. Merge Visible and Save
That's it..... I hope you have enjoyed my tutorial. If you have any questions please
feel free to leave a message in the Comments.
This tutorial was written September 2013 by me(Koolbrat) any similarities to another is just a coincidence.
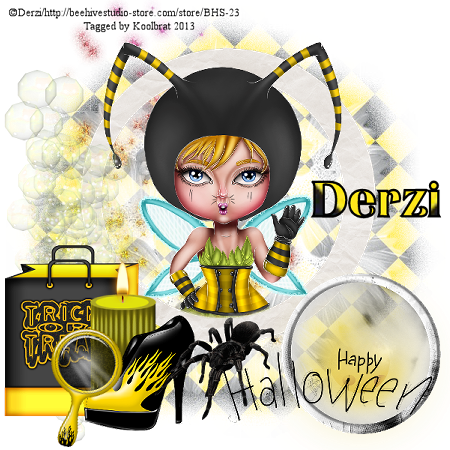
Bee Anyone
Bee Anyone
I am using "LaunchingFreebie2" by Derzi
You can purchase it here: BHS
Scrapkit "Halloween Party" by Hania Designz
You can purchase it here: SATC
I am using "LaunchingFreebie2" by Derzi
You can purchase it here: BHS
Scrapkit "Halloween Party" by Hania Designz
You can purchase it here: SATC
This tube is a freebie if you spend $5 or more during the Grand Opening of
The Beehive Studio Oct. 1st thru Oct 5th
1. Open new image 600 X 600
2. Floodfill with paper 07. Load saved mask and merge group
3. Copy and paste element 46. Resize to your liking and place in the middle of your image
4. Copy and paste element 94. Resize and place in the middle of your image
5. Grab your magic wand and click inside the frame
6. Paste your tube as new layer. Resize and place to your liking
7. Duplicate your tube and X it out
8. Make sure you are on the orginal layer and go Selections/Invert/Delete. Select none
9. UnX the copy and take your eraser tool and erase the extra tube that is over lapping your frame
10. Copy and paste element 88. Place in the lower left hand corner of your image
11. Copy and paste element 73. Resize and place in front of your bubbles
12. Copy and paste element 40. Resize and place in front of halloween bag
13. Copy and paste element 47. Resize and place in front of your candle
14. Copy and paste element 42. Resize and rotate 15 degrees to the right. Place so that it looks like it is sitting against your candle
15. Copy and paste element 17. Resize and place in the lower left hand corner of your image
16. Copy and paste element 27. Resize and place over the light in the right hand corner
17. Copy and paste element 68. Resize and place in the lower right hand corner of your image
18. Copy and paste element 37. Resize and place in the middle of the lower part of your image
19. Add your copyright info and Text
20. Merge Visible and Save
That's it..... I hope you have enjoyed my tutorial. If you have any questions please
feel free to leave a message in the Comments.
This tutorial was written September 2013 by me(Koolbrat) any similarities to another is just a coincidence.
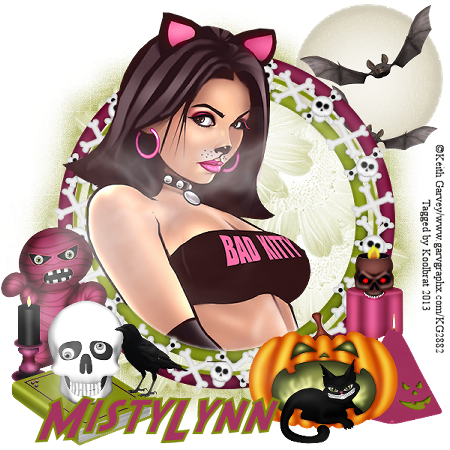
Purple Halloween
Purple Halloween
I am using "Bad Kitty" by Keith Garvey
You can purchase it here: Garv
Scrapkit "Halloween Night " by MistyLynn Creations
You can purchase it here: SATC
1. Open new image 600 X 600
2. Floodfill with paper 5. Load saved mask and merge group
3. Copy and paste moon and bats. Resize and place in the upper right hand corner of your image
4. Copy and paste frame 66. Resize and place in the middle of your image
5. Copy and paste frame 67. Resize and place over the other frame. Rotate 15 degrees to the right
6. Grab your magic wand and click inside the frist frame
7. Copy and paste your tube as new image. Resize and place to your liking
8. Duplicate your tube and Xout the copy
9. While on the orginal go Selections/Invert/Delete then select none
10. UnX your copy copy and grab your eraser tool and erase the overage of your tube
11. Copy and paste the skull on fire. Resize and place in the lower right hnd corner of your image
12. Copy and paste the scarey candle. Resize and place in front of your table
13. Copy and paste your mummy. Resize and place in the lower left hand corner of your image
14. Copy and paste skull on the book. Resize and place in the lower left hand corner of your image
15. Copy and paste your pumpkin and cat. Resize and place next to your candle
16. Copy and paste the raven. Resize and place so that it looks like he is sitting on top of the book
17. Copy and paste the mist. Place to your liking
18. Add your copyright info and Text
19. Merge visible and Save
That's it..... I hope you have enjoyed my tutorial. If you have any questions please
feel free to leave a message in the Comments.
This tutorial was written September 2013 by me(Koolbrat) any similarities to another is just a coincidence.
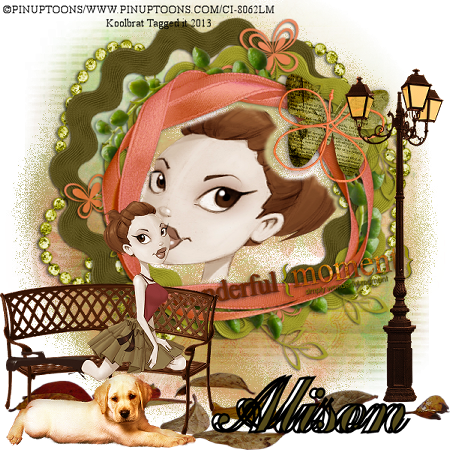
Lazy Autumn Days
Lazy Autumn Days
I am using "Coy ruffles" by Pinup Toons
You can purchase it here: CDO
Scrapkit "Autumn Glow" by HungryHill
Cluster Frame can be gotten here: Treasured Scraps
You can purchase it here: Treasured Scraps
1. Open new image 600 X 600
2. Floodfill with paper 2. Load saved mask and merge group
3. Add new layer and floodfill with paper 7. Load saved mask and merge group
4. Copy and paste Cluster frame. Resize and place in the middle of your image
5. Grab your magic wand and click inside your frame
6. Copy and paste your tube into selection select none
7. Copy and paste street lamp. Resize and place on the right hand side of your image
8. Copy and paste leaf scatter. Resize and place at the bottom of your image
9. Copy and paste bench. Resize and place in the lower left hand corner of your image
10. Copy and paste pup. Resize and place in front of your image
11. Copy and paste your tube. Resize and place so that it looks like she is sitting on the bench
12. Add your copyright info and Text
13. Merge Visible and Save
That's it..... I hope you have enjoyed my tutorial. If you have any questions please
feel free to leave a message in the Comments.
This tutorial was written September 2013 by me(Koolbrat) any similarities to another is just a coincidence.
Friday, September 27, 2013
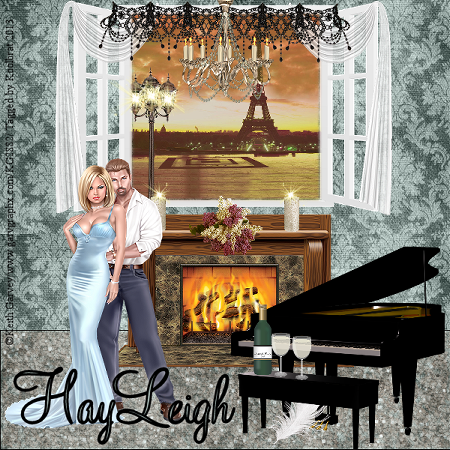
Romantic Nights
Romantic Nights
I am using "GarvGuy2 and Dressed" by Keith Garvey
You can purchase it here: Garv and Garv
Scrapkit "Musical Romance" by Ruinations
I am using "GarvGuy2 and Dressed" by Keith Garvey
You can purchase it here: Garv and Garv
Scrapkit "Musical Romance" by Ruinations
You can purchase it here: PPP
You will have to provide the Yellow Sparkle
1. Open new image 600 X 600
2. Floodfill with paper 7
3. Grab your shapes tool and draw a rectangle at the bottom of your image
4. Floodfill with paper 3 with Texture settings of grass angle 0 and scale 100. Select none
5. Copy and paste frame 3. Resize to your liking and place top middle of your image
6. Grab your magic wand and click inside the frame
7. Copy and paste paper 2 into selection. While still selected copy and paste lamp post as new layer. Go
Selections/invert/delete. Then select none
8. Copy and paste a yellow sparkle (that you will need to provide). Place on the middle lamp so that it looks like it is lite up
9. Duplicate your sparkle layer 2 times. Make sure that you duplicate the orginal cause the copies will fade
10. Place your 2 other sparkles in the other lamp lights
11. Copy and paste the curtians. Resize and place on your window frame
12. Copy and paste the fireplace. Resize and place just under your window
13. Copy and paste the paino. Resize and place in the lower right hand corner of your image
14. Copy and paste the feather. Resize and place in front of your paino
15. Copy and paste the paino bench. Resize and place just over your feather
16. Copy and paste the flower bunch(37). Resize and place in the middle of your fireplace mantle
17. Copy and paste the black balist. Resize and place on top of your window frame
18. Copy and paste Chandler. Resize to your liking and place so that it looks like it is hanging from the ceiling
19. Copy and paste candle. Resize and place on the left side of your mantle
20. Take the same sparkle and put it on the top of your candle so that it looks like it is lite. Merge your sparkle with your
candle
21. Duplicate your candle and mirror so that the other one is on the right hand side of your image
22. Copy and paste your wine glass. Resize and place on the paino bench
23. Duplicate your wine glass and move it so that it is sitting next to the other one
24. Copy and paste the wine bottle. Resize and place on the left hand side of your glasses
25. Copy and paste Garv Guy2. Resize and place so that he looks like he is standing on the left side of the fireplace
26. Copy and paste Dressed. Resize and place her so that she is standing in front but off to the left side of him
27. Add your copyright info and Text
28. Merge Visible and Save
That's it..... I hope you have enjoyed my tutorial. If you have any questions please
feel free to leave a message in the Comments.
This tutorial was written September 2013 by me(Koolbrat) any similarities to another is just a coincidence.
Thursday, September 26, 2013
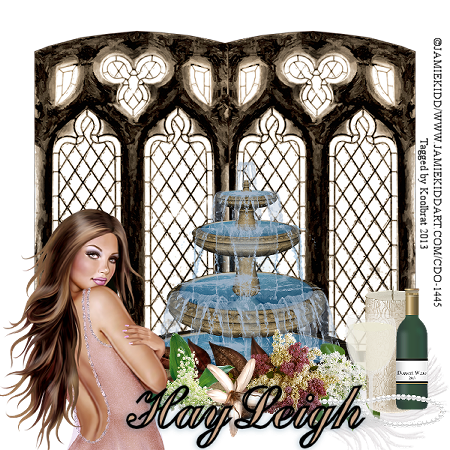
Flower Fountain
Flower Fountain
I am using "Flirty" by Jamie Kidd
You can purchase it here: CDO
Scrapkit "Musical Romance" by Ruinations
You can purchase it here: PPP
1. Open new image 600 X 600
2. Copy and paste element 10. Resize and place in the middle of your image
3. Duplicate element 10 and mirror
4. Copy and paste element 5. Resize and place in the middle of your wall image
5. Copy and paste element 17. Resize and place in the lower right hand side of your image
6. Copy and paste element 40. Resize and place on the right side of the fountain
7. Copy and paste element 30. Resize and place on top of your feather layer
8. Copy and paste element 20. Resize and place in front of your candle
9. Copy and paste element 22. Resize and place on the left hand side of your candle
10. Copy and paste element 16. Resize and place in front of your glass and bottle layer
11. Copy and paste element 48. Resize rotate and place in the middle of your fountain
12. Copy and paste element 41. Resize and place on the left hand side of your image
13. Copy and paste element 37. Resize and place in the middle of your flowers in front of your fountain
14. Copy and paste element 42. Resize and place on the left hand side of element 37
15. Copy and paste your tube. Resize and place in the lower left hand corner of your image
16. Add your copyright info and Text
17. Merge Visible and Save
That's it..... I hope you have enjoyed my tutorial. If you have any questions please
feel free to leave a message in the Comments.
This tutorial was written September 2013 by me(Koolbrat) any similarities to another is just a coincidence.
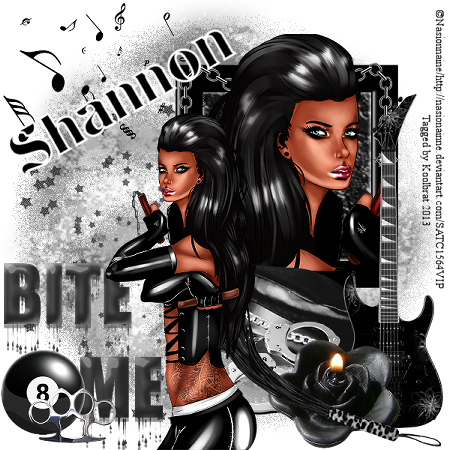
Mystical Eight Ball
Mystical Eight Ball
I am using "Shannon Ren" by Nasionainne
You can purchase it here: SATC
Scrapkit "Ren" by Kissed by Kelz
You can purchase it here: KBK
1. Open new image 600 X 600
2. Floodfill with paper 14. Load saved mask and merge group
3. Add new layer and floodfill with paper 8. Load saved mask and merge group
4. Copy and paste star spiral and place in the middle of your image
5. Copy and paste note scatter. Resize and place in the upper left hand corner of your image
6. Copy and paste frame. Resize to your liking and place in the middle of the right hand side of your image
7. Copy and paste chain. Resize to your liking and place at the top of your frame
8. Grab your magic wand and click inside your frame. Floodfill with paper 2
9. Copy and paste your tube as new layer. Resize to your liking and place in the frame
10. Duplicate your tube and X out the copy
11. On the orginal layer go selections/ Invert/delete
12. UnX your copy layer
13. Copy and paste hat. Resize to your liking and place in the lower right hand corner of your image
14. Copy and paste guitar. Resize and place next to your hat
15. Copy and paste handcuffs. Resize and place in front of your hat
16. Copy and paste candle. Resize and place in front of your guitar
17. Copy and paste word art. Resize and place in the lower left hand corner of his image
18. Copy and paste whip. Resize and place in front of your candle
19. Copy and paste your tube and resize and place in the middle of your image
20. Copy and paste 8ball. Resize and place in the lower left hand corner of your image
21. Copy and paste brass knuckles. Resize and place in front of your 8ball
22. Add your copyright info and Text
23. Merge Visible and Save
That's it..... I hope you have enjoyed my tutorial. If you have any questions please
feel free to leave a message in the Comments.
This tutorial was written September 2013 by me(Koolbrat) any similarities to another is just a coincidence.
Wednesday, September 25, 2013
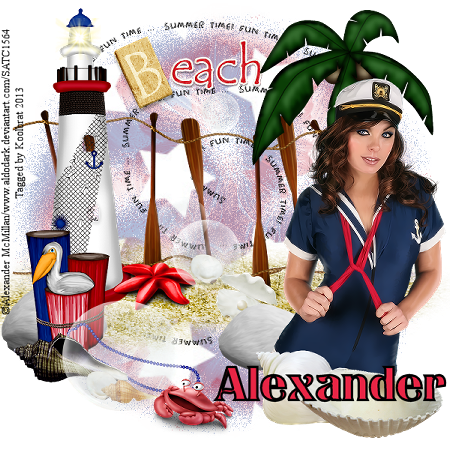
Relaxing at the Beach
Relaxing at The Beach
I am using "Sailor Girl" by Alexander McMillan
I am using "Sailor Girl" by Alexander McMillan
You can purchase it here: SATC
Scrapkit "Sailor Beach" by Bibi Collection
You can purchase it here: SATC
1. Open new image 600 X 600
2. Floodfill with paper 5. Load saved mask and merge group
3. Add new layer and floodfill with paper 7. Load saved mask and merge group
4. Copy and paste element 34. Resize to your liking and place in the middle of your image
5. Copy and paste element 61. Resize to your liking and place in the middle of your image
6. Copy and paste element 99. Resize to your liking and place in the upper middle of your image
7. Copy and paste element 38. Resize to your liking and place on the left hand side of your image
8. Copy and paste element 57. Resize to your liking and place just below your lighthouse
9. Copy and paste element 39. Resize to your liking and place in front of your rock
10. Copy and paste element 47. Resize to your liking and place in the upper right hand middle of your image
11. Copy and paste element62. Resize to your liking and place in the middle of the sand
12. Copy and paste element 58. Place in front of your shell
13. Copy and paste your tube and place in front of your tree
14. Copy and paste element 27. Resize and place at the foot of your lighthouse
15. Copy and paste element 92. Resize and place in front of your tube
16. Copy and paste element 12. Resize and place next to your pelican
17. Copy and paste element 3. Resize and place in front of your necklace
18. Copy and paste element 7. Resize and place in front of your shell and necklace
19. Copy and paste element 5. Resize and place on the right hand side of the shell in front of your tube
20. Copy and paste element 65. Resize and place between your tube and your bubble
21. Crop element 31 so that you only have one of the big sparkles. then paste it so that it looks like the lighthouse has it's
light on
22. Add your copyright info and Text
23. Merge Visible and Save
That's it..... I hope you have enjoyed my tutorial. If you have any questions please
feel free to leave a message in the Comments.
This tutorial was written September 2013 by me(Koolbrat) any similarities to another is just a coincidence.
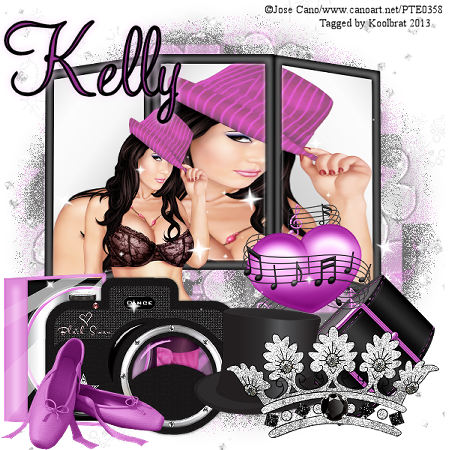
Musical Ballerina
Musical Ballerina
I am using "Jennifer Swift" by Jose Cano
I am using "Jennifer Swift" by Jose Cano
You can purchase it here: SATC
Scrapkit "Gothic Ballerina" by Evol Angel Scraps
You can purchase it here: Sweet Pinup, Scrap Candy
1. Open new image 600 X 600
2. Floodfill with paper 2. Load saved mask and merge group
3. Add new layer and floodfill with paper 8. Load saved mask and merge group
4. Copy and paste Sparkles
5. Copy and paste mirror2. Resize to your liking and place in the middle of your image
6. Grab your magic wand and click inside each Mirror frame
7. Copy and paste your tube into selection and select none
8. Copy and paste your tube again. Resize to your liking and place on the left hand side of your image
9. Copy and paste cd. Resize to your liking and place in the lower left hand corner of your image
10. Copy and paste camera. Resize to your liking and place in front of your cd
11. Copy and paste bracelet. Resize to your liking and place in the lower right hand corner of your image
12. Copy and paste musicalheart. Resize to your liking and place behind your bracelet
13. Copy and paste tophat. Resize to your liking and place in the middle of your camera and heart
14. Copy and paste shoes. Resize to your liking and place in front of your camera and cd
15. Copy and paste crown. Resize to your liking and place in front of your bracelet
16. Copy and paste Sparkles2
17. Add your copyright info and Text
18. Merge Visible and Save
That's it..... I hope you have enjoyed my tutorial. If you have any questions please
feel free to leave a message in the Comments.
This tutorial was written September 2013 by me(Koolbrat) any similarities to another is just a coincidence.
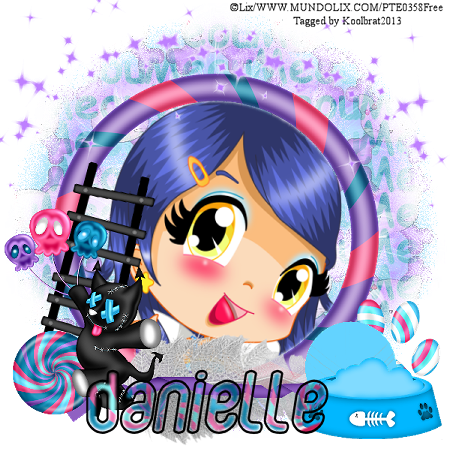
Swirls of Bubbles
Swirl of Bubbles
I am using "Angelina" by Lix
I got this amazing tube as a freebie off PTE but they have since gone out of business. But Lix has many wonderful tubes that you could use with this kit
You can purchase it here: LTS
Scrapkit "Bubble Kitten" by Scraps by Danielle
You can purchase it here: SBD
1. Open new image 600 X 600
2. Floodfill with paper 11. Load saved mask and merge group
3. Add new layer and floodfill with paper 7. Load saved mask and merge group
4. Copy and paste frame 2. Resize to your liking and place in the middle of your image
5. Grab your magic wand and click inside the frame
6. Copy and paste your tube into selection then select none
7. Copy and paste feather. Resize to your liking and place at the bottom of the frame
8. Copy and paste ribbon. Resize to your liiking and place over your feather layer
9. Copy and paste paw print. Resize to your liking and place in the lower right hand corner of your image
10. Copy and paste ladder. Resize to your liking and rotate 15 degrees to the right. Then place so that it looks like it is
leaning on the left hand side of your frame
11. Copy and paste candy. Resize to your liking and place at the bottom of your ladder
12. Copy and paste emo Ted. Resize to your liking and place next to your ladder
13. Copy and paste yarn. Resize to your liking and place on the left hand side of your paw print
14. Copy and paste cat food bowl. Resize to your liking and place in front of your yarn
15. Copy and paste sparkles1. Move to the upper right hand corner of your image
16. Duplicate your sparkle layer and image mirror
17. Add your copyright info and Text
18. Merge Visible and Save
That's it..... I hope you have enjoyed my tutorial. If you have any questions please
feel free to leave a message in the Comments.
This tutorial was written September 2013 by me(Koolbrat) any similarities to another is just a coincidence.
Tuesday, September 24, 2013
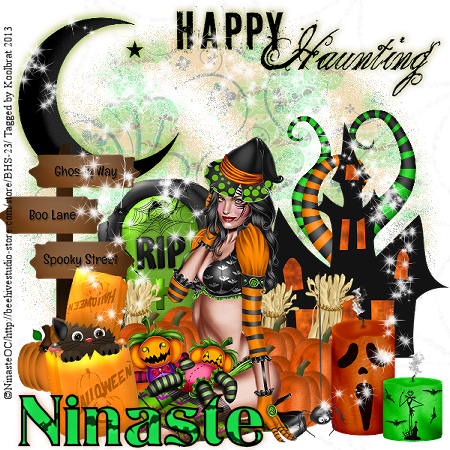
Happy Hautning
Happy Haunting
I am using "Coraline Witch" by Ninaste OC
You can purchase it here: BHS
Scrapkit "Spooky Street" by Pink Paradox
You can purchase it here: PPP
1. Open new image 600 X 600
2. Floodfill with paper 19. Load saved mask and merge group. Change the Visibility to your liking
3. Add new layer and floodfill with paper 32. Load saved mask and merge group. Change the Visibility to your liking
4. Copy and paste element 201
5. Copy and paste element 191. Resize to your liking and place on the right hand side of your image
6. Copy and paste element 2. Resize to your liking and place in front of element 191
7. Copy and paste element 50. Resize to your liking and place on the left hand side of your house
8. Copy and paste element 31. Resize to your liking and place in the middle of your image
9. Copy and paste your tube. Resize to your liking and place in the middle of the pumpkins
10. Copy and paste element 130. Resize to your liking and place in the upper left hand corner of your image. Add drop
shadow of your choice
11. Copy and paste element 55. Resize to your liking and place on the left hand side of your image
12. Copy and paste element 116. Resize to your liking and place in the lower right hand corner of your image
13. Copy and paste element 21. Resize to your liking and place on the left hand side of your image in front of your
pumpkins and straw
14. Copy and paste WA 13. Resize to your liking and place in the upper right hand corner of your image. Add dropshadow
of your choice
15. Copy and paste element 112. Resize to your liking and place so that it looks like it is hanging from the straw on the right
hand side of the pumpkins
16. Copy and paste element 206. Flip and place to your liking
17. Add your copyright info and Text
18. Merge visible and Save
That's it..... I hope you have enjoyed my tutorial. If you have any questions please
feel free to leave a message in the Comments.
This tutorial was written September 2013 by me(Koolbrat) any similarities to another is just a coincidence.
Black Biker
Black Biker
I am using the amazing artwork of Keith Garvey
You can purchase it here: Garv
Scrapkit "Kelly" by MistyLynn's Creations
You can purchase it here: SATC
1. Open new image 640 X 200
2. Floodfill with paper 01
3. Go Selections/ Select All/ Selections/ Modify/ Contract/12
4. Floodfill with paper 09. Select None
5. Copy and paste element 46. Resize to your liking and place in the left hand corner of your image. Add drop shadow of
your choice
6. Copy and paste element 36. Resize to your liking and place in front of your building
7. Copy and paste element 43. Resize to your liking and place on the left hand side of your image. Add drop shadow of
your choice
8. Copy and paste element 45. Resize to your liking and mirror. Then place on the left hand side of your image
9. Copy and paste element 50. Resize to your liking and place on the right hand side of your image next to the speakers
10. Copy and paste element 38. Resize to your liking and place in front of your speakers
11. Copy and paste element 24. Resize to your liking and place on the left hand side of of your speakers
12. Copy and paste your tube. Resize to your liking and place next to the motercycle
13. Copy and paste element 40. Place to your liking
14. Add your copyright info
15. Add your Text
16. Duplicate your text 3 times. X out the copies and make sure that you are on the orginal layer
17. Go Adjust/Add Remove noise/ Add noise.... Use settings of your choice and repeat with the cpoied layers
18. Make sure that the orginal layer is highlighted and unX and merge visible
19. Copy and paste as new animation in your AS
20. Repeat 19 for the copied layers
21. View your animation and make sure that it looks the way you want and Save
That's it..... I hope you have enjoyed my tutorial. If you have any questions please
feel free to leave a message in the Comments.
This tutorial was written September 2013 by me(Koolbrat) any similarities to another is just a coincidence.
Shells of the Sea
Shells of the Sea
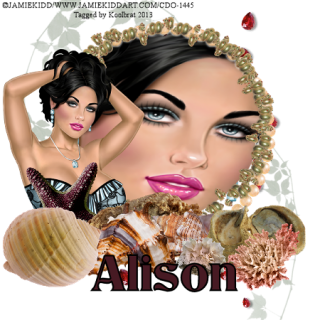
I am using "Lacey" by Jamie Kidd
You can purchase it here: CDO
Scrapkit "September Sea" by HungryHill
You can purchase it here: Treasured Scraps
1. Open new image 600 X 600
2. Copy and paste leaf mist and place in the middle of your image
3. Copy and paste ruby drops and place in the middle of your image
4. Copy and paste bead circle. Resize to your liking and place in the middle of your image
5. Grab your magic wand and click inside the circle. Paste your tube into selection. Select none
6. Copy and paste shell circle. Resize it and place over your bead circle
7. Copy and paste your tube. Resize and place to your liking
8. Copy and paste starfish. Resize and place so that it is over the bottom part of your tube
9. Copy and paste shell4. Resize to your liking and place next to the starfish
10. Copy and paste shell3. Resize to your liking and place in front of shell4
11. Copy and paste shell1. Resize to your liking and place next to shell 3
12. Copy and paste shell5. Resize to your liking and place in front of your starfish
13. Copy and paste oyster shell. Resize to your liking and place next to shell1
14. Copy and paste coral 2. Resize to your liking and place in front of shell 1
15. Copy and paste coral. Resize to your liking and place in front of your oyster shell
16. Add your copyright info and Text
17. Merge visible and Save
That's it..... I hope you have enjoyed my tutorial. If you have any questions please
feel free to leave a message in the Comments.
This tutorial was written September 2013 by me(Koolbrat) any similarities to another is just a coincidence.
Monday, September 23, 2013
Halloween Treats
Halloween Treats
I am using "Coraline" by NinasteOC
You can purchase it here: BHS
Scrapkit "Lolly Witch" by AmyMarie
You can purchase it here: AmyMarie's Kits
1. Open new image 600 X 600
2. Copy and paste element 77. Place in the upper left hand corner of your image
3. Copy and paste element 75. Place so that it looks like they are over lapping
4. Copy and paste element 58. Resize to your liking and place in the upper right hand corner of your image. Add drop
shadow of your choice
5. Copy and paste element 2. Resize to your liking and place in the middle of your image
6. Grab your magic wand and click inside your frame. Floodfill with paper 9.
7. Copy and paste your tube as new layer. Resize and place to your liking.
8. Duplicate your tube and X out the copy.
9. Make sure that you are on the orginal and go selection/ invert/ delete
10. UnX the copy. Make sure that they are in the right place
11. Copy and paste element 46. Resize and place next to the left hand side of your frame
12. Copy and paste element 3. Resize to your liking and place at the bottom of your frame. Add drop shadow of your choice
13. Copy and paste element 22. Resize to your liking and place next to the left hand side of your frame
14. Copy and paste element 17. Resize and place on the right hand side of your frame
15. Copy and paste element39. Resize to your liking and place on the right hand side of your frame
16. Copy and paste element 60. Place to your liking
17. Add your copyright info and Text
18. Merge Visible and Save
That's it..... I hope you have enjoyed my tutorial. If you have any questions please
feel free to leave a message in the Comments.
This tutorial was written September 2013 by me(Koolbrat) any similarities to another is just a coincidence.
Be A Ware
Be A Ware
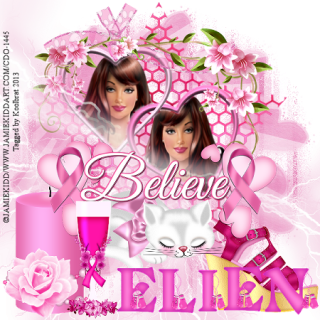
I am using "Grace" by Jamie Kidd
You can purchase it here: CDO
Scrapkit "Pink Courage" by Waggish Sparkles
You can purchase it here: SATC
1. Open new image 600 X 600
2. Floodfill with paper 9. Load saved mask and merge group
3. Add new layer and floodfill with paper 11. Load saved mask and merge group
4. Copy and paste wired star. Resize to your liking and place in the middle of your image
5. Copy and paste frame. Resize to you liking and place in the middle of your image
6. Grab you magic wand and click in the left heart. Paste your tube into selection. Select none
7. Grab your magic wand again and click in the right heart. Paste another part of your tube into selection and select none
8. Copy and paste flower garland. Resize to your liking and place over th top of your frame layer
9.Copy and paste lighting. Place in the upper left hand corner of your image
10. Copy and paste shoe3. Resize to your liking and place in the lower right hand corner of your image
11. Copy and paste cat4. Resize to your liking and place in the middle of your image
12. Copy and paste candle. Resize to your liking and place in the lower left hand corner of your image
13. Copy and paste Believe. Resize to your liking and place in the middle of your image above your cat
14. Copy and paste Cocktail. Resize to your liking and place next to your candle
15. Copy and paste rose. Resize to your liking and place in front of your candle
16. Copy and paste the E from the wordart. Resize and place to your liking
17. Copy and paste the L from the wordart. Resize and place to your liking
18. Copy and paste the I from the wordart. Resize and place to your liking
19. Redo number 16
20. Copy and paste the N from the wordart. Resize and place to your liking
21. Add your copyright info and Text
22. Merge Visible and Save
That's it..... I hope you have enjoyed my tutorial. If you have any questions please
feel free to leave a message in the Comments.
This tutorial was written September 2013 by me(Koolbrat) any similarities to another is just a coincidence.
Spooky
Spooky
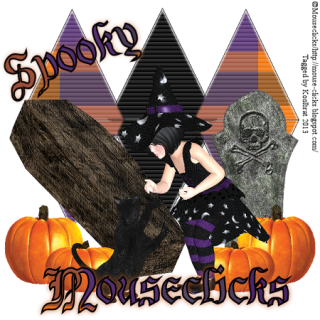
I used the wonderful artwork of Mouseclicks
Everything you are going to need is in this Scrapkit
I used the wonderful artwork of Mouseclicks
Everything you are going to need is in this Scrapkit
Scrapkit used "Halloween Mix"
You can purchase it here: Berry Applicious, Mystical Scraps,
1. Open new image 600 X 600
2. Grab your shapes tool and draw a triangle. Duplicate 5 times and place them so that you make the triangle background
3. Floodfill them to you liking and add the blinds effect
4. Copy and paste halloween mix2(3). Resize to your liking and place on the left hand side of your image
5. Copy and paste halloween mix2(1). Resize to your liking and place on the right hand side of your image
6. Copy and paste halloween mix2(8). Resize to your liking and place to the left of your casket
7. Copy and paste halloween mix2(6). Resize to your liking and place next to the other pumpkin
8. Merge down to your first pumpkin and duplicate then mirror your pumpkins
9. Copy and paste halloween mix2(14). Resize to your liking and place in the middle of your image
10. Add your copyright info and text
11. Merge visible and save
That's it..... I hope you have enjoyed my tutorial. If you have any questions please
feel free to leave a message in the Comments.
This tutorial was written September 2013 by me(Koolbrat) any similarities to another is just a coincidence.
Hell's Fire
Hell's Fire
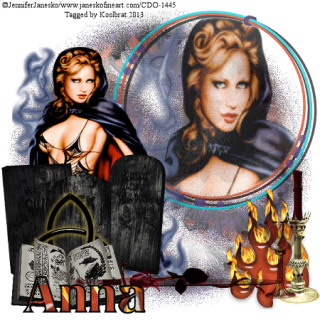
I used the wonderful artwork of Jennifer Janesko
You can purchase his work here: CDO
Scrapkit " When Hell Freezes over by Anna's Attic
You can purchase it here: Mystical Scraps
1. Open new image 600 X 600
2. Floodfill with paper 1. Load saved mask and merge group.
3. Add new layer and floofill with paper 5. Load saved mask and merge group
4. Copy and paste frame1. Resize to you liking and place in the upper right hand corner of your image
5. Grab your magic wand and click inside your frame. Then copy and paste your tube into selection. Select none
6. Copy and paste your tube. Resize and place in the middle left hand side of your image
7. Copy and paste your flame. Resize to your liking and place in the lower right hand corner of your image
8. Copy and paste tombstones. Resize to your liking and place in front of your tube
9. Copy and paste symbol. Resize to your liking and place in front of your tombsotnes. Add drop shadow of your choice
10. Copy and paste spell book. Resize to your liking and place in front of your symbol
11. Copy and paste Skullrose. Resize to your liking and place on your spell book
12. Copy and paste candle. Resize to your liking and place in front of your flame
13. Copy and paste gobblet. Resize to your liking and place next to your candle
14. Add your copyright info and Text
15. Merge visible and Save
That's it..... I hope you have enjoyed my tutorial. If you have any questions please
feel free to leave a message in the Comments.
This tutorial was written Sept 2013 by me(Koolbrat) any similarities to another is just a coincidence.
Monday, August 12, 2013
Sea Lovers
Sea Lovers
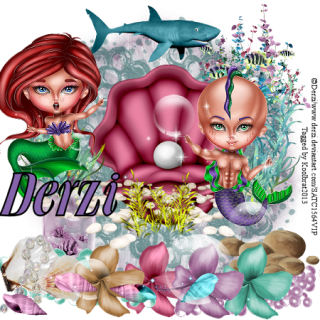
I am using "PP1 Sealovers" by Derzi
You can purchase it here: SATC
Scrapkit "Sea_Lovers" by AmyMarie
You can purchase it here: SATC
1. Open new image 600 X 600
2. Floodfill with paper 12. Load saved mask and merge group
3. Add new layer and floodfill with paper 10. Load saved mask and merge group
4. Copy and paste element 47. Resize to your liking and place in the lower left hand corner of your image
5. Copy and paste element 98. Resize to your liking and place in the middle of your image on the lower half
6. Copy and paste element 45. Resize to your liking and place in front of your bottle layer
7. Copy and paste element 46. Resize to your liking and place in the lower right hand corner of your image. GO
Image/Mirror
8. Copy and paste element 58. Resize to your liking and place in the lower right hand corner of your image
9. Copy and paste element 99. Resize to your liking and place in front of your rocks
10. Copy and paste element 57. Resize to your liking and place in the lower left hand corner of your image
11. Copy and paste element 100. Resize to your liking and place in front of your 2 other flowers
12. Copy and paste element 101. Resize to your liking and place next to your pink flower
13. Copy and paste element 19. Resize to your liking and place in the upper right hand corner of your image
14. Copy and paste element 96. Resize to your liking and place in the middle of your image
15. Copy and paste element 25. Resize to your liking and place in front of your shell layer
16. Copy and paste element 12. Resize to your liking and place in the lower part of your image
17. Copy and paste element 11. Resize to your liking and place above your shell
18. Copy and paste girl tube. Resize to your liking and place on the left hand side of your shell
19. Copy and paste boy tube. Resize to your liking and place on the right hand side of your shell
20. Copy and paste element 107. Place to your liking
21. Copy and paste element 43. Place to your liking
22. Add your copyright info and Text
23. Merge visible and Save
That's it..... I hope you have enjoyed my tutorial. If you have any questions please
feel free to leave a message in the Comments.
This tutorial was written August 2013 by me(Koolbrat) any similarities to another is just a coincidence.
Blue Ice
Blue Ice
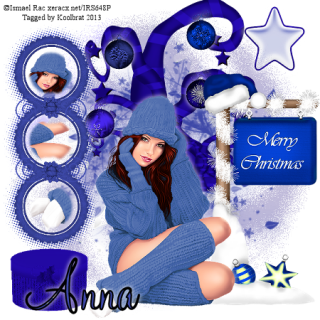
I am using "Warm Winter" by Ismael Rac
You can purchase it here: Rac
FTU Scrapkit "Ice Ice Baby" by Anna's Attic
You can get it here: Anna's Attic
1. Open new image 600 X 600
2. Floodfill with paper 4. Load saved mask and merge group
3. Add new layer floodfill with paper 1. Load saved mask and merge group
4. Copy and paste swirl 1. Resize to your liking and place in the middle of your image
5. Copy and paste ball 1. Resize to your liking and place on the left hand side top branch. Add drop shadow of your choice
6. Copy and paste ball 2. Resize to your liking and place on the right hand side top branch. Add the same drop shadow
7. Copy and paste ball 4. Resize to your liking and place on the second branch on the left hand side. Add the same drop shadow
8. Copy and paste ball 3. Resize to your liking and place on the second branch of the irhg hand side. Add the same drop shadow
9. Copy and paste acrylic Star1. Resize to your liking and place int he upper right hand side of your image. Add the same drop shadow
10. Copy and paste Merry Christmas sign. Resize to your liking and place in the lower right hand corner of your image
11. Copy and paste your tube. Resize to your liking and place in the middle of your image
12. Copy and paste frame 3. Resize to your liking and place on the left hand side of your image
13. Grab your magic wand and click inside the top frame.
14. Copy and paste a piece of your tube into selection. Selections none
15. Grab your magic wand again and click inside the second circle of your frame
16. Copy and paste another piece of your tube into selection. Select none
17. Grab your magic wand a third time and click on the third circle of your frame.
18. Copy and paste another piece of your image into selection. Select non
19. Copy and paste box 1. Resize to your liking and place in the lower left hand corner of your image
20. Add your copyright info and Text
21.Merge visible and Save
That's it..... I hope you have enjoyed my tutorial. If you have any questions please
feel free to leave a message in the Comments.
This tutorial was written August 2013 by me(Koolbrat) any similarities to another is just a coincidence.
Subscribe to:
Posts
(Atom)
TERMS OF USE
The Tubes in the zip are all made by me(Koolbrat).
:Please do not claim them as your own.
:They are Free for Personal Use Only.
:Please do not Share the files....
:Please do not change the file names.
:Please do not Burn to a CD or DVD or replicate to any other media or fix tangent unless it is for your own personal back up.
:Please do not use to create Brushes, Custom Shapes, Ect.
:Please leave the tubes intact, do not distor in any way.
If you have any Questions. Comment regarding these TOU please email koolbrat@gmail.com
Thank you for your download,
I hope you enjoy them,
Have fun,
Love Koolbrat
***********************
Copyright Notes:
Taggers.
Please add my copyright.
DO NOT use with other artist Tubes,
with the exception of Elements, Frames Ect.
Tutorial Writers.
Please include a credit to me somewhere on your page
(http://bratsplace-koolbrat.blogspot.com/)
Please add my copyright.
DO NOT use with other artists Tubes, with the exception of Elements, Frames ECT.
************************
Blog Archive
-
▼
2013
(85)
-
►
September
(20)
- Haunted Nights
- Killer on the Loose
- Halloween Monsters
- Cherry Halloween
- Bee Anyone
- Purple Halloween
- Lazy Autumn Days
- Romantic Nights
- Flower Fountain
- Mystical Eight Ball
- Relaxing at the Beach
- Musical Ballerina
- Swirls of Bubbles
- Happy Hautning
- Black Biker
- Shells of the Sea
- Halloween Treats
- Be A Ware
- Spooky
- Hell's Fire
-
►
September
(20)
Labels
- FTU Frames (5)
- My CT Tutorials (137)
- My Tutorials (2)
- News (118)


