Linkbar
Friday, April 26, 2013
New Tutorial using " For MUM" by Hana Designz
Pressies for MUM
I am using the amazing artwork of Ismael Rac
You can purchase it here: RAC
Scrapkit "For MUM" by Hana DesignzYou can purchase it here: The Scrappinbox
Drop Shadow and Text of your choice
1. Open new image 640 X 200
2. Floodfill with paper9
3. Go Selections/ Select All/ Selections/ Modify/ Contrast with these settings 12
4. Floodfill with paper10 using these settings RGB Value/ Tolerance 90/ Blend Normal/ Opacity 100
5. Copy and paste HD-63
6. Copy and paste HD-57. Resize to your liking and place in the lower left hand side of your image. Add drop shadow of choice
7. Duplicate HD-57 and go Image Mirror. Add same drop shadow
8. Copy and paste HD-85. Resize to your liking and place behind the butterfly layer. Add drop shadow of choice
9. Duplicate HD-57 and go Image Mirror. Add same drop shadow
10. Copy and paste HD-42. Resize to your liking and place under your flower layer in the left hand corner. Add drop shadow
of choice
11. Copy and paste HD-92. Resize to your liking and place next to your flower layer. Add drop shadow of choice
12. Copy and paste HD-89. Resize to your liking and place in front of your presents layer. Add drop shadow of choice
13. Copy and paste HD-87. Resize to your liking and place on the present boxes. Add drop shadow of choice
14. Copay and paste your tube and place close to the right hand corner of your image. Resize to your liking and add drop
shadow of choice
15. Add your copyright and Text
16. Merge Visible and Save
That's it..... I hope you have enjoyed my tutorial. If you have any questions please
feel free to leave a message in the Chatbox.
This tutorial was written April 2013 by me(Koolbrat) any similarities to another is just a coincidence.
Wednesday, April 24, 2013
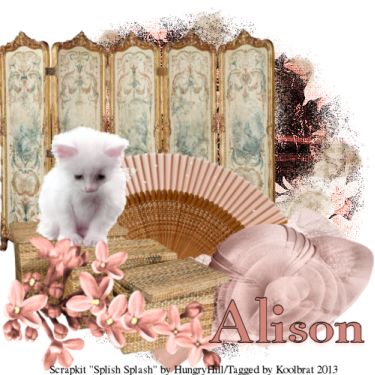
New Tutorial using "Splish Splash" by HungryHill
Cutie Kitty
Scrapkit "Splish Splash" by HungryHill
Thank you Sarah for the wonderful kit.
You can purchase it at any of the four amazing stores: DSI, Mystical Scraps,
Treasured Scraps, DigiFox
Mask and Font of choice
1. Open new image 500 X 500
2. Floodfill with paper5. Load mask of choice and merge group.
3. Add new layer and floodfill with paper12. Load mask of choice and merge group
4. Copy and paste screen. Resize to your liking and place in the middle of your image
5. Copy and paste fan. Resize to your liking and place at the bottom of your image.
6. Copy and paste hat. Resize to your liking and place on the right side of your fan layer
7. Copy and paste basket. Resize to your liking and place on the left hand side of your image
8. Copy and paste kitten. Resize to your liking and place so that it looks like the kitten is sitting on the baskets
9. Copy and paste flower1. Resize to your liking and place in front of the baskets.
10.Add your copyright and Text
11. Merge Visible and Save.
You will notice that I didn't use a tube in this tag. Alison has provided lots of really cool elements in this kit. You are welcome
to add a tube if you like. Make sure that you do not forget your copyright.
Even though you don't use a tube it is always a good thing to give credit to the designer of the kit that you use.
That's it..... I hope you have enjoyed my tutorial. If you have any questions please
feel free to leave a message in the Chatbox.
This tutorial was written April 2013 by me(Koolbrat) any similarities to another is just a coincidence.
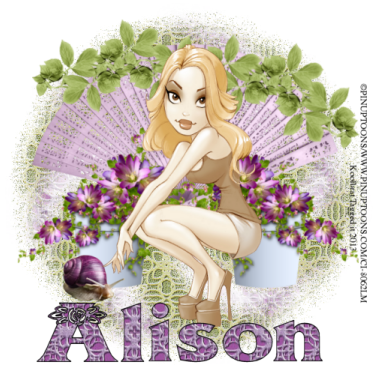
New Tutorial using "Always" by HungryHill
Always Cute
I used the wonderful artwork of Pinup Toons
You can purchase his work here:CDO
Scrapkit "Always" by HungryHill
You can purchase it at anyone of these four stores: DSI, Mystical Scraps,
Treasured Scraps, DigiFox
Mask and Font of choice
1. Open new image 500 X 500
2. Floodfill with paper8. Load saved mask and merge group
3. Add new layer and floodfill with paper12. Load saved mask and merge group
4. Copy and paste fan. Resize to your liking and place in the middle of your image
5. Copy and paste flowerpot. Resize to your liking and place on the left hand side of your fan.
6. Duplicate your flowerpot layer and Mirror it.
7. Copy and paste snail. Resize to your liking and place in front of your flowerpot on the left hand side
8. Copy and paste leaf border. Resize to your liking and place on the top of your fan layer.
9. Copy and paste your tube. Resize to your liking and place in the middle of your flowerpots.
10. Add your copyright and Text
11. Merge visible and Save
That's it..... I hope you have enjoyed my tutorial. If you have any questions please
feel free to leave a message in the Chatbox.
This tutorial was written April 2013 by me(Koolbrat) any similarities to another is just a coincidence.
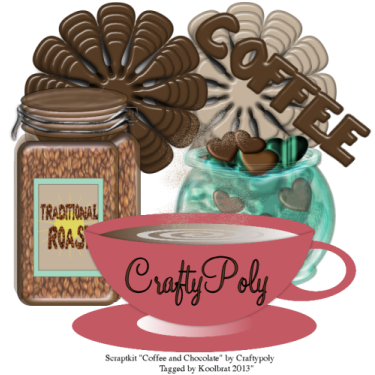
New Tutorial using " Coffee and Chocolate" by CraftyPoly
Coffeeholic
Scrapkit "Coffee and Chocolate" by Craftypoly
You can purchase it Here: Scrappinbox
Mask and Font of choice
1. Open new image 500 X 500
2. Copy and paste element59. Resize to your liking and place on the left hand side of your image
3. Copy and paste element60. Resize to your liking and place on the right hand side of your image
4. Copy and paste element85. Resize to your liking and rotate 40 degrees to the right. Move to the top
right hand side of your image
5. Copy and paste element81. Resize to your liking and place on the left hand side of your image
6. Copy and paste element97. Resize to your liking and place on the right hand side of your image
7. Copy and paste element82. Resize to your liking and place in the lower middle of your image
8. Add your copyright and your text
9. Merge visible and Save
You will notice that I didn't use a tube in this tag. You are welcome to add a tube if you like. Make sure that you do not forget your copyright.
Even though you don't use a tube it is always a good thing to give credit to the designer of the kit that you use.
That's it..... I hope you have enjoyed my tutorial. If you have any questions please
feel free to leave a message in the Chatbox.
This tutorial was written April 2013 by me(Koolbrat) any similarities to another is just a coincidence.
Saturday, April 20, 2013
This is going for a really good cause please check it out
Life Grabs Us in Mysterious Ways and Throws a Few Hurdles Along Our
Path. For Two Well Respected Friends and Designers in the PSP Community,
Their Current Hurdle is a Big One and They Need Help From Family,
Friends and Our Small Community. Krissy and Her Mum Joy are in Need of
Our Support! Joy Recently Suffered a Stroke That has Left Her Incapable
of Doing Many Things on Her Own, Including Living by Herself. Krissy has
Gladly Taken on the Task of Being the Supportive and Capable Caregiver
as Well as Loving Daughter. Because of This, They’re Facing a Bit of a
Financial Hurdle. Piled on are Not Only Their Regular Day to Day Bills
and Living Expenses but Also the Costs Involved with Hospital and
Doctors Visits Plus Ongoing Tests. The Easiest and Quickest Way to Help
our Beautiful Friends is Through This Incredible Collab!
This Collab, Named "Pixie Perfect", Is a Theme That Joy Absolutely Loves. We Have Included Her Favorite Color ( Purple ) Along With Other Beautifully Striking and Complimentary Colors! The End Result is a Huge Collab Consisting of Both PU and CU Items Made by Some of the Most Creative and Inspiring Designers in Our Community and Totally a Whopping 1.18GB! They’ve All Come Together to Show Their Love and Support for Krissy and Joy!
For the Low Price You are Paying You are Getting an Amazing Deal. If Purchased Individually You Would be Sure to Part With a Large Chunk of Change. So Simply Purchase this Stunning Collab, Grab Some Goodies, and Know That You are Giving Support to a Truly Deserving Set of Friends who Need Help in Climbing Over One of Life's Hurdles!
Click HERE to Purchase :)
Friday, April 12, 2013
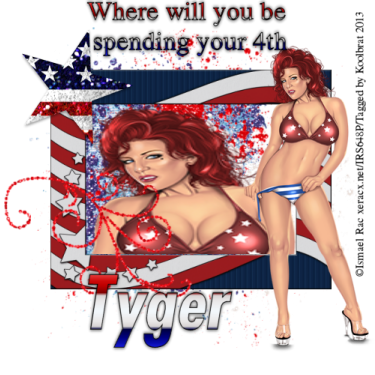
New Tutorial using "Patriot Games"
Independence
I used the wonderful artwork of Ismael Rac.
You can purchase his work here: Rac
Scrapkit "Patriot Games" by Tygers
You can purchase it here: Tygers Tidbits
Font of choice
1. Open new image 500 X 500
2. Copy and paste element2. Resize to your liking and place in the middle of your image
3. Copy and paste element4. Resize to your liking and leave over the top of your other layer
4. Copy and paste element5. Resize to your liking and leave over the top of both your other layers, so that it looks like
they are over lapping
5. Copy and paste element10. Resize to your liking and leave in the middle of your image.
8. Take your magiceand and select inside your frame layer.
9. Copy and paste your tube. You can use multiple tubes as long as they are by the same artist. Select none
10. Copy and paste element16. Resize to your liking. I only resized mine 75% that way it was still kind big. Place
on the upper left hand side of your frame.
11. Copy and paste element1. Resize to your liking and place on the lower left hand side of your frame.
12. Copy and paste your tube. Resize to your liking and place on the right hand side of your frame.
13. Add your copyright info and text.
14. Merge visible and save
That's it..... I hope you have enjoyed my tutorial. If you have any questions please
feel free to leave a message in the Chatbox.
This tutorial was written June 2013 by me(Koolbrat) any similarities to another is just a coincidence.
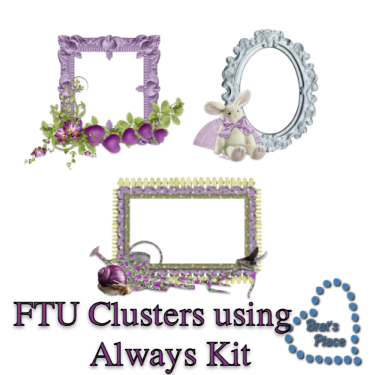
FTU Cluster Frames
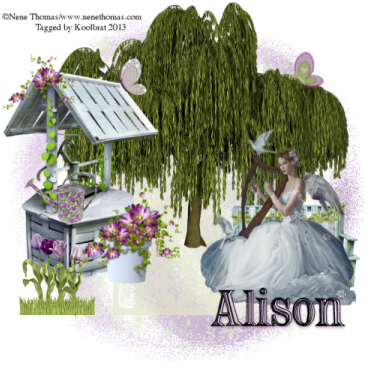
Forever Tutorial
Forever
I used the wonderful artwork of Nene Thomas.
I used this artwork with her permission
You can purchase his work here: Nene
Scrapkit "Always" by HungryHill.
You can purchase it here: Mystical Scraps
Mask and Font of choice
1. Open new image 500 X 500
2. Floodfill with paper2. Load mask of your choice and merge group
3. Add new layer and floodfill with paper4. Load mask of your choice and merge group
4. Copy and paste willow and resize to your liking... Place in the middle of your image
5. Copy and paste well and resize to your liking. Place on the left hand side of your image
6. Copy and paste watering can. Resize to your liking and place so that it looks like it is sitting on the edge of your well
7. Copy and paste flower vine. Resize to your liking and place at the top of your well where the two parts of the roof
come together
8. Copy and paste flutterby1. Resize to your liking and place on the right hand side of your well so that it looks like it is sitting on the roof
9. Copy and paste flowerpot. Resize to your liking and place on the right hand side of your well so that it looks like it is
sitting right in front of it
10. Copy and paste flutterby3. Resize to your liking and place so that it looks like it is sitting on one of the branches of the willow tree
11. Copy and paste grass. Resize to your liking and place in front of your well
12. Copy and paste tulip4. Resize and place in the gras to your liking
13. Repeat step 12 just change to tulip3
14. Repeat step 12 with tulip2
15. Repeat step 12 with tulip1
16. Copy and paste bench. Resize it to your liking and place on the right hand side of your image
17. Copy and paste leafborder. Resize to your liking and place so that it looks like it is covering the back of your bench.
18. Duplicate your leafborder. Go Image mirror and place on the other side of your bench.
19. Place your tube
20. Add your copyright info and text
21. Merge visible and save
That's it..... I hope you have enjoyed my tutorial. If you have any questions please
feel free to leave a message in the Chatbox.
This tutorial was written June 2013 by me(Koolbrat) any similarities to another is just a coincidence.
New Show off Tags
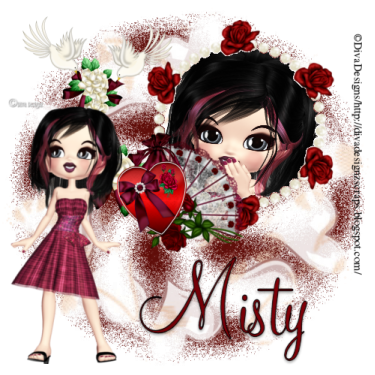
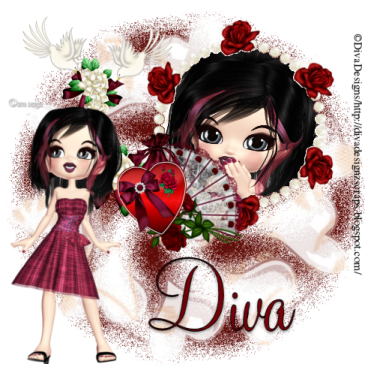
New Show off Tags using "Cherie" by DivaDesigns and Kit " Kiss from a Rose"
by Misty. You can purchase both the tube and the kit here: Scrappinbox
Monday, April 8, 2013
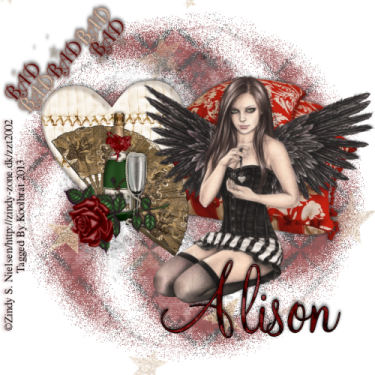
Naughty
Naughty
I am using the amazing artwork of: Zindy Nielsen
I am using the amazing artwork of: Zindy Nielsen
You can purchase it here: Zindy
Scrapkit "A Little Devious" by HungryHill
You can purchase it here: DSI or DigiFox
1. Open New Image 500 X 500
2. Floodfill with paper2. Load mask of choice and merge group.Lower visibility to your liking.
3. Add New layer and floodfill with paper10. Load mask of choice and merge group.
4. Copy and paste pillows. Resize to your liking and place somewhere in the middle on the right hand side of your
image.
5. Copy and paste heart. Resize to your liking and place in the middle on the left hand side. Add drop shadow of
your liking.
6. Copy and paste fan. Resize to your liking and place in front of your heart.
7. Copy and paste wine bottle. Resize to your liking and place in front of your fan.
8. Copy and paste wine glass. Resize to your liking and place next to your wine bottle. Add drop shadow to your
liking.
9. Copy and paste rose. Resize to your liking and place in front of your wine bottle and glass. I added a drop shadow
to this but you don't have to.
10. Copy and paste wordart. Resize to your liking and rotate about 50 degrees. Place in the upper left hand side of your
image. You can play with the rotate if you like. Add drop shadow of your choosing.
11. Copy and paste your tube and place to your liking.
12. Add your copyright info and Text.
13. Merge Visible, resize and Save
That's it..... I hope you have enjoyed my tutorial. If you have any questions please
feel free to leave a message in the Chatbox.
This tutorial was written July 2013 by me(Koolbrat) any similarities to another is just a coincidence.
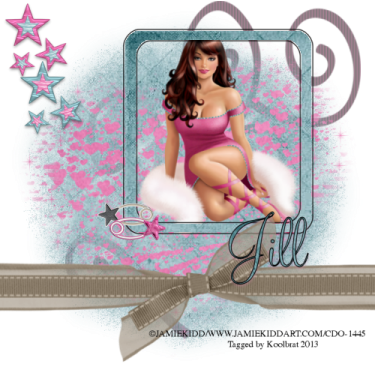
Starry
Starry
I am using the amazing artwork of Jamie Kidd.
You can purchase it here: CDO
Scrapkit "Afternoon Delight" by Jill
You can purchase it here: Mouseclicks or Scrappinbox
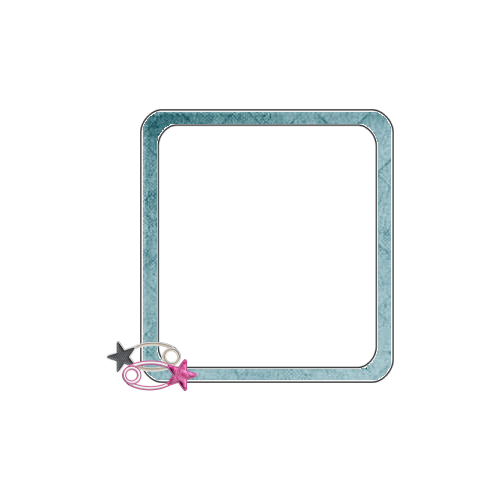
Frame of choice or you can download my cluster frame for this Tutorial.
You can download the frame here: BratsPlace
1. Open new image 500 X 500.
2. Copy and paste doodle01. Change the visibility on it to your liking
3. Add new layer and floodfill with paper7. Load mask of your choice and merge group
4. Add new layer and floodfill with paper2. Load mask of your choice and merge group
5. Add cluster frame that you downloaded or create your own.
6. Copy and paste extra05. Resize to your liking and move to the upper left hand side of your image
7. Copy and paste extra06. Resize to your liking and move to just below the previous stars
8. Copy and paste tied3. Resize to your liking and place in the middle of your image.
9. Add your tube of choice
10. Add your copyright info and text.
11. Merge visible, resize and save.
Cluster Frame for Starry Tutorial
Saturday, April 6, 2013
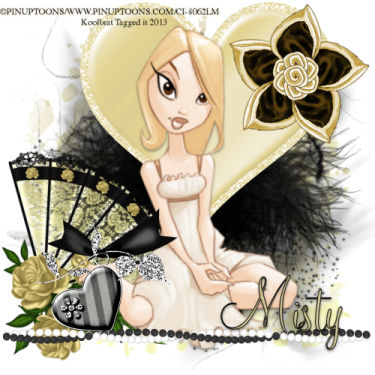
Elegant
Elegant
I used the wonderful artwork of Pinup Toons.
You can purchase his work here: CDO
Scrapkit "Black and Gold" by MistyScraps.
You can purchase it here: Scrappinbox
Mask and Font of choice
1. Open new Image 500 X 500
2. Floodfill with paper9. Load Mask of choice and Merge group.
3. Add new layer and floodfill with paper10. Load Mask of choice and Merge group.
4. Copy and Paste Element20 resize to your liking. and place in the middle of your image.
5. Copy and Paste Element8 resize to your liking and place over the feather element.
6. Copy and Paste Element4 resize to your liking and place on the right hand side of the heart. Add Drop Shadow.
7. Copy and Paste Element19 resize to your liking and place on the left hand side of your image.
8. Copy and Paste Element15 resize to your liking and place in front of your fan layer.
9. Copy and Paste Element14 place along the bottom of your image.
10. Copy and Paste your tube resize to your liking and move the whole layer under your fan layer in your Layer
Palatte.
11. Add your Copyright and your Text.
12. Merge Visible and Save
That's it..... I hope you have enjoyed my tutorial. If you have any questions please
feel free to leave a message in the Chatbox.
This tutorial was written June 2013 by me(Koolbrat) any similarities to another is just a coincidence.
Subscribe to:
Posts
(Atom)
TERMS OF USE
The Tubes in the zip are all made by me(Koolbrat).
:Please do not claim them as your own.
:They are Free for Personal Use Only.
:Please do not Share the files....
:Please do not change the file names.
:Please do not Burn to a CD or DVD or replicate to any other media or fix tangent unless it is for your own personal back up.
:Please do not use to create Brushes, Custom Shapes, Ect.
:Please leave the tubes intact, do not distor in any way.
If you have any Questions. Comment regarding these TOU please email koolbrat@gmail.com
Thank you for your download,
I hope you enjoy them,
Have fun,
Love Koolbrat
***********************
Copyright Notes:
Taggers.
Please add my copyright.
DO NOT use with other artist Tubes,
with the exception of Elements, Frames Ect.
Tutorial Writers.
Please include a credit to me somewhere on your page
(http://bratsplace-koolbrat.blogspot.com/)
Please add my copyright.
DO NOT use with other artists Tubes, with the exception of Elements, Frames ECT.
************************
Blog Archive
-
▼
2013
(85)
-
▼
April
(13)
- New Tutorial using " For MUM" by Hana Designz
- New Tutorial using "Splish Splash" by HungryHill
- New Tutorial using "Always" by HungryHill
- New Tutorial using " Coffee and Chocolate" by Craf...
- This is going for a really good cause please check...
- New Tutorial using "Patriot Games"
- FTU Cluster Frames
- Forever Tutorial
- New Show off Tags
- Naughty
- Starry
- Cluster Frame for Starry Tutorial
- Elegant
-
▼
April
(13)
Labels
- FTU Frames (5)
- My CT Tutorials (137)
- My Tutorials (2)
- News (118)


