Linkbar
Monday, April 21, 2014
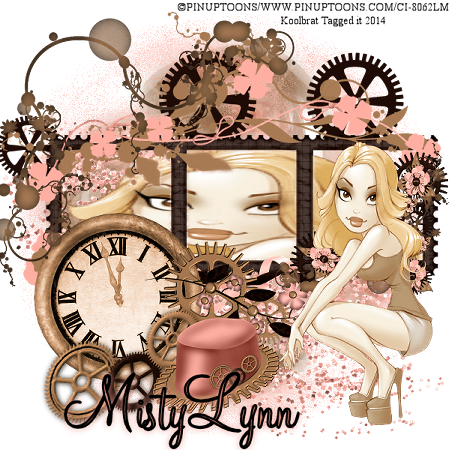
New PTU CT Tag/Tutorial "Punky" using " Steam Punky" by MistyLynn's Creation
Punky
I am using the amazing artwork of Pinup Toons
You can purchase it here: CDO
Scrapkit "Steam Punky" by MistyLynn's Creations
You can also purchase it here: Scrap Candy
1. Open new image 600 X 600
2. Floodfill with paper01. Load saved mask and merge group
3. Add new layer and floodfill with paper 03. Load saved mask and merge group
4. Copy and paste element 37. Place in the middle of your image
5. Copy and paste element 30. Resize and place in the middle of your image
6. Grab your magic wand and click inside all the frame opens
7. Copy and paste your tube into selection
8. Copy and paste your tube and place it to your liking
9. Copy and paste element 34. Resize and place at the bottom of your frame
10. Copy and paste element 35. Resize and place on top of your pink ribbon
11. Copy and paste element 27. Resize and place on the left hand side of your image
12. Copy and paste element 14. Resize and flip then mirror place in the upper left hand corner of your image
13. Copy and paste element 18. Resize and rotate 90 degrees to the left. Place in front of your clock
14. Copy and paste element 15. Resize and place on the lower right and corner of your frame
15. Copy and paste element 21. Resize and place at the bottom of your clock
16. Copy and paste element 22. Resize and place on the right hand side of element 21
17. Add you copyright info and Text
18. Merge visible and Save
That's it..... I hope you have enjoyed my tutorial. If you have any questions please
feel free to leave a message in the Comments.
This tutorial was written April 2014 by me(Koolbrat) any similarities to another is just a coincidence.
Monday, April 14, 2014
New PTU CT Tag/ Tutorila "Pirate Paridise" using "Sexy Pirate" by Design by Joan
Pirate Paridise
I am using the amazing artwork of The Hunter
You can purchase it here: SNC
Matching Scrapkit "Sexy Pirate" by Design by Joan
You can also purchase it here: SNC
1. Open new image 600 X 600
2. Copy and paste element P_DBJ72. Resize to your liking and place in the upper left hand corner of your image
3. Copy and paste element P_DBJ46. Resize and place in the middle of your image
4. Grab your magic wand and click inside your frame
5. Floodfill with paper PP_DBJ-6
6. Copy and paste your tube. Resize and place it in the middle of your frame
7. Copy and paste P_DBJ83. Resize and place on the lower right hand corner of your frame
8. Copy and paste P_DBJ45. Resize and place over your gold coins on the right hand corner of your image. this will make it
look like they are hiding
9. Duplicate layer and go Image/Mirror
10. Copy and paste P_DBJ_7. Resize and place in front of your grass on the right hand side
11. Copy and paste P_DBJ49. Resize and place in front of your grass on the left hand side
12. Copy and paste P_DBJ40. Resize and rotate 30 degrees to the left. Place next to your glass bottle
13. Copy and paste P_DBJ44. Resize and place just under your skulls on the left hand corner of your frame
14. Copy and paste P_DBJ-2. Resize and place oh the left hand side of your glass bottle
15. Copy and paste P_DBJ54. Resize mirror. Then place so that it looks like you chest is spilling over your rocks
16. Copy and paste P_DBJ11. Resize and place in front of your rocks
17. Copy and paste P_DBJ04. Place closer to the bottom of your image
18. Add your copyright info and text
19. Merge visible and Save
That's it..... I hope you have enjoyed my tutorial. If you have any questions please
feel free to leave a message in the Comments.
This tutorial was written April 2014 by me(Koolbrat) any similarities to another is just a coincidence.
Wednesday, April 2, 2014
New PTU CT Tag/Tutorial "Musical Violin" using "Violin" by Bibi Collections
Musical Violin
I am using the amazing artwork of The Hunter
You can purchase it here: SNC
Matching Scrapkit "Violin" by Bibi's Collection
You can also purchase it here: SNC
1. Open new image 600 X 600
2. Floodfill with paper 6. Load saved mask and merge visible
3. Copy and paste element 29. Resize to you liking and Rotate 90 degrees to the left
4. Grab your magic wand and select the top window of your frame
5. Copy and paste a piece of your tube into selection. Then go selections none
6. Repeat #4 with the middle open window of your frame
7. Copy and paste another piece of your tube into selection. Select none
8. Repeat #4 with the bottom open window of your frame
9. Copy and paste the last piece of your tube into selection. Select none
10. Copy and paste your whole tube and place to your liking
11. Copy and paste element 14. Resize and place on the left hand side of your image
12. Copy and paste element 59. Resize and place in front of your tube layer
13. Copy and paste element 71. Resize and place on the lower right hand corner of your frame layer
14. Copy and paste element 74. Resize Rotate and place on the left hand side of your image
15. Copy and paste element 90. Resize and place in front of your pile of leaves
16. Copy and paste element 73. Resize and place on the lower left hand corner of your frame
17. Copy and paste element 16. Place in the lower left hand side of your image
18. Add your copyright info and text
19. Merge visible and save
That's it..... I hope you have enjoyed my tutorial. If you have any questions please
feel free to leave a message in the Comments.
This tutorial was written April 2014 by me(Koolbrat) any similarities to another is just a coincidence.
Tuesday, April 1, 2014
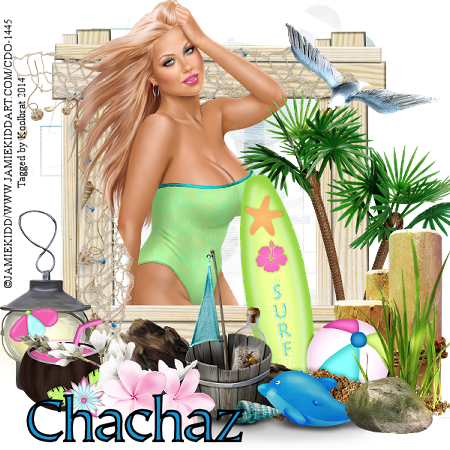
New PTU CT Tag/Tutorial " Up Coming Summer" using "GeorgeousFace" by Chachaz Creations
Up Coming Summer
I am using the amazing artwork of Jamie Kidd
You can purchase it here: CDO
Scrapkit "GeorgeousFace" by Chachaz Creations
You can also purchase it here: SNC
1. Open new image 600 X 600
2. Floodfill with paper6. Load saved mask and merge group
3. Copy and paste element11. Resize and place in the middle of your image
4. Grab your magic wand and click inside your frame
5. Copy and paste your tube as new layer. Resize to you liking and place in the middle of your frame. Duplicate tube
6. On original copy go Selections/Modify/Epand by 5/ Invert/ Delete select none
7. Now on your duplicate grab your eraser tool and erase everything above the frame that you don't want showing
8. Copy and paste element 54. Resize and place on the right hand side of your frame
9. Copy and paste element 36. Resize and place in front of your tree
10. Copy and paste element 38. Resize and place in front of your blocks
11. Copy and paste element 5. Resize and place in front of your surf board
12. Copy and paste element 17. Resize and place in front of your piece of wood
13. Copy and paste element 21. Resize and mirror. Place on the right hand upper corner of your frame
14. Copy and paste element 19. Resize and place on the left hand corner of your image
15. Copy and paste element 28. Resize and place on the left hand side of your frame
16. Copy and paste element 58. Resize and place in front of your coconut layer
17. Copy and paste element 30. Resize and place in front of your white flower layer
18. Copy and paste element 14. Resize and place in front of your sand
19. Add your copyright info and Text
20. Merge visible and Save
That's it..... I hope you have enjoyed my tutorial. If you have any questions please
feel free to leave a message in the Comments.
This tutorial was written April 2014 by me(Koolbrat) any similarities to another is just a coincidence.
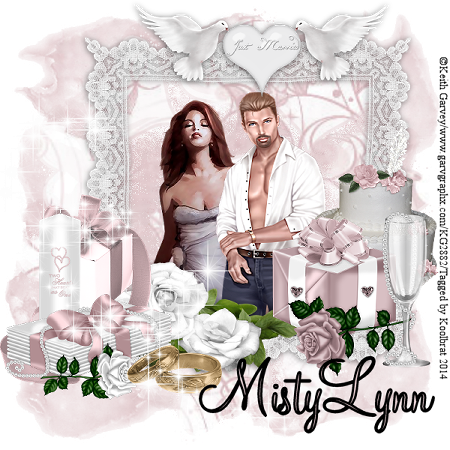
New PTU CT Tag/Tutorial 'Wedding Memories" using "Wedding Day" by MistyLynn Creations
Wedding Memories
I am using the amazing artwork of Keith Garvey
You can purchase it here: Garv and Garv
Scrapkit "Wedding Day" by MistyLynn's Creations
You can also purchase it here: Scrap Candy
1. OPen new image 600 X 600
2. Floodfill with paper 06. Load saved mask and merge group
3. Add new layer and floodfill with paper07. Load saved mask and merge group
4. Copy and paste frame. Resize and add back ground of your choice. Place in the middle of your image
5. Grab you magic wand and click inside your frame
6. Copy and paste your tube as new layer. Resize and place in the frame to your liking
7. Copy and paste element 70. Resize and place on the left hand side of your image
8. Copy and paste element 58. Resize and place in front of your gift layer
9. Copy and paste element 66. Resize and place in front of your candle
10. Copy and paste element 54. Resize and place next to your gift
11. Copy and paste element 07. Resize and place on the right hand side of your image
12. Copy and paste element 49. Resize and place in front of your cake layer
13. Copy and paste element 39. Resize and place above your frame layer. Add drop shadow of your choice
14. Copy and paste element46. Place on the left hand side of your image
15. Add your copyright info and Text
16. Merge visible and Save
That's it..... I hope you have enjoyed my tutorial. If you have any questions please
feel free to leave a message in the Comments.
This tutorial was written April 2014 by me(Koolbrat) any similarities to another is just a coincidence.
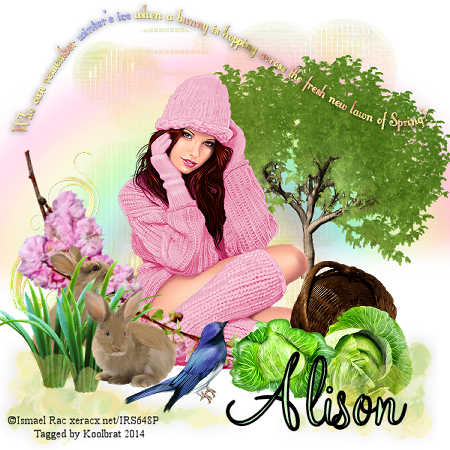
New PTU CT Tag/Tutorial " Forest of Colors" using "Water Color Spring" by Hungryhill
Forest of Colors
I am using the amazing artwork of Ismael Rac
You can purchase it here: Rac
Scrapkit "Scrap_HH Watercolor Spring Mini" by HungryHill
You can also purchase it here: CDO
1. Open new image 600 X 600
2. Floodfill with paper3. Load saved mask of choice and merge group
3. Copy and paste rainbow. Resize to your liking and place in the middle of your image
4. Copy and paste tree. Resize to your liking and place on the right hand side of your image
5. Copy and paste your tube. Resize to your liking and place in the middle of your image
6. Copy and paste doodle-1. Resize and place on the left hand side of your tube
7. Copy and paste bloom-1. Resize and place over your doodle
8. Copy and paste bloom-2. Resize and flip and place over your first bloom
9. Copy and paste bunny-1. Resize and place in front of your blooms
10. Copy and paste grass-2. Resize and place in front of your bunny. Duplicate grass layer
11. Move duplicated grass layer so that it is over lapping the first on but hiding your bunny
12. Copy and paste basket. Resize to your liking and place on the right hand side of your image
13. Copy and paste cabbage-1. Resize and place next to your basket so that it looks like it rolled out
14. Copy and paste cabbage-2. Resize and place on the other side of your basket
15. Copy ad paste bunny-2. Resize and place so that it is sitting in front of the grass
16. Copy and paste bluejay. Resize and place in the middle of your image so that he is sitting in front of your tubes shins
17. Copy and paste mist. Place at the bottom of your image
18. Copy and paste your Word Art. Resize and place at the top of your image
19. Add your copyright info and Text
20. Merge visible and Save
That's it..... I hope you have enjoyed my tutorial. If you have any questions please
feel free to leave a message in the Comments.
This tutorial was written April 2014 by me(Koolbrat) any similarities to another is just a coincidence.
Subscribe to:
Comments
(Atom)
TERMS OF USE
The Tubes in the zip are all made by me(Koolbrat).
:Please do not claim them as your own.
:They are Free for Personal Use Only.
:Please do not Share the files....
:Please do not change the file names.
:Please do not Burn to a CD or DVD or replicate to any other media or fix tangent unless it is for your own personal back up.
:Please do not use to create Brushes, Custom Shapes, Ect.
:Please leave the tubes intact, do not distor in any way.
If you have any Questions. Comment regarding these TOU please email koolbrat@gmail.com
Thank you for your download,
I hope you enjoy them,
Have fun,
Love Koolbrat
***********************
Copyright Notes:
Taggers.
Please add my copyright.
DO NOT use with other artist Tubes,
with the exception of Elements, Frames Ect.
Tutorial Writers.
Please include a credit to me somewhere on your page
(http://bratsplace-koolbrat.blogspot.com/)
Please add my copyright.
DO NOT use with other artists Tubes, with the exception of Elements, Frames ECT.
************************
Blog Archive
-
▼
2014
(29)
-
▼
April
(6)
- New PTU CT Tag/Tutorial "Punky" using " Steam Punk...
- New PTU CT Tag/ Tutorila "Pirate Paridise" using "...
- New PTU CT Tag/Tutorial "Musical Violin" using "Vi...
- New PTU CT Tag/Tutorial " Up Coming Summer" using ...
- New PTU CT Tag/Tutorial 'Wedding Memories" using "...
- New PTU CT Tag/Tutorial " Forest of Colors" using ...
-
▼
April
(6)
Labels
- FTU Frames (5)
- My CT Tutorials (137)
- My Tutorials (2)
- News (118)


