Linkbar
Wednesday, March 20, 2013
Dreamer

Dreamer
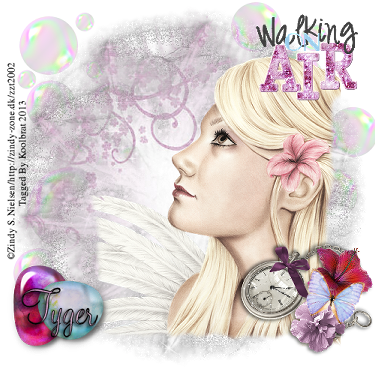
I am using the amazing artwork of Zindy Nielsen.
You can purchase it here: Zindy
Scrapkit "Walking on Air" by Tygers Tidbits
Thank you Tyger for the wonderful kit.
You can purchase it here: DigiFox Studio and Twilight Scraps
Mask and Font of choice
1. Open New Image 500 X 500
2. Floodfill with paper11
3. Go Selections Load/Save Mask and choose your mask. Merge group and add Drop shadow of your choice
4. Add New Layer Floodfill with paper08
5. Repeat number 3
6. Copy and Paste watch element. Resize to your liking and place in the lower right hand corner. Add Drop
Shadow of your choice.
7. Copy and Paste Pink Flower element. Resize to your liking and place in right hand corner over the chain on the watch.
Add Drop Shadow of choice.
8. Copy and Paste Blue Flower element. Resize to your liking and place below the pink flower on the chain. Add Drop
Shadow of your choice.
9. Copy and Paste butterfly element 47. Resize to your liking and place between the two flowers. Add Drop Shadow of
your choice.
10. Copy and Paste Bubble element16. Duplicate and Mirror the copy. Move both below your mask layers.
11. Copy and Paste Pink Rock and place it in the lower left hand corner.
12. Copy and Paste Blue Rock and place in the same corner just moved over alittle.
13. Copy and Paste Word Art. Resize to your liking and move to the upper right hand corner of your image. Add
Drop Shadow of your choice.
14. Add Tube of choice. and move it below your rock and watch layers. Add Drop Shadow of choice
15. Add Copyright info and Text.
16. Resize and save.
That's it..... I hope you have enjoyed my tutorial. If you have any questions please
feel free to leave a message in the Chatbox.
This tutorial was written January 2013 by me(Koolbrat) any similarities to another is just a coincidence.
Subscribe to:
Post Comments
(Atom)
TERMS OF USE
The Tubes in the zip are all made by me(Koolbrat).
:Please do not claim them as your own.
:They are Free for Personal Use Only.
:Please do not Share the files....
:Please do not change the file names.
:Please do not Burn to a CD or DVD or replicate to any other media or fix tangent unless it is for your own personal back up.
:Please do not use to create Brushes, Custom Shapes, Ect.
:Please leave the tubes intact, do not distor in any way.
If you have any Questions. Comment regarding these TOU please email koolbrat@gmail.com
Thank you for your download,
I hope you enjoy them,
Have fun,
Love Koolbrat
***********************
Copyright Notes:
Taggers.
Please add my copyright.
DO NOT use with other artist Tubes,
with the exception of Elements, Frames Ect.
Tutorial Writers.
Please include a credit to me somewhere on your page
(http://bratsplace-koolbrat.blogspot.com/)
Please add my copyright.
DO NOT use with other artists Tubes, with the exception of Elements, Frames ECT.
************************
Labels
- FTU Frames (5)
- My CT Tutorials (137)
- My Tutorials (2)
- News (118)


0 comments:
Post a Comment