Linkbar
Monday, August 12, 2013
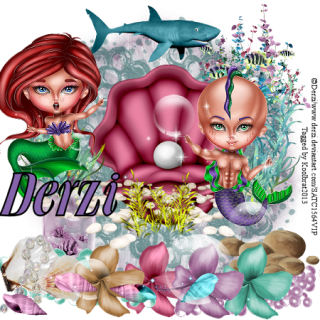
Sea Lovers
Sea Lovers
I am using "PP1 Sealovers" by Derzi
You can purchase it here: SATC
Scrapkit "Sea_Lovers" by AmyMarie
You can purchase it here: SATC
1. Open new image 600 X 600
2. Floodfill with paper 12. Load saved mask and merge group
3. Add new layer and floodfill with paper 10. Load saved mask and merge group
4. Copy and paste element 47. Resize to your liking and place in the lower left hand corner of your image
5. Copy and paste element 98. Resize to your liking and place in the middle of your image on the lower half
6. Copy and paste element 45. Resize to your liking and place in front of your bottle layer
7. Copy and paste element 46. Resize to your liking and place in the lower right hand corner of your image. GO
Image/Mirror
8. Copy and paste element 58. Resize to your liking and place in the lower right hand corner of your image
9. Copy and paste element 99. Resize to your liking and place in front of your rocks
10. Copy and paste element 57. Resize to your liking and place in the lower left hand corner of your image
11. Copy and paste element 100. Resize to your liking and place in front of your 2 other flowers
12. Copy and paste element 101. Resize to your liking and place next to your pink flower
13. Copy and paste element 19. Resize to your liking and place in the upper right hand corner of your image
14. Copy and paste element 96. Resize to your liking and place in the middle of your image
15. Copy and paste element 25. Resize to your liking and place in front of your shell layer
16. Copy and paste element 12. Resize to your liking and place in the lower part of your image
17. Copy and paste element 11. Resize to your liking and place above your shell
18. Copy and paste girl tube. Resize to your liking and place on the left hand side of your shell
19. Copy and paste boy tube. Resize to your liking and place on the right hand side of your shell
20. Copy and paste element 107. Place to your liking
21. Copy and paste element 43. Place to your liking
22. Add your copyright info and Text
23. Merge visible and Save
That's it..... I hope you have enjoyed my tutorial. If you have any questions please
feel free to leave a message in the Comments.
This tutorial was written August 2013 by me(Koolbrat) any similarities to another is just a coincidence.
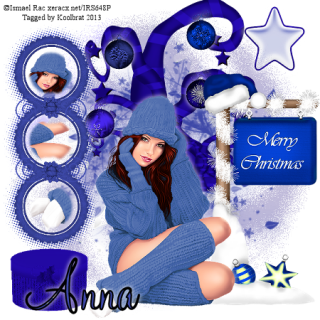
Blue Ice
Blue Ice
I am using "Warm Winter" by Ismael Rac
You can purchase it here: Rac
FTU Scrapkit "Ice Ice Baby" by Anna's Attic
You can get it here: Anna's Attic
1. Open new image 600 X 600
2. Floodfill with paper 4. Load saved mask and merge group
3. Add new layer floodfill with paper 1. Load saved mask and merge group
4. Copy and paste swirl 1. Resize to your liking and place in the middle of your image
5. Copy and paste ball 1. Resize to your liking and place on the left hand side top branch. Add drop shadow of your choice
6. Copy and paste ball 2. Resize to your liking and place on the right hand side top branch. Add the same drop shadow
7. Copy and paste ball 4. Resize to your liking and place on the second branch on the left hand side. Add the same drop shadow
8. Copy and paste ball 3. Resize to your liking and place on the second branch of the irhg hand side. Add the same drop shadow
9. Copy and paste acrylic Star1. Resize to your liking and place int he upper right hand side of your image. Add the same drop shadow
10. Copy and paste Merry Christmas sign. Resize to your liking and place in the lower right hand corner of your image
11. Copy and paste your tube. Resize to your liking and place in the middle of your image
12. Copy and paste frame 3. Resize to your liking and place on the left hand side of your image
13. Grab your magic wand and click inside the top frame.
14. Copy and paste a piece of your tube into selection. Selections none
15. Grab your magic wand again and click inside the second circle of your frame
16. Copy and paste another piece of your tube into selection. Select none
17. Grab your magic wand a third time and click on the third circle of your frame.
18. Copy and paste another piece of your image into selection. Select non
19. Copy and paste box 1. Resize to your liking and place in the lower left hand corner of your image
20. Add your copyright info and Text
21.Merge visible and Save
That's it..... I hope you have enjoyed my tutorial. If you have any questions please
feel free to leave a message in the Comments.
This tutorial was written August 2013 by me(Koolbrat) any similarities to another is just a coincidence.
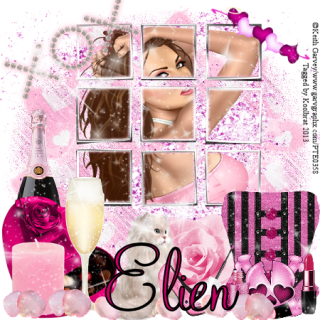
Cupid's Motivation
Cupid's Motivation
I am using "Robin" by Keith Garvey
You can purchase it here: Garv
Scrapkit "Cupids Wishes" by Waggish Sparkles
You can purchase it here: SATC
1. Open new image 600 X 600
2. Floodfill with paper10. Load saved mask and merge group
3. Add new layer and floodfill with paper 5. Load saved mask and merge group
4. Copy and paste splatter. Resize to your liking and place in the middle of your image
5. Copy and paste frame. Resize to your liking and place in the middle of your image
6. Grab your magic wand and click inside all of your frame pieces. You can do this by clicking one and then holding the shift key while you click inside the others
7. Copy and paste your tube into selection. Select none
8. Copy and paste rose. Resize to your liking and place in the middle of the lower half of your image
9. Copy and paste cat2. Resize to your liking and place on the left hand side of your rose
10. Copy and paste diamond. Resize to your liking rotate 30 degree to the left. Place in the upper left hand corner of your image
11. Copy and paste hearts with halo. Resize to your liking and rotate 30 degrees to the right. Place in the upper right hand corner of your image
12. Copy and paste champagne. Resize to your liking and place in the lower left hand corner of your image
13. Copy and paste corset. Resize to your liking and place in the lower right hand corner of your image
14. Copy and paste chocolate box. Resize to your liking and place in front of your champagne bottle
15. Copy and paste candle. Resize to your liking and place in front of your chocolate box
16. Copy and paste champagne glass. Resize to your liking and place in front of your chocloate box next to your candle
17. Copy and paste love skull. Resize to your liking and place in front of your corset
18. Copy and paste shoe. Resize to your liking and place on the right hand side of your cat
19. Copy and paste nail polish. Resize to your liking and place oh the left hand side of your skull
20. Copy and paste lipstick. Resize to your liking and place on the right hand side of your skull
21. Copy and paste petal4. Resize to your liking and place in front of champagne glass
22. Duplicate petal4. Move in front nail polish
23. Duplicate petal4 again and move in front of your shoe
24. Copy and paste petal5. Resize to your liking and place in front of your candle
25. Duplicate petal 5 and move in front of your skull
26. Duplicate petal 5 again and move in front of your glass
27. Copy and paste glitter2
28. Copy and paste glitter4
29. Add your copyright info and Text
30. Merge visible and Save
That's it..... I hope you have enjoyed my tutorial. If you have any questions please
feel free to leave a message in the Comments.
This tutorial was written August 2013 by me(Koolbrat) any similarities to another is just a coincidence.
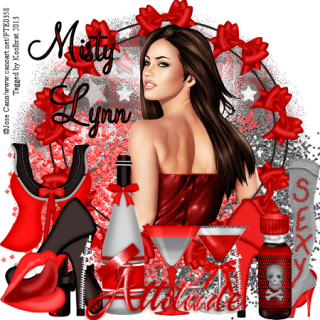
Jinx Attitude
Jinx Attitude
I am using "Megan1" by Jose Cano
You can purchase it here: SATC
Scrapkit "Naughty Jinx" by MistyLynn Creation's
You can purchase it here: SATC
1. Open new image 600 X 600
2. Floodfill with paper 06. Load saved mask and merge group
3. Add new layer and floodfill with paper 04. Load saved mask and merge group
4. Copy and paste glitter2. Resize to your liking and place in the lower right hand corner of your image
5. Copy and paste glitter 01. Resize to your liking and place in the lower left hand corner of your image
6. Copy and paste frame 02. Resize to your liking and place in the middle of your image
7. Grab your magic wand and click inside your frame
8. Copy and paste your tube as new layer. Resize and place to your liking
9. Duplicate your tube layer and make sure that you are clicked on the orginal tube layer
10. Go Selcetions/ Invert/ Delete
11. Click on your duplicate and take your eraser tool and erase the part of your tube that is showing above your frame
12.Copy and paste shoe1. Resize to your liking and place in the lower right hand corner of your image
13. Copy and paste nighty. Resize to your liking and place in the lower left hand corner of your image
14. Copy and paste boot 02. Resize and place in the lower right hand corner of your image
15. Copy and paste bottle. Resize and place next to the boot
16. Copy and paste lipstick. Resize and place in front of your nighty
17. Copy and paste shoe2. Resize and place in front of your lipstick
18. Copy and paste lips01. Resize and place in front of your shoe
19. Copy and paste drink01. Resize and place next to your shoe in the right hand corner
20. Copy and paste drink 02. Resize and place next to the first drink
21.Copy and paste jinx mix. Resize and place next to the second drink
22. Copy and paste wordart. Resize and place over your drinks
23. Add your copyright info and Text
24. Merge visible and Save
That's it..... I hope you have enjoyed my tutorial. If you have any questions please
feel free to leave a message in the Comments.
This tutorial was written August 2013 by me(Koolbrat) any similarities to another is just a coincidence.
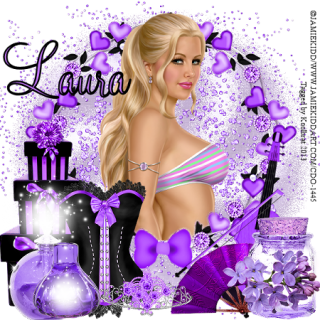
Melanie's Passion
Melanie's Passion
I am using "Candy" by Jamie Kidd
You can purchase it here: CDO
Scrapkit "Purple Passion" by Tiny Turtles
You can purchase it here: SATC
1. Open new image 600 X 600
2. Floodfill with paper 19. Load saved mask and merge group
3. Add new layer and floodfill with paper 24. Load saved mask and merge group
4. Copy and paste element 8
5. Copy and paste element 78. Resize to your liking and place in the middle of your image
6. Grab your magic wand and click inside element 78
7. Copy and paste your tube. Resize to your liking and place where you want it
8. Duplicate your tube and X it out
9. Go selections/Invert/Delete
10. UNX your duplicate and use your eraser and erase the extra that is over lapping your frame layer
11. Copy and paste element 97. Resize to your liking and place in the lower left hand corner of your image
12. Copy and paste element 100. Resize to your liking and place next to your gifts
13. Copy and paste element 99. Resize to your liking and place in the lower right hand corner of your image
14. Copy and paste element 67. Resize to your liking and place in front of your violin
15. Copy and paste element 14. Resize to your liking and place in front of your fan layer
16. Copy and paste element 63. Resize to your liking and place in front of your jar
17. Copy and paste element 11. Resize to your liking and place in the lower left hand corner of your image
18. Copy and paste element 98. Resize to your liking and place on the left hand side of your image
19. Copy and paste element 88. Resize to your liking and place in the lower middle of your image
20. Add your copyright info and Text
21. Merge visible and Save
That's it..... I hope you have enjoyed my tutorial. If you have any questions please
feel free to leave a message in the Comments.
This tutorial was written August 2013 by me(Koolbrat) any similarities to another is just a coincidence.
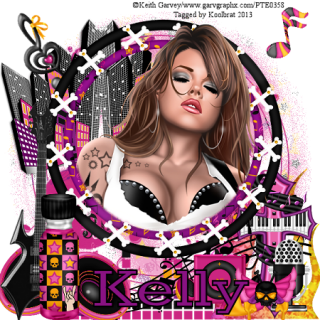
Muzik Lover
Muzik Lover
I am using "Rock On" by Keith Garvey
You can purchase it here: Garv
Scrapkit "Hot Muzik" by Evol Angel Scraps
I am using "Rock On" by Keith Garvey
You can purchase it here: Garv
Scrapkit "Hot Muzik" by Evol Angel Scraps
You can purchase it here: Sweet Pinup, Scraps Candy
1. Open new image 600 X 600
2. Floodfill with paper9. Load saved mask and merge group
3. Add new layer and floodfill with paper 3. Load saved mask and merge group
4. Copy and paste beats. Resize to your liking and place in the lower middle of your image
5. Copy and paste city scape. Resize to your liking and place in the upper left hand corner of your image
6. Copy and paste flame. Resize to your liking and place in the lower right hand side of your image
7. Copy and paste musicnotes. Resize to your liking and place in the lower right hand side of your image
8. Copy and paste musicnote. Resize to your liking and place in the upper left hand corner of your image
9. Copy and paste musiccross. Resize to your liking and place in the lower right hand corner of your image
10. Copy and paste microphone. Resize to your liking and place in the lower right hand corner of your image
11. Copy and paste miniIpod. Resize to your liking and place next to the microphone
12. Copy and paste skullfly. Resize to your liking and place in front of your microphone layer
13. Copy and paste frame 2. Resize to your liking and place in the middle of your image
14. Grab your magic wand and click inside your frame
15. Copy and paste your tube as a new layer. Resize to your liking and place where you want.
16. Duplicate your tube layer and X it out
17. Go back to the orignal tube and go selections/ Invert
18. UnX the duplicate tube and earse the extra part of your tube that is showing above your frame
19. Copy and paste speakers. Resize to your liking and place in the lower left hand corner of your image
20. Copy and paste guitar. Resize to your liking and place in front of your speakers. Rotate 30 Degrees to the left
21. Copy and paste music note 2. Resize to your liking and place in the upper right hand corner of your image
22. Copy and paste nail polish. Resize to your liking and place in front of your guitar
23. Add your copyright info and Text
24. Merge visible and Save
That's it..... I hope you have enjoyed my tutorial. If you have any questions please
feel free to leave a message in the Comments.
This tutorial was written August 2013 by me(Koolbrat) any similarities to another is just a coincidence.
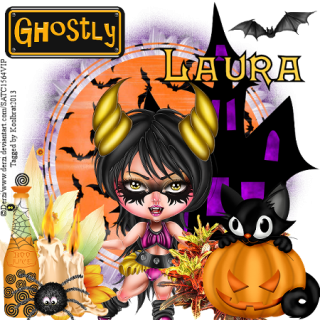
Spookilious
Spookilious
I am using "Lily Bug" by Derzi
You can purchase it here: SATC
Scrapkit "Spookween" by Tiny Turtles
You can purchase it here: SATC
1. Open new image 600 X 600
2. Floodfill with paper 11. Load saved mask and merge group
3. Add new layer and floodfill with paper 17. Load saved mask and merge group
4. Copy and paste element 67. Resize to your liking and place on the right hand side of your image
5. Copy and paste your tube. Resize to your liking and place in the middle of your image
6. Copy and paste element 58. Resize to your liking and place in the upper left hand corner of your image
7. Copy and paste element 63. Resize to your liking and place in the upper right hand corner of your image
8. Copy and paste element 14. Resize to your liking and place in the lower right hand corner of your image
9. Copy and paste element 88. Resize to your liking and place in front of your leaf layer
10. Copy and paste element 91. Resize to your liking and place in the lower left hand corner of your image
11. Copy and paste element 92. Resize to your liking and place on top of your feather layer
12. Copy and paste element 114. Resize to your liking and place in front of the the candles
13. Copy and paste element 50. Resize to your liking and place in front of your bottle layer so that the spider looks like it is on the bottle and the candles
14. Add your copyright info and Text
15. Merge visible and Save
That's it..... I hope you have enjoyed my tutorial. If you have any questions please
feel free to leave a message in the Comments.
This tutorial was written August 2013 by me(Koolbrat) any similarities to another is just a coincidence.
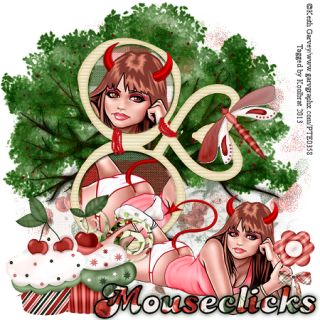
Tootie Cutie
Tootie Cherry
I am using "Bad and Good" by Keith Garvey
You can purchase it here: Garv
Scrapkit "Tootie Cutie" by MRS W
You can purchase it here: Rockin Scraps
1. Open new image 600 X 600
2. Flood fill with paper style A. Load saved mask and merge group
3. Add new layer and floodfill with paper style D. Load saved mask and merge group
4. Copy and paste tree01. Resize to your liking and place in the middle of your image
5. Copy and paste frame02. Resize to your liking and rotate 90 degrees to the right. Place in front of your tree in the middle of your image
6. Grab your magic wand and click inside the top circle of your frame and floodfill with paper style C. Then copy and paste a piece of your tube
7. Grab your magic wand again and click inside the bottom cirlce and repeat number 6 but change the piece of tube
8. Copy and paste your tube and place to your liking
9. Copy and paste lollipop01. Resize to your liking and place on the right side of your tube
10. Copy and paste bug02. Resize to your liking and place on your frame
11. Copy and paste doodle01. Resize to your liking. Go image/mirror and place in the lower left hand corner of your image
12. Copy and paste cupcake02. Resize to your liking and place in front of your doodle
13. Copy and paste cupcake01. Resize to your liking and place on the left hand side of your other cupcake
14. Add your copyright info and Text
15. Merge visible and Save
That's it..... I hope you have enjoyed my tutorial. If you have any questions please
feel free to leave a message in the Comments.
This tutorial was written August 2013 by me(Koolbrat) any similarities to another is just a coincidence.
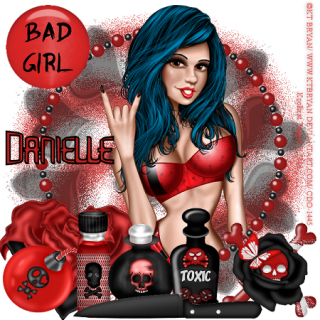
Toxic
Toxic
I am using "Roxxy" by KT Bryan
You can purchase it here: CDO
Scrapkit "Toxic Love" by Scraps by Danielle
You can purchase it here: SBD
1. Open new image 600 X 600
2. Floodfill with red(bd1f1f). Load saved mask and merge group
3. Add new layer and floodfill with black(000000). Load saved mask and merge group
4. Copy and paste beaded frame. Place in the middle of your image
5. Grab your magc wand and click inside of your frame
6. Copy and paste your tube and new layer
7. Duplicate your tube and move the original under your frame layer. X out the duplicate and make sure you are clicked on the orginal tube layer and go Selections/ Invert/ Delete
8. UnX your duplicate layer and use your earser tool to earse the parts of your tube that are showing above your frame layer that you don't want to show
9. Copy and paste heart with rose. Resize to your liking and place in the lower left hand corner of your image
10. Copy and paste bomb. Resize to your liking and place in front of your heart with rose
11. Copy and paste bad girl. Resize to your liking and place in the upper left hand corner of your image
12. Copy and paste nail pilish. Resize to your liking and place in front of the bomb layer
13. Copy and paste skull candy. Resize to your liking and place in the lower right hand corner of your image
14. Copy and paste rose skull. Resize to your liking and place in front of your skull layer
15. Copy and paste ppoison bottle. Resize to your liking and place next to the nail polish layer
16. Copy and paste toxic bottle. Resize to your liking and place on the right hand side of your poison bottle
17. Copy and paste knife. Resize to your liking and place in the middle of the lower part of your image. Go Image/ Mirror/ Image/ Flip
18. Add your copyright info and Text
19. Merge visible and Save
That's it..... I hope you have enjoyed my tutorial. If you have any questions please
feel free to leave a message in the Comments.
This tutorial was written August 2013 by me(Koolbrat) any similarities to another is just a coincidence.
Saturday, August 10, 2013
Testing
Wednesday, August 7, 2013
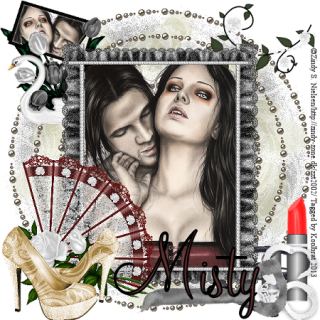
Seduced
Seduced
I am using "A Vampire's Love " by Zindy Nielsen
You can purchase it here: Zindy
Scrapkit "50 Shades of Seduction" by Misty Mayhem Scraps
You can purchase it here: Rockin Scraps
1. Open new image 600 X 600
2. Floodfill with paper 1. Load saved mask and merge group
3. Add new layer and floodfill with paper 9. Load saved mask and merge group
4. Copy and paste element 28. Resize to your liking and place in the middle of your image
5. Copy and paste element 8. Resize to your liking and place in the lower right hand side of your image
6. Copy and paste element 1. Resize to your liking and place in front of your whip
7. Copy and paste element 7. Resize to your liking and place in front of your lip stick
8. Copy and paste element 2. Resize to your liking and place in front of your handcuffs. Rotate 90 degrees to your right
9. Copy and paste element 12. Resize to your liking and place in the upper left hand corner of your image
10. Grab your magic wand and click inside the frame
11. Copy and paste your tube into selection. Selections none
12. Copy and paste element 20. Resize to your liking and place in the upper right hand corner of your image. Image mirror
13. Copy and paste your tube. Resize to your liking and place in the middle of your image
14. Copy and paste element 11. Resize to your liking and place on the bottom of your tube.
15. Duplicate element 11 and go image flip move to the top of your tube
16. Copy and paste element 11. Resize to your liking and place on one side of your tube
17. Duplicate element 11 from number 16 and go image flip place on the other side of your tube.
This will make it look like you have a frame around your tube.
18. Copy and paste element 17. Resize to your liking and place in the lower left hand corner of your image
19. Copy and paste element 27. Resize to your liking and place in front of your fan layer
20. Add your copyright info and Text
21. Merge visible and Save
That's it..... I hope you have enjoyed my tutorial. If you have any questions please
feel free to leave a message in the Chatbox.
This tutorial was written August 2013 by me(Koolbrat) any similarities to another is just a coincidence.
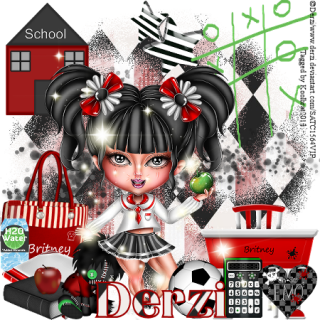
Britany's First Day
Britany's First Day
I am using "Little Britany" by Derzi
You can purchase it here: SATC
Scrapkit "Little Britany" by Hania Designz
You can purchase it here: SATC
1. Open new image 600 X 600
2. Floodfill with paper 06. Load saved mask and merge group
3. Add new layer and floodfill with paper 09. Load saved mask and merge group
4. Copy and paste element 07. Place in the middle of your image
5. Copy and paste element 12. Resize to your liking and place in the upper middle of your image
6. Copy and paste element 95. Resize to your liking and place in the upper right hand corner of your image
7. Copy and paste element 36. Reisze to your liking and place in the lower left hand corner of your image
8. Copy and paste element 86. Resize to your liking and place in front of your bag
9. Copy and passte element 08. Resize to your liking and place in front of your water bottle and bag
10. Copy and paste element 77. Resize to your liking and place in the lower right hand corner of your image
11.Copy and paste element 13. Resize to your liking and place in front of your desk
12. Copy and paste element 73. Resize to your liking and place on top of your white book in the lower left hand corner of your image. Go image/ mirror
13. Copy and paste element 92. Resize to your liking and place next to your black book
14. Copy and paste element 74. Reisze to your liking and place in the upper left hand corner of your image
15. Copy and paste your tube. Resize to your liking and place in the lower middle of your image
16. Copy and paste element 15. Place in the middle of your image
17. Copy and paste element 22. Resize to your liking and place next to the right hand side of your tube
18. Copy and paste element 04. Resize to your liking and place in the lower right hand corner of your image in front of your desk
19. Add your copyright info and Text
20. Merge visible and Save
That's it..... I hope you have enjoyed my tutorial. If you have any questions please
feel free to leave a message in the Chatbox.
This tutorial was written August 2013 by me(Koolbrat) any similarities to another is just a coincidence.
Tuesday, August 6, 2013
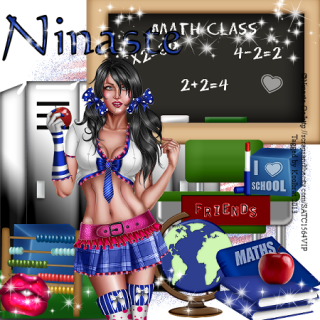
Sexy School Days
Sexy School Days
I am using the amazing artwork of NinasteOc
You can purchase it here:SATC
Scrapkit "Naughty SchoolGirl" by Disturbed Scraps
You can purchase it here: SATC
I am using the amazing artwork of NinasteOc
You can purchase it here:SATC
Scrapkit "Naughty SchoolGirl" by Disturbed Scraps
You can purchase it here: SATC
Font of choice
1. Open new image 600 X 600
2. floodfill with paper 12. Load saved mask and merge group
3. Add new layer and floodfill with paper 04. Load saved amsk and merge group
4. Copy and paste element 62. Resize to your liking and place in the middle of your image
5. Copy and paste element 68. Resize to your liking and place on the right hand side of your image
6. Copy and paste element 36. Resize to your liking and place in front of your chalkboard
7. Copy and paste element 73. Resize to your liking and place on your desk
8. Copy and paste element 56. Resize to your liking and place on the left hand side of your desk over the legs
9. Copy and paste element 95. Resize to your liking and place on the desk
10. Copy and paste element 58. Resize to your liking and place on the right hand corner of your desk
11. Copy and paste element 33. Resize to your liking and place in on the right hand side of yoru globe
12. Copy and paste element 1. Resize to your liking and place in the lower left hand corner of your image
13. Copy and paste element 52. Resize to your liking and place in front of your math book
14. Copy and paste element 35. Resize to your liking and place in front of your blocks
15. Copy and paste element 96. Place in the lower left hand corner of your image
16. Add your copyright info and Text
17. Copy and paste element 124. Place at the bottom of your image
18. Duplicate sparkle layer and move to the top of your image
19. Copy and paste your tube. Resize to your liking and place in the middle of your image
20. Merge visible and Save
That's it..... I hope you have enjoyed my tutorial. If you have any questions please
feel free to leave a message in the Chatbox.
This tutorial was written August 2013 by me(Koolbrat) any similarities to another is just a coincidence.
Monday, August 5, 2013
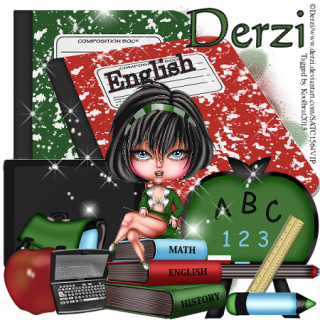
School Time
School Time
I am using "Lily Bug" by Derzi
You can purchase it here: SATC
FTU Scrapkit "School Girl" by Hania Designz
You can purchase it here: SATC
1. Open new image 600 X 600
2. Floodfill with paper 01. Load saved mask and merge group
3. Add new layer and floodfill with paper 04. Load saved mask and merge group
4. Copy and paste element 02. Resize to you liking and place in the middle of your image
5. Copy and paste element 03. Resize to your liking and place on the right hand side of your green book
6. Copy and paste element 08. Resize to your liking and place on the left hand side of your image
7. Copy and paste element 16. Resize to your liking and place in the lower right hand side of your image
8. Copy and paste element 06, Resize to your liking and place across the chalkboard on the right hand side of your image
9. Copy and paste element 13. Resize to your liking and place across the lower part of your ruler
10. Copy and paste element 05. Resize to your liking and place in the lower left hand corner of your image
11. Copy and paste element 01. Resize to your liking and place in front of your bag layer
12. Copy and paste element 24. Resize to your liking and place on the right hand side of your apple
13. Copy and paste element 17. Resize to your liking and place in the middle of the lower half of your image
14. Copy and paste element 21. Place to your liking
15. Copy and paste your tube. Resize to your liking and place to where she is sitting on top of the books
16. Duplicate layer and go Image/ Flip/Image Mirror
17. Add your copyright info and Text
18. Merge visible and Save
That's it..... I hope you have enjoyed my tutorial. If you have any questions please
feel free to leave a message in the Chatbox.
This tutorial was written August 2013 by me(Koolbrat) any similarities to another is just a coincidence.
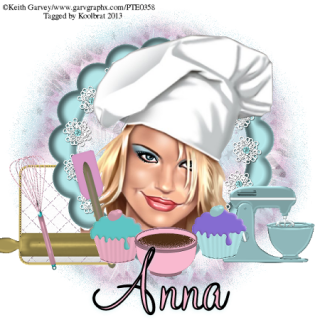
Cupcake Delight
Cupcake Delight
I am using the amazing artwork of Keith Garvey
You can purchase it here: Garv
Scrapkit "Cupcake Wars" by Anna's Attic
You can purchase it here: Pics for Design, Mystical Scraps
And Rockin Scrapz
1. Open new image 600 X 600
2. Floodfill with paper 1. Load saved mask and merge group
3. Add new layer and floodfill with paper 5. Load saved mask and merge group
4. Copy and paste Hot pad. Resize to your liking and place in the lower left hand corner of your image
5. Copy and paste frame 1. Resize to your liking and place in the middle of your image
6. Move your hot pad so that it is sticking out on the left hand side of your frame layer.
7. Grab your magic wand and click inside your frame
8. Copy and paste your tube as new layer. Duplicate your tube layer. Place tubes where you want them in your frame
9. Go selections and invert then hit delete
10. Copy and paste your rolling pin. Resize to your liking and rotate 90 degrees to the right and place over the bottom half of your hot pad
11. Copy and paste spatula. Resize to your liking and place on the right hand side of your rolling pin. Rotate 15 degrees to the left
12. Copy and paste cupcake 6. Resize to your liking and place on the spatula
13. Copy and paste mixer. Resize to your liking and place on the most outer right hand side of your frame
14. Copy and paste cupcake 5. Resize to your liking and place on the inner right hand side of your mixer
15. Copy and paste whisk. Resize to your liking and place on the outer left hand side of your frame
16. Copy and paste bowl. Resize to your liking and place in the middle of your cupcakes
17. Add your copyright info and Text
18. Merge visible and Save
That's it..... I hope you have enjoyed my tutorial. If you have any questions please
feel free to leave a message in the Chatbox.
This tutorial was written August 2013 by me(Koolbrat) any similarities to another is just a coincidence.
Sunday, August 4, 2013
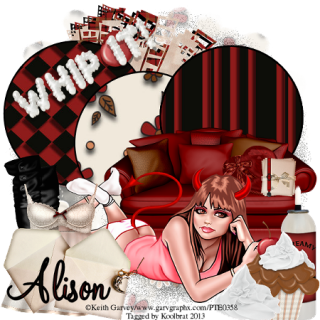
Devilious
Devilious
I am using the amazing artwork of Keith Garvey
You can purchase it here: Garv
Scrapkit "Whip It" by HungryHill
You can purchase it here: Treasured Scraps
1. Open new image 600 X 600
2. Floodfill with paper 10. Load mask of choice and merge group
3. Add new layer and floodfill with paper 09. Load mask of choice and merge group
4. Copy and paste landscape. Resize to your liking and place in the upper middle of your image
5. Grab your shapes tool and draw a circle with the outside black and the inside with paper 3. Convert to raster layer
6. Draw another circle and redo number 5 just change the inside color to paper 9. Convert to raster layer
7. Redo number 5 just change the inside color to paper 4. Convert to raster layer
8. Position your circles to your liking
9. Copy and paste loveseat. Resize to your liking and place in the middle on the right hand side of your image
10. Copy and paste heart-box. Resize to your liking and place on the right hand side of your loveseat
11. Copy and paste stationary. Resize to your liking and place next to your heart-box
12. Copy and paste wrap. Resize to your liking and place on your stationary
13. Copy and paste your tab suspender. resize to your liking and place on your stationary
14. Copy and paste your tube. Resize to your liking and place in the middle of your image in front of the loveseat
15. Copy and paste your boots. Resize to your liking and place in the lower left hand corner of your image
16. Copy and paste your babydoll. Resize to your liking and place over your boots
17. Copy and paste your envolopes. Resize to your liking and place over your babydoll
18. Copy and paste your whip cream can. Resize to your liking and place in the lower left hand corner of your image
19. Copy and paste your cupcake. Resize to your liking and place in front of your whip cream can
20. Copy and paste your whip cream. Resize to your liking and place next to your cupcake
21. Copy and paste your word art. Resize to your liking. Rotate 30 degrees to your left and place in the upper left hand corner of your image
22. Add your copyright info and Text
23. Merge visible and Save
That's it..... I hope you have enjoyed my tutorial. If you have any questions please
feel free to leave a message in the Chatbox.
This tutorial was written August 2013 by me(Koolbrat) any similarities to another is just a coincidence.
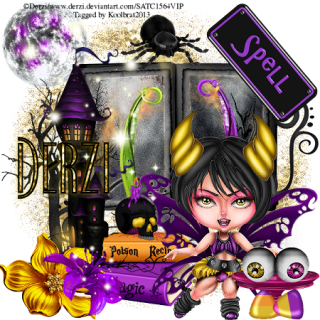
Spellbound
Spellbound
I am using "Lily Bug" by Derzi
You can purchase it here: SATC
Scrapkit "I put a spell on you" by Hania Designz
You can purchase it here: SATC
1. Open new image 600 X 600
2. Floodfill with paper 10. Load mask of choice and merge group
3. Add new layer and floodfill with paper 01. Load mask of choice and merge group
4. Copy and paste element 57. Resize to your liking and place in the upper left hand corner of your image
5. Copy and paste element 99. Resize to your liking and place in the middle of your image
6. Grab your magic wand and click inside the left hand side of your frame
7. Copy and paste paper 03 into selection
8. Grab your magic wand again and click inside the right hand side of your frame
9. Copy and paste paper 04
10. Copy and paste element 52. Resize to your liking and go image mirror and place it in the left hand side of your frame
11. Copy and paste element 51. Resize to your liking and place in the right hand side of your frame
12. Copy and paste element 53. Resize to your liking and place so that it is covering the green bland on the left hand side of your image
13. Copy and paste element 74. Resize to your liking and place above your frame
14. Copy and paste element 75. Resize to your liking and rotate 50 to the left and place on the right hand side of your frame
15. Copy and paste element 90. Reisze to your liking and place on the left hand side of your frame
16. Copy and paste element 88. Resize to your liking and place in the lower left hand corner of your image
17. Copy and paste element 91. Resize to your liking and place next to the yellow flower
18. Copy and paste your tube. Resize to your liking and place in the lower right hand side of your image
19. Copy and paste element 50. Resize to your liking and place in the lower right hand corner of your image next to your tube
20. Copy and paste element 36. Resize to your liking and place in front of your eyeballs on stand
21. Copy and paste element 37. Resize to your liking and rotate 50 degrees to your left and place infront of your other candy
22. Copy and paste element 73 and place in the middle of your image on the left hand side
23. Add to copyright info and Text
24. Merge visible and Save
That's it..... I hope you have enjoyed my tutorial. If you have any questions please
feel free to leave a message in the Chatbox.
This tutorial was written August 2013 by me(Koolbrat) any similarities to another is just a coincidence.
Friday, August 2, 2013
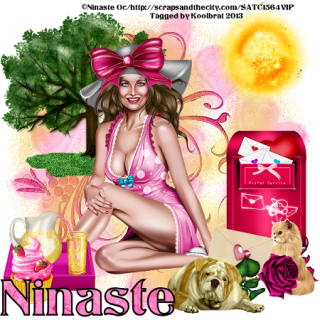
Flirty in Pink
Flirty In Pink
I am using the amazing artwork of NinasteOc
You can purchase it here:SATC
Scrapkit "Flirty Cindy" by Disturbed Scraps
You can purchase it here: SATC
Font of choice
1. Open new image 600 X 600
2. Copy and paste element 93
3. Floodfill with paper 004. Load mask of choice and merge group
4. Floodfill with paper 005. Load mask of choice and merge group
5. Copy and paste element 91. Resize to your liking and place on the right hand side of your image
6. Copy and paste element 47. Resize to your liking and place in the middle of your image on the left hand side
7. Copy and paste element 001. Reisize to your liking and place in the upper left hand corner of your image
8. Copy and paste element 66. Reisze to your liking and place in the upper right hand corner of your image
9. Copy and paste your tube of choice. Resize to your liking and place in the middle of your image
10. Copy and paste element 63. Resize to your liking and place in the lower right hand corner of your image
11. Copy and paste element 87. Resize to your liking and place next to your cat layer
12. Copy and paste element 19. Resize to your liking and place in front of your envolope layer
13. Copy and paste element 60. Resize to your liking and place off to the left hand side of your rose layer
14. Copy and paste element 35. Resize to your liking and place in the lower left hand corner of your image
15. Copy and paste element 34. Resize to your liking and place on your tray layer
16. Copy and paste element 33. Resize to your liking and place on your tray next to your glass
17. Copy and paste element 30. Resize to your liking and place in front of your tray
18. Add your copyright info and Text
19. Merge visible and Save
That's it..... I hope you have enjoyed my tutorial. If you have any questions please
feel free to leave a message in the Chatbox.
This tutorial was written August 2013 by me(Koolbrat) any similarities to another is just a coincidence.
Subscribe to:
Comments
(Atom)
TERMS OF USE
The Tubes in the zip are all made by me(Koolbrat).
:Please do not claim them as your own.
:They are Free for Personal Use Only.
:Please do not Share the files....
:Please do not change the file names.
:Please do not Burn to a CD or DVD or replicate to any other media or fix tangent unless it is for your own personal back up.
:Please do not use to create Brushes, Custom Shapes, Ect.
:Please leave the tubes intact, do not distor in any way.
If you have any Questions. Comment regarding these TOU please email koolbrat@gmail.com
Thank you for your download,
I hope you enjoy them,
Have fun,
Love Koolbrat
***********************
Copyright Notes:
Taggers.
Please add my copyright.
DO NOT use with other artist Tubes,
with the exception of Elements, Frames Ect.
Tutorial Writers.
Please include a credit to me somewhere on your page
(http://bratsplace-koolbrat.blogspot.com/)
Please add my copyright.
DO NOT use with other artists Tubes, with the exception of Elements, Frames ECT.
************************
Labels
- FTU Frames (5)
- My CT Tutorials (137)
- My Tutorials (2)
- News (118)


