Linkbar
Friday, May 24, 2013
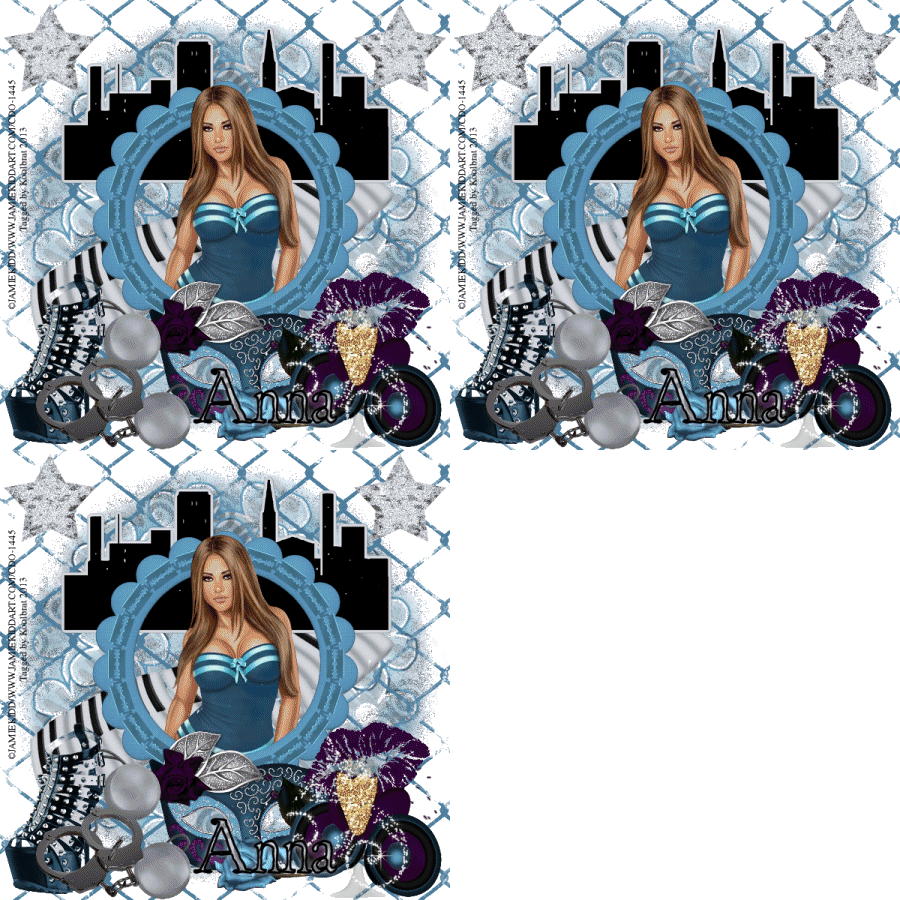
New Show off Tag Darker Shades
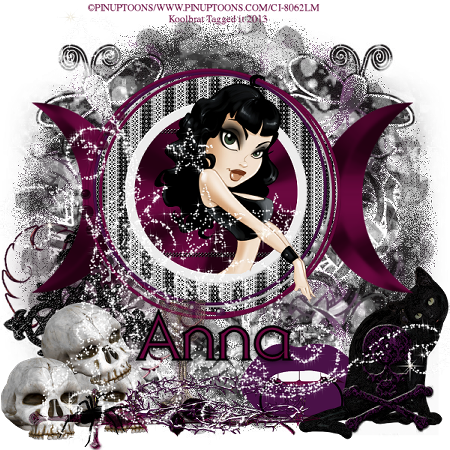
Gothic Poetry
Gothic Poetry
I am using the amazing artwork of Pinup Toons
You can purchase it here: CDO
Scrapkit "Lithium" by Anna
You can purchase it here: The Scrappin Box, Mystical Scraps
Tagging Angels
Masks of Choice
You can purchase it here: CDO
Scrapkit "Lithium" by Anna
You can purchase it here: The Scrappin Box, Mystical Scraps
Tagging Angels
Masks of Choice
Glitter of choice
1. Open new image 600 X 600
2. Floodfill with paper 8. Load mask of choice and merge group
3. Add new layer and floodfill with paper4. Load mask of choice and merge group
4. Copy and paste pierced lip resize to your liking and place in the lower left hand corner of your image
5. Copy and paste cat resize to your liking and place off to the side of your li;v;p layer
6. Copy and paste skull3 resize to your liking and place in front of your cat
7. Copy and paste heart4 reisize to your liking and place in the lower right hand corner of your image. Add drop shadow of your choice
8. Copy and paste gothic cross resize to lkyour liking and place in front of your heart
9. Copy and paste skulls resize to your liking and place in front of your cross
10. Copy and paste Goddess symbol resize 75% and place in the middle of your image
11. Copy and paste frame5 resize 75% and place so that the circle of the symbol is in the middle of your frame
12. Copy and paste frame1 resize 75% and place over your other frame layer
13. X out everything but your Goddess symbol, frame5, and frame1. Merge visible then unx everything again
14. Now it is going to get alittle tricky lol.
15. Grab your magic wand and click inside your frame layer
16. Go Selections/ Modify 5
17. Paste your tube as new layer. Move to where you are happy. Duplicate and hide
18. Go selections/ invert/ delete
19. Now unhide your tube layer and erase the part that is hanging over your frame
20. Copy and paste Gobblet resize and place in between your skull and your cat. Add drop shadow of your choice
21. Copy and paste skullrose resize to your liking and place in front of your skulls laying down
22. Copy and paste your spider resize and place next to your skulls
23. Copy and paste your crown resize and place in between your skulls and cat again so that it is in front of your gobblet
24. Copy and paste glitter of choice or no glitter at all
25. Add your copyright info and text
26. Merge visible, resize to your liking and Save
That's it..... I hope you have enjoyed my tutorial. If you have any questions please
feel free to leave a message in the Chatbox.
This tutorial was written May 2013 by me(Koolbrat) any similarities to another is just a coincidence.
Wednesday, May 22, 2013
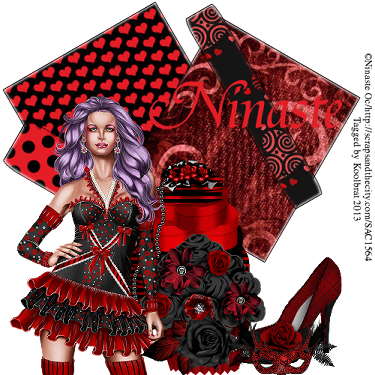
Party Lovin
Party Lovin
I am using the amazing artwork of Ninaste Oc
You can purchase it here: SATC
Scrapkit "Heather 2" by Tiny Turtles
You can purchase it here: SATC
1. Open new image 500 X 500
2. Grab the square in your preset shape and draw a square. Convert to raster layer and floodfill with paper9
3. Draw another square. Convert to raster layer and floodfill with paper7
4. Draw a rectangle. Convert to raster layer and floodfill with paper8
5. Draw another rectangle. Convert to raster and floodfill with paper37
6. Arrange to your liking
7. Copy and paste your boxes. Resize to your liking and place in the lower middle of your layer
8. Copy and paste your shoe. Resize to your liking and place in the lower right hand corner of your image
9. Copy and paste your flower basket. Resize to your liking and place in front of your boxes layer
10. Copy and paste your tube. Resize to your liking and place in the left hand corner of your image
11. Copy and paste your red leaves. Resize to your liking and place in front of your basket layer
12. Copy and paste your black rose. Resize to your liking and place so that it is on top of your leaves layer
13. Copy and paste your mask. Resize to your liking and place in front of your shoe layer
14. Add your copyright info and Text
15. Merge visible and Save
That's it..... I hope you have enjoyed my tutorial. If you have any questions please
feel free to leave a message in the Chatbox.
This tutorial was written May 2013 by me(Koolbrat) any similarities to another is just a coincidence.
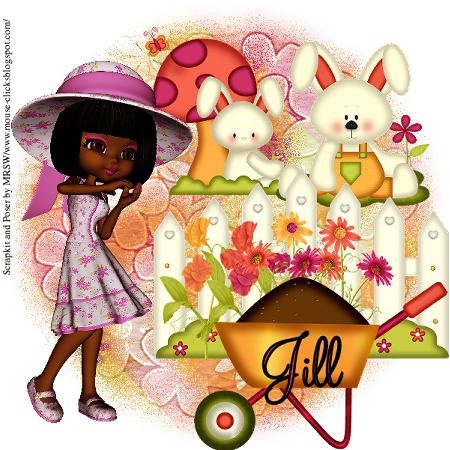
New Show off Tag using "Hoppy gardening" by Mouseclicks
You can purchase this lovely Tube "Summer Fling Cookie" at The Scrappin Box or Mystical Scraps and the Scrapkit "Hopping Gardening" at The Scrappin Box or Mystical Scraps
New Show off Tag "RelaxingSummer" using "It's Summer" by Mouseclicks
New Show off Tag "My Animals" using "Fun with Animals" by Mouseclicks
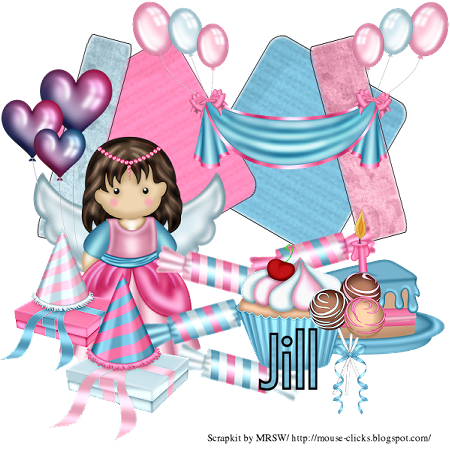
New CT Tag and Tutorial "Happy Happy Birthday" using Cute-Birthday by Mouseclicks
Happy Happy Birthday
Scrapkit "Cute Birthday" by Mouseclicks
You can purchase it here: The Scrappinbox, Mystical Scrapes
1. Open new image 600 X 600
2. Grab your shapes tool and draw a square. Convert to raster layer and floodfill with paper7
3. Redo number 2 but floodfill with paper8
4. Grab your shapes tool again draw a rectangle. Convert to raster layer and floodfill with paper6
5. Redo number 4 but floodfill with paper5
6. Copy and paste partystuff. Resize to your liking and place in the upper right hand corner of your image
7. Copy and paste angel. Resize to your liking and place in the middle of your image on the left hand side
8. Copy and paste gift1. Resize to your liking and place in front of your angel
9. Copy and paste candy4. Resize to your liking and place next to your angel
10. Copy and paste candy1. Resize to your liking and place at the corner of your blue square
11. Copy and paste cakeslice. Resize to your liking and place in front of your candy layer
12. Copy and paste candy3. Resize to your liking and place next to your candy1
13. Copy and paste candy2. Resize to your liking and place between your candy3 and candy4
14. Copy and paste cupcake. Resize to your liking and place in front of your cake layer
15. Copy and paste gift 2. Resize to your liking and place in front of your angel
16. Copy and paste your cake pops. Resize to your liking and place in front of your cupcake and cake layers
17. Add your copyright info and text
18. Merge visible and save
That's it..... I hope you have enjoyed my tutorial. If you have any questions please
feel free to leave a message in the Chatbox.
This tutorial was written May 2013 by me(Koolbrat) any similarities to another is just a coincidence.
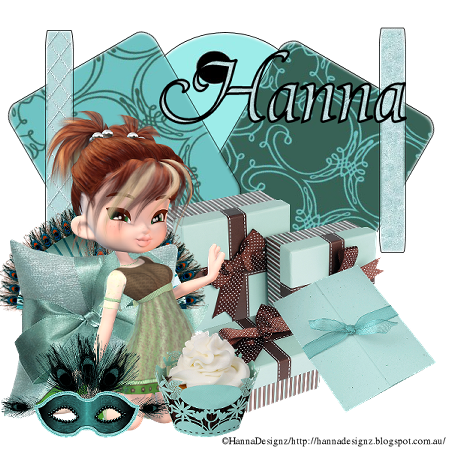
New CT Tag and Tutorial 'Party Heaven" using Hana Designz
Party Heaven
Scrapkit "Shades of CYAN" by Hanna Designz
You can purchase it here: The Scrappinbox
1. Open new image 600 X 600
2. Grab your shapes tool and draw a circle. Convert to raster layer and floodfill with paper6
3. Grab your shapes tool again and draw a square. Convert to raster layer and floodfill with paper9
4. Grab your shapes tool again and draw another square. Convert to raster layer and floodfill with paper7
5. Grab your shapes tool again and draw a rectangle. Convert to raster layer and floodfill with paper1
6. Grab your shapes tool one more time and draw another rectangle. Convert to raster layer and floodfill with paper3
7. Arrange to your shapes to your liking
8. Copy and paste your present boxes. Resize to your liking and place in the middle of your image
9. Copy and paste your letter. Resize to your liking and place in front of your boxes
10. Copy and paste your peacock fan. Resize to your liking and place in the middle of your image on the left hand side
11. Copy and paste your pillow. Resize to your liking and place in front of your peacock fan
12. Copy and paste your tube. Resize to your liking and place in front of your pillow layer
13. Copy and paste your cupcake. Resize to your liking and place on the right hand side of your tube layer
14. Copy and paste your mask. Resize to your liking and place in front of your tube on the left hand side
15. Add your copyright info and text
16. Merge Visible and save
That's it..... I hope you have enjoyed my tutorial. If you have any questions please
feel free to leave a message in the Chatbox.
Monday, May 13, 2013
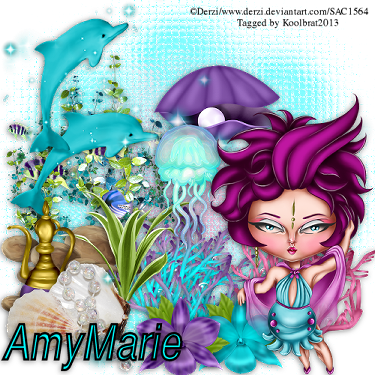
Georgeous Ocen
Georgeous Ocean
I am using the amazing artwork of Derzi
You can purchase it here: SATCScrapkit "Aquatic Beauty" by AmyMarie
You can purchase it here: SATC
Drop shadow of choice
1. Open new image 500 X 500
2. Floodfill with paper11. Load mask of choice merge group
3. Add new layer and floodfill with paper10. Load mask of choice and merge group
4. Go effects/ texture effects/ Mosaic glass. Settings of your choice
5. Copy and paste element61. Resize to your liking and place on the left hand side of your image about midway up. Add drop shadow of choice
6. Copy and paste element51. Resize to your liking and place in the lower left hand corner of your image. Add drop shadow of choice
7. Copy and paste element17. Resize to your liking and place on your rock layer. Add drop shadow of choice
8. Copy and paste element34. Resize to your liking and place next to your pitcher element. Add drop shadow of choice
9. Copy and paste element52. Resize to your liking and place in the lower left hand corner of your image. Add drop shadow of choice
10. Copy and paste element28. Resize to your liking and place in the upper left hand corner of your image. Add drop shadow of choice
11. Copy and paste element23. Resize to your liking and place in the middle of your image. Add drop shadow of choice
12. Copy and paste element5. Resize to your liking and place just below your clam layer. Add drop shadow of choice
13. Copy and paste element24. Resize to your liking and place in the lower middle of your image. Add drop shadow of choice. Move layer so that it is under your jelly fish layer
14. Copy and paste element25. Resize to your liking and place next to your element 24. Add drop shadow of choice
15. Copy and paste element19. Move layer so that it is under your dolphin layer
16. Copy and paste your tube. Resize to you liking and place in the lower right hand corner of your image. Add drop shadow of choice
17. Copy and paste element20. Resize to your liking and place next to your tube. Add drop shadow of choice
18. Copy and paste element21. Resize to your liking and place on the left had side of your blue flower. Add drop shadow of choice
19. Add your copyright info and text
20. Merge visible and Save
That's it..... I hope you have enjoyed my tutorial. If you have any questions please
feel free to leave a message in the Chatbox.
This tutorial was written May 2013 by me(Koolbrat) any similarities to another is just a coincidence.
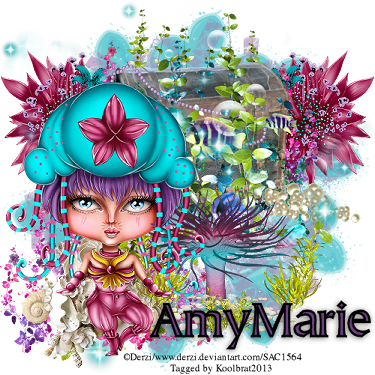
Sea of the Future
Sea of the Future
I am using the amazing artwork of Derzi
You can purchase it here: SATC
Scrapkit "Aquatic Beauty" by AmyMarie
You can purchase it here: SATC
1. Open new image 500 X 500
2. Floodfill with paper9. Load mask of choice and merge group. Change layer visibility to 64
3. Add new layer and floodfill with paper6. Load mask of choice and merge group. Change layer visibility to 62
4. Copy and paste element 16. Resize to your liking and place on the right side of your image
5. Duplicate your element layer and click image mirror
6. Copy and paste element86. Resize to your liking and place in the middle of your image
7. Copy and paste element80. Resize to your liking and place in the lower left hand corner of your image
8. Copy and paste element74. Resize to your liking an place on top of your seaweed layer
9. Copy and paste element31. Resize to your liking and place in the lower right hand sorta middle of image
10. Copy and paste element19
11. Copy and paste element27. Resize to your liking and place around your element 31 layer
12. Copy and paste your tube. Resize to your liking and place in the lower left hand corner of your image
13. Add your copyright info and text
14. Merge visible and Save
That's it..... I hope you have enjoyed my tutorial. If you have any questions please
feel free to leave a message in the Chatbox.
This tutorial was written May 2013 by me(Koolbrat) any similarities to another is just a coincidence.
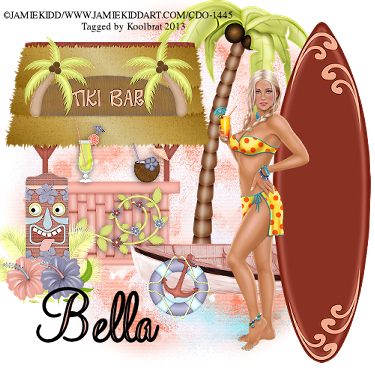
Beach Party Time
Beach Pary Time
I am using the amazing artwork of Jamie Kidd
You can purchase it here: CDO
Scrapkit "Beach Babe" by Bella
You can purchase it here: Digifox
Drop shadow of choice
1. Open new image 500 X 500
2. Floodfill with paper4. Load mask of choice and merge group
3. Add new layer and floodfill with paper8. Load mask of choiceand merge group
4. Copy and paste palmtree. Resize to your liking and place in the middle of your image
5. Copy and paste tikihut. Resize to your liking and place on the left hand side of your image
6. Copy and paste canoe. Resize to your liking and place in the middle of your image
7. Copy and paste surf board. Resize to your liking and place on the right hand side of your image
8. Copy and paste tube. Resize to your liking and place next to your surf board.
9. Copy and paste life preserver. Resize to your liking and place in front of your canoe layer
10. Copy and paste floral element. Resize to your liking and place on the front of your tiki hut
11. Copy and paste tikihut name. Resize to your liking and place on the roof of the hut
12. Copy and paste face. Resize and place oh the left hand side of your tiki hut
13. Copy and paste pink flower. Resize to your liking and place to that it looks like it is sitting in front of your tiki face
14. Copy and paste blue flower. Resize to your liking and place next to the pink flower
15. Copy and paste yellow/green drink. Resize to your liking and place so that it looks like it is sitting on the bar of your tiki hut. Add drop shadow of choice
16. Copy and paste your coconut drink. Resize to your liking and place so that it looks like it is sitting on the back of your tiki hut. Add drop shadow of choice
17. Add your copyright info and text
18. Merge visible and Save
That's it..... I hope you have enjoyed my tutorial. If you have any questions please
feel free to leave a message in the Chatbox.
This tutorial was written May 2013 by me(Koolbrat) any similarities to another is just a coincidence.
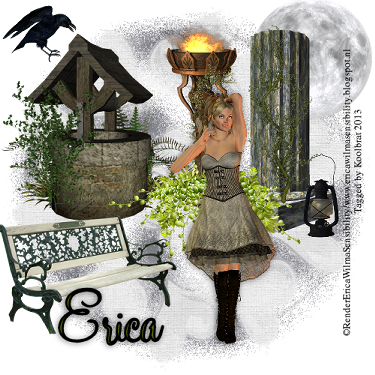
Medievil Godess
Midievil Godess
I am using the amazing artwork of Erica Wilma
You can purchase it here: The Scrappinbox
Scrapkit "Medevil Times" by Erica Wilma
You can purchase it here:Sensibility Scrapping
Drop shadow of choice
1. Open new image 500 X 500
2. Floodfill with paper9. Load mask of choice and merge group
3. Add new layer and floodfill with paper10. Load mask of choice and merge group
4. Copy and paste moon. Resize to your liking and place in the upper right hand corner of your image
5. Copy and paste wishing well. Resize and place in the upper left hand corner of your image
6. Copy and paste column. Resize to your liking and place so that it is covering the left hand side of the moon
7. Copy and paste bench. Resize to your liking and place just under your wishing well layer
8. Copy and paste chalice. Resize to your liking and place in the middle of yur wishing well and your cloumn
9. Copy and paste lantern. Resize to your liking and place on the right hand side of your column
10. Copy and paste forest decor. Resize to your liking and place at the bottom of your chalice
11. Copy and paste vine1. Resize to your liking and place on your cloumn
12. Copy and paste vine3. Reisze to your liking and place under your forest layer and on your chalice
13. Copy and paste crow. Resize to your liking and place in the air by the wishing well
14. Copy and paste your tube. Reisze and place in front of your chalice layer
15. Add your copyright info and text
16. Merge visible and Save
That's it..... I hope you have enjoyed my tutorial. If you have any questions please
feel free to leave a message in the Chatbox.
This tutorial was written May 2013 by me(Koolbrat) any similarities to another is just a coincidence.
Saturday, May 11, 2013
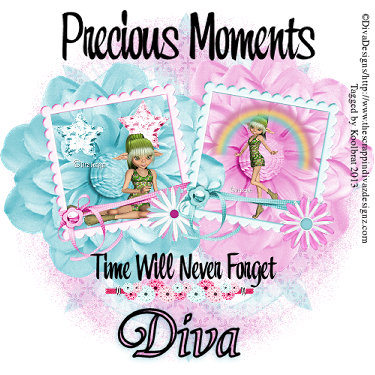
Precious Moments in Time
Precious Moment's in Time
I am using the amazing artwork of Diva Designs
You can purchase it here: The Scrappinbox
Scrapkit "Precious Moments" by Diva Designs
You can purchase it here: The Scrappinbox
1. Open new image 500 X 500
2. Floodfill with paper3. Load mask of choice and merge group. Change the visibility to 64
3. Add new layer and floodfill with paper4. Load mask of choice and merge group. Change visibility to 76
4. Copy and paste flower 1. Resize to your liking and place in the left hand middle of your image
5. Copy and paste flower 2. Resize to your liking and place in the right hand middle of your image
6. Copy and paste frame 1. Resize to your liking and place in the middle of your blue flower. Rotate 10 degrees left
7. Copy and paste frame 2. Resize to your liking and place in the middle of your pink flower. Rotate 10 degrees right
8. Copy and paste crystal3. Resize to your liking and place in the upper left hand corner of your pink frame
9. Copy and paste crystal4. Resize to your liking and place in the upper right hand corner of your pink frame
10. Copy and paste Amity butterfly 06 or your tube of choice. Resize to your liking and place in the middle of your pink frame
11. Copy and paste flower 4. Resize to your liking and place on the lower right hand corner of your frame
12. Copy and paste rainbow. Resize to your liking and place in the middle of your blue frame layer
13. Copy and paste your Amity butterfly01 or tube of your choice. Resize to your liking and place in the middle of your blue
frame layer in the middle of the rainbow
14. Copy and paste flower6. Resize to your liking and place on the lower right hand corner of your blue frame
15. Copy and paste Precious Moments WordArt. Resize to your liking and place above your frame layers
16. Copy and paste Time will never forget WordArt. Resize to your liking and place under your frame layers so that it is just below them and kinda centered
17. Copy and paste your flower ribbon. Resize to your liking and place so that it looks like that Time will never forget is sitting on top of it.
18. Add your copyright info and text
19. Merge visible and Save
That's it..... I hope you have enjoyed my tutorial. If you have any questions please
feel free to leave a message in the Chatbox.
This tutorial was written May 2013 by me(Koolbrat) any similarities to another is just a coincidence.
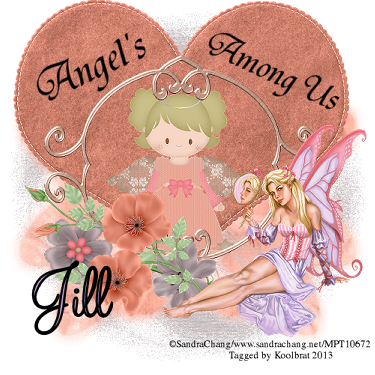
Among Us
Among Us
I am using the amazing artwork of Sandra Chang
You can purchase it here: Sandra
Scrapkit "Go Angel's Among Us" by Mouseclicks
You can purchase it here: The Scrappinbox, Mystical Scraps
1. Open new image 500 X 500
2. Floodfill with paper3. Load mask of choice and merge group
3. Add new layer and floodfill with paper8. Load mask of choice and merge group
4. Copy and paste heart01. Resize to your liking and place in the middle of your image
5. Copy and paste frame 2. Resize to your liking and place on the heart towards the bottom
6. Copy and paste angel 4. Resize to your liking and place under your frame layer so that she is standing in the middle of the frame
7. Copy and paste flower 4. Resize to your liking and place at the base of the middle of your frame. Rotate 30 degrees to the right
8. Copy and paste flower3. Resize to your liking and place on the oppisite side of the first flower. Rotate 30 degrees to the left
9. Copy and paste flower2. Resize to your liking and place in the middle of your other 2 flowers
10. Copy and paste your tube. Resize to your liking and place on the lower right hand side of your image
11. Add your copyright info and Text
12. Merge visible and Save
That's it..... I hope you have enjoyed my tutorial. If you have any questions please
feel free to leave a message in the Chatbox.
This tutorial was written May 2013 by me(Koolbrat) any similarities to another is just a coincidence.
Tuesday, May 7, 2013
Heels of Glory
Heels of Glory
I am using the amazing artwork of Jamie Kidd
You can purchase it here: CDO
Scrapkit "Flower Garden" by Misty Mayhem Scraps
You can purchase it here: The Scrappinbox
1. Open new image 500 X 500
2. Copy and paste element 35. Change the visibility to 68
3. Add new layer and floodfill with paper 8. Load mask of choice and merge group. Change visibility to 82
4. Add new layer and floodfill with paper 6. Load mask of choice and merge group. Change visibility to 46
5. Copy and paste element 29. Resize to your liking and place in the lower right hand corner of your image
6. Copy and paste element 10. Resize to your liking and place in front of you fan layer
7. Copy and paste element 7. Resize to your liking and place in the middle of your image off to the left just alittle
8. Copy and paste element 3. Resize to your liking and place in the upper right hand corner of your image
9. Grab your magic wand and click inside your frame layer and floodfill with paper 35
10. With the inside of your frame still selected copy and paste your tube into the selection
11. Copy and paste your tube. Place in front of your your heels layer
12. Copy and paste element 17. Resize to your liking and place in front of your tube layer
13. Add your copyright info and text.
14. Merge visible and Save
That's it..... I hope you have enjoyed my tutorial. If you have any questions please
feel free to leave a message in the Chatbox.
This tutorial was written May 2013 by me(Koolbrat) any similarities to another is just a coincidence.
Monday, May 6, 2013
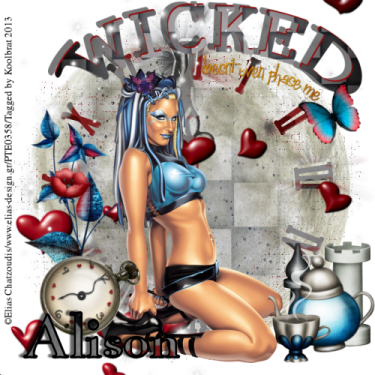
Wicked Alice
Wicked Alice
I am using the amazing artwork of Elias Chatzoudis
You can purchase it here: Elias
Scrapkit "Go Ask Alice" by HungryHill
You can purchase it here: Treasured Scraps
Mask and Font of choice
1. Open new image 500 X 500
2. Copy and paste moon. Resize to your liking and place in the middle of your image
3. Floodfill with paper-7. Load mask of choice and merge group
4. Floodfill with paper-12. Load mask of choice and merge group
5. Copy and paste falling hearts.
6. Copy and paste sparkle. Resize to your liking or leave orginal size
7. Copy and paste stem. Resize to your liking and place on the left side of your image
8. Copy and paste flower-1. Resize to your liking and place over the stem layer with the stem higher then the flower layer
9. Copy and paste WA-1. Resize to your liking and place in the upper right hand corner of your image
10. Copy and paste chesspiece-2. Resize to your liking and place in the lower right hand corner of your image
11. Copy and paste chesspiece-1. Resize to your liking and place next to Chesspiece-2.
12. Copy and paste teapot. Resize to your liking and rotate 15 degrees to the right and place in front of your chesspieces
13. Copy and paste teacup. Resize to your liking and place next to your teapot
14. Copy and paste watch. Resize to your liking and place in front of your flower and stem layers
15. Copy and paste flutterby. Resize to your liking and Mirror. Then place just under your WA
16. Copy and paste tube of your choice. Resize to your liking and place in the middle of your image
17. Add your copyright info and text
18. Merge visible and save
That's it..... I hope you have enjoyed my tutorial. If you have any questions please
feel free to leave a message in the Chatbox.
This tutorial was written April 2013 by me(Koolbrat) any similarities to another is just a coincidence.
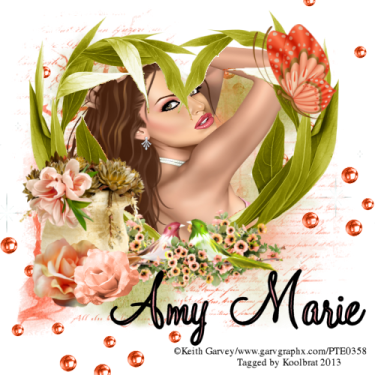
Flower Elegance
Flower Elegance
I am using the amazing artwork of Keith Garvey
You can purchase it here: Keith
Scrapkit "Linda" by Amy Marie
You can purchase it here:DigiFox
Mask and Font of choice
1. Open new image 500 X 500
2. Copy and paste 68
3. Add new layer and floodfill with paper9. Load mask of choice and merge group
4. Add new layer and floodfill with paper1. Load mask of choice and merge group
5. Copy and paste 86
6. Copy and paste 90. Grab your magic wand and click inside your flower frame. Copy and paste your tube. Then click
selections none
7. Copy and paste 51. Resize to your liking and place in the middle of your frame and tube layer
8. Copy and paste 126. Resize to your liking and place on the right hand corner of your frame layer
9. Copy and paste 98. Resize to your liking and place in the lower left hand side of your image
10. Copy and paste 13. Resize to your liking and place in front of your planter layer.
11. Copy and paste 22. Resize to your liking and place next to your other flower layer
12. Copy and paste 5. Resize to your liking and place so that it looks like it is coming off the side of your planter layer
13. Add your copyright info and Text
14. Merge visible and resize
15. Save
That's it..... I hope you have enjoyed my tutorial. If you have any questions please
feel free to leave a message in the Chatbox.
This tutorial was written April 2013 by me(Koolbrat) any similarities to another is just a coincidence.
Nature at it's Best
Nature at it's Best
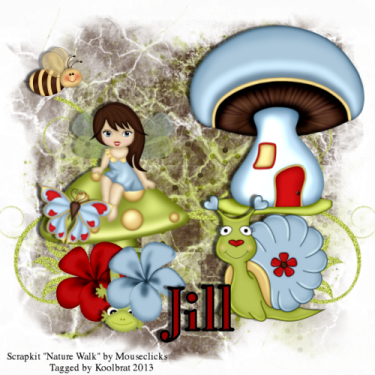
Scrapkit "Nature Walk" by Mouseclicks
You can purchase it here: The Scrappinbox
Mask and Font of choice
1. Open new image 500 X 500
2. Floodfill with paper7. Load mask of choice. Merge group
3. Floodfill with paper1. Load mask of choice. Merge group
4. Copy and paste doodle01. Resize to your liking and place in the middle of your image
5. Duplicate doodle layer and mirror the duplicate layer
6. Copy and paste mushroomhouse01. Resize to your liking and place in the upper right hand corner of your image.
Add drop shadow of your choosing
7. Copy and paste fairy01. Resize to your liking and place on the left hand side of your image. Add drop shadow of your
choosing
8. Copy and paste butterfly03. Resize to your liking and place so that it looks like the butterfly is sitting on your fairy layer.
Add drop shadow of your choosing
9. Copy and paste extra05. Resize to your liking and place in front of your fairy layer.
10. Copy and paste geeko01. Resize to your liking and place next to your flower layer. Add drop shadow of your choosing
11. Copy and paste extra06. Resize to your liking and place over your geeko layer so that his head is the only thing showing
12. Copy and paste bumblebee. Resize to your liking and place in the upper left hand corner of your image. Add drop
shadow of your choosing
13. Copy and paste happysnail. Resize to your liking and place in the lower right hand side of your image. Add drop
shadow of your choosing.
14. Add a tube of choice if your like
15. Add your copyright info and Text
16. Merge visible and Save
That's it..... I hope you have enjoyed my tutorial. If you have any questions please
feel free to leave a message in the Chatbox.
This tutorial was written April 2013 by me(Koolbrat) any similarities to another is just a coincidence.
Nighttime of Fun
Nighttime of Fun
I am using the amazing artwork of Keith Garvey
You can purchase it here: Keith
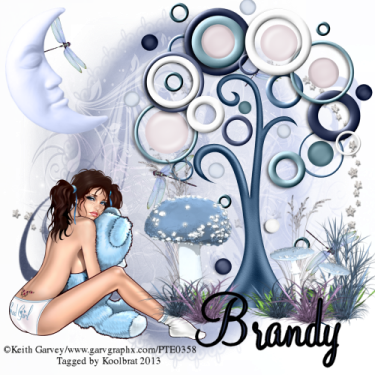
Scrapkit "Nighttime Fun" by Brandy
You can purchase it here:The Scrappinbox
Mask and Font of choice
1. Open new image 500 X 500
2. Copy and paste bling swirl. Resize to your liking and place in the middle of your image
3. Add new layer and floodfill with paper14. Load mask and merge group
4. Add new layer and floodfill with paper2. Load mask and merge group
5. Copy and paste dragonflies. Resize to your liking and place so that they are around the top of your image
6. Copy and paste sparkle.
7. Copy and paste tree. Resize to your liking and place in the upper right hand corner of your image
8. Copy and paste your tube so that it is sitting on the left hand side of your image
9. Copy and paste mushrooms. Resize and place so that they are at the bottom of the tree
10. Copy and paste moon. Resize to your liking and place in the upper right hand corner of your image
11. Add your copyright info and Text
12. Merge visible and resize
13. Save
That's it..... I hope you have enjoyed my tutorial. If you have any questions please
feel free to leave a message in the Chatbox.
This tutorial was written April 2013 by me(Koolbrat) any similarities to another is just a coincidence.
Time for Love
Scrapkit "Girly Cuteness" by Tiny Turtles Design
You can also purchase it here: SATC
1. Open new image 640 X 200
2. Floodfill with paper girly cuteness 11
3. Go Selections/ Select All/ Selections/ Modify/ Contract/12
4. Floodfill with girly cuteness 27 . Add drop shadow of your choice. Select None
5. Copy and paste girly cuteness 24. Resize to your liking and place in the lower left hand corner of your image. Add
drop shadow of choice
6. Copy and paste girly cuteness 106. Resize to your liking and place in the lower left hand corner of your image so that
it is just over the tip of the cake. Add drop shadow of choice
7. Copy and paste girly cuteness 9. Resize to your liking and place in the lower left hand corner of your image so that it is
right next to your last layer. Add drop shadow of choice
8. Copy and paste girly cuteness 16. Resize to your liking and place in the upper left hand corner of your image. Add drop
shadow of choice
9.Copy and paste girly cuteness1. Resize to your liking and place in the lower left hand corner of your image. Add drop
shadow of choice
10. Copy and paste girly cuteness34. Resize to your liking and place just to the right of your be mine cake layer. Add drop
shadow of choice
11. Copy and paste girly cuteness39. Resize to your liking and place in the middle of your image. Add drop shadow of
choice
12. Copy and paste your tube. Resize to your liking and place in the middle of your fan layer. Add drop shadow of choice
13.Add your copyright info and Text
14. Merge visible and Save
Avatar
1. Open new image 150 X 150
2. Floodfill with girly cuteness 11
3 Go Selections/ Select All/ Modify/ Contract/12
4. Floodfill with girly cuteness 27. Add drop shadow of choice. Select None
5. Copy and Paste your tube
6. Add your copyright info and Text
7. Merge Visible and Save
That's it..... I hope you have enjoyed my tutorial. If you have any questions please
feel free to leave a message in the Chatbox.
This tutorial was written June 2013 by me(Koolbrat) any similarities to another is just a coincidence.
Subscribe to:
Comments
(Atom)
TERMS OF USE
The Tubes in the zip are all made by me(Koolbrat).
:Please do not claim them as your own.
:They are Free for Personal Use Only.
:Please do not Share the files....
:Please do not change the file names.
:Please do not Burn to a CD or DVD or replicate to any other media or fix tangent unless it is for your own personal back up.
:Please do not use to create Brushes, Custom Shapes, Ect.
:Please leave the tubes intact, do not distor in any way.
If you have any Questions. Comment regarding these TOU please email koolbrat@gmail.com
Thank you for your download,
I hope you enjoy them,
Have fun,
Love Koolbrat
***********************
Copyright Notes:
Taggers.
Please add my copyright.
DO NOT use with other artist Tubes,
with the exception of Elements, Frames Ect.
Tutorial Writers.
Please include a credit to me somewhere on your page
(http://bratsplace-koolbrat.blogspot.com/)
Please add my copyright.
DO NOT use with other artists Tubes, with the exception of Elements, Frames ECT.
************************
Blog Archive
-
▼
2013
(85)
-
▼
May
(20)
- New Show off Tag Darker Shades
- Gothic Poetry
- Party Lovin
- New Show off Tag using "Hoppy gardening" by Mousec...
- New Show off Tag "RelaxingSummer" using "It's Summ...
- New Show off Tag "My Animals" using "Fun with Anim...
- New CT Tag and Tutorial "Happy Happy Birthday" usi...
- New CT Tag and Tutorial 'Party Heaven" using Hana ...
- Georgeous Ocen
- Sea of the Future
- Beach Party Time
- Medievil Godess
- Precious Moments in Time
- Among Us
- Heels of Glory
- Wicked Alice
- Flower Elegance
- Nature at it's Best
- Nighttime of Fun
- Time for Love
-
▼
May
(20)
Labels
- FTU Frames (5)
- My CT Tutorials (137)
- My Tutorials (2)
- News (118)


