Linkbar
Thursday, February 2, 2012
Valentine Elegance
Valentine Elegance
I am using the amazing artwork of Keith Garvey
You can purchase it here: PTE
You can purchase it here: PTE
Scrapkit "Simply Elegant" by Stef
Thank you for the wonderful kit hun
You can purchase it here: Stefs-scrapkits
Thank you for the wonderful kit hun
You can purchase it here: Stefs-scrapkits
Masks and Font of choice
Don't forget to add your Drop Shadows
Don't forget to add your Drop Shadows
1. Open new image 500 X 500
2. Floodfill with paper10. Go Layers/Load Save Mask/ Load Mask from Disk. Choose your mask and Merge Group
3. Add new layer and Floodfill with paper12. Go Layers/ Load Mask from Disk. Choose your mask and Merge Group
4. Copy and Paste element 37. Duplicate and move copy up just alittle
5. Copy and Paste element01 Resize 75%
6. Copy and Paste element 07 resize 75% 2 times rotate left 15 degrees
7. Add your tube
8. Copy and Paste element50 resize 75% 3 times. Place in the lower left hand side
9. Copy and Paste element45 resize 75% 2 times. Place in upper left hand corner of frame
10. Copy and Paste element36 resize 75% 4 times. Place in lower right hand corner
11. Add a friends name
12. Don't forget to add your copyright info
13. Merge Visible and Save
That's it..... I hope you have enjoyed my tutorial. If you have any questions please
feel free to leave a message in the Chatbox.
This tutorial was written February 2012 by me(Koolbrat) any similarities to another is just a coincidence.
Time Goes
Time Goes
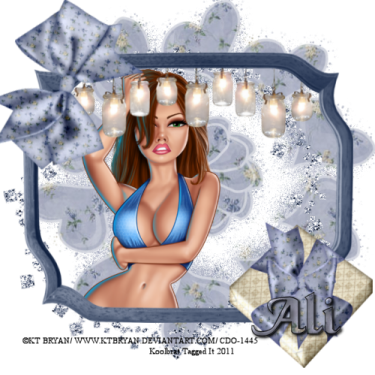
Scrapkit "As Time Goes By" by Sarah
Thank you Sarah for the wonderful kit.
You can purchase it here: HungryHillAnnex
Thank you Sarah for the wonderful kit.
You can purchase it here: HungryHillAnnex
Mask and Font of choice
1. Open new image 500 X 500
2. Floodfill with paper4
3. Go Layers/Load Save Mask/Load mask from Disk. Choose your mask and Merge group
4. Copy and Paste glitter circle resize and place to your liking
5. Copy and Paste frame3 resize and place to your liking
6. Copy and Paste gift resize to your liking and place on the lower right hand side of your frame
7. Copy and Paste calico bow resize and rotate to your liking and place on the upper left hand corner of your frame
8. Add tube of your choice or you can purchase the tube I used.
9. Add a friends name
10. Dont forget to add you copyright info
11. Merge Visible and Save
That's it..... I hope you have enjoyed my tutorial. If you have any questions please
feel free to leave a message in the Chatbox.
This tutorial was written February 2012 by me(Koolbrat) any similarities to another is just a coincidence.
Desire Me
Desire Me
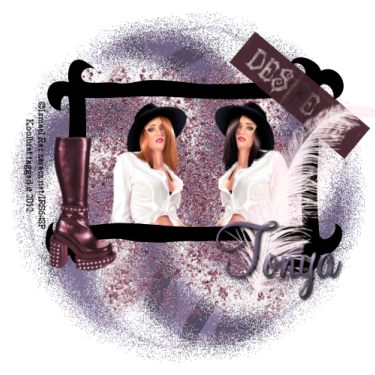
Scrapkit "Dark Desire" By Tonya... Thank you Tonya for the
amazing kit hun...
You can purchase it here:BrokenSky Dezines
Mask and Font of choice...
amazing kit hun...
You can purchase it here:BrokenSky Dezines
Mask and Font of choice...
1. Open new image 500 X 500
2. Floodfill with paper7. Go layers/load save mask/load mask from disk... Choose your mask.. Merge group
3. Copy and Paste glidder2 and resize 75%
4. Copy and Paste frame1
5. Copy and Paste your tube. Resize if needed. Drag below frame layer
6. Copy and Paste wordart5 resize to your liking and rotate to the right. Place on the top right hand corner of frame
7. Copy and Paste feather resize and place on lower right corner of frame.
8. Copy and Paste boot2 resize and place on left side of frame
9. Add the name of a friend
10. Make sure you add your copyright info.
11. Merge Visible and Save
That's it..... I hope you have enjoyed my tutorial. If you have any questions please
feel free to leave a message in the Chatbox.
This tutorial was written February 2012 by me(Koolbrat) any similarities to another is just a coincidence.
Beating Heart
Beating Heart
I am using the amazing artwork of Jose Cano
You can purchase it here: PTE
Scraptkit "My Heart It Beats" by LHDScraps
Thank you LHD for the wonderful kit hun
You can purchase it here: DigiFox
Masks and Font of choice
2. Copy and Paste element 15 resize 75%
3. Add another layer Floodfill with paper8. Go Layers/Load Save Mask/ Load Mask from Disk. Choose your mask.
Merge Group
4. Add new layer Floodfill with paper4. Go Layers/Load Save Mask/ Load Mask from Disk. Choose your mask and
Merge Group
5. Copy and Paste frame2 resize 75% then 85%
6. Add your tube
7. Copy and Paste element7 resize 75% 4 times. Place in lower left hand corner
8. Copy and Paste element26 resize to your liking and place in the same corner
9. Copy and Paste element 28 resize to your liking and place in front of gift box
10. Copy and Paste element32 resize to your liking and move under you gift box layer
11. Add a friends name
12. Don't forget to add your copyright info
13. Merge Visible and Save
That's it..... I hope you have enjoyed my tutorial. If you have any questions please
feel free to leave a message in the Chatbox.
This tutorial was written February 2012 by me(Koolbrat) any similarities to another is just a coincidence.
Subscribe to:
Comments
(Atom)
TERMS OF USE
The Tubes in the zip are all made by me(Koolbrat).
:Please do not claim them as your own.
:They are Free for Personal Use Only.
:Please do not Share the files....
:Please do not change the file names.
:Please do not Burn to a CD or DVD or replicate to any other media or fix tangent unless it is for your own personal back up.
:Please do not use to create Brushes, Custom Shapes, Ect.
:Please leave the tubes intact, do not distor in any way.
If you have any Questions. Comment regarding these TOU please email koolbrat@gmail.com
Thank you for your download,
I hope you enjoy them,
Have fun,
Love Koolbrat
***********************
Copyright Notes:
Taggers.
Please add my copyright.
DO NOT use with other artist Tubes,
with the exception of Elements, Frames Ect.
Tutorial Writers.
Please include a credit to me somewhere on your page
(http://bratsplace-koolbrat.blogspot.com/)
Please add my copyright.
DO NOT use with other artists Tubes, with the exception of Elements, Frames ECT.
************************
Labels
- FTU Frames (5)
- My CT Tutorials (137)
- My Tutorials (2)
- News (118)


